Membership Compulsory
Chapter 12: Setting — 12.8 Membership Compulsory Setup
Use Membership Compulsory Setup to choose which fields are required when registering a new member. For example, make "Phone Number" and "Email" mandatory, but keep "Address" optional. This ensures you collect the data you need without overwhelming new sign-ups.
When to use this: When you need to configure whether member registration is required during checkout at the POS.
Prerequisites
- Membership Setup completed
Membership Compulsory Field List
📝 General Description
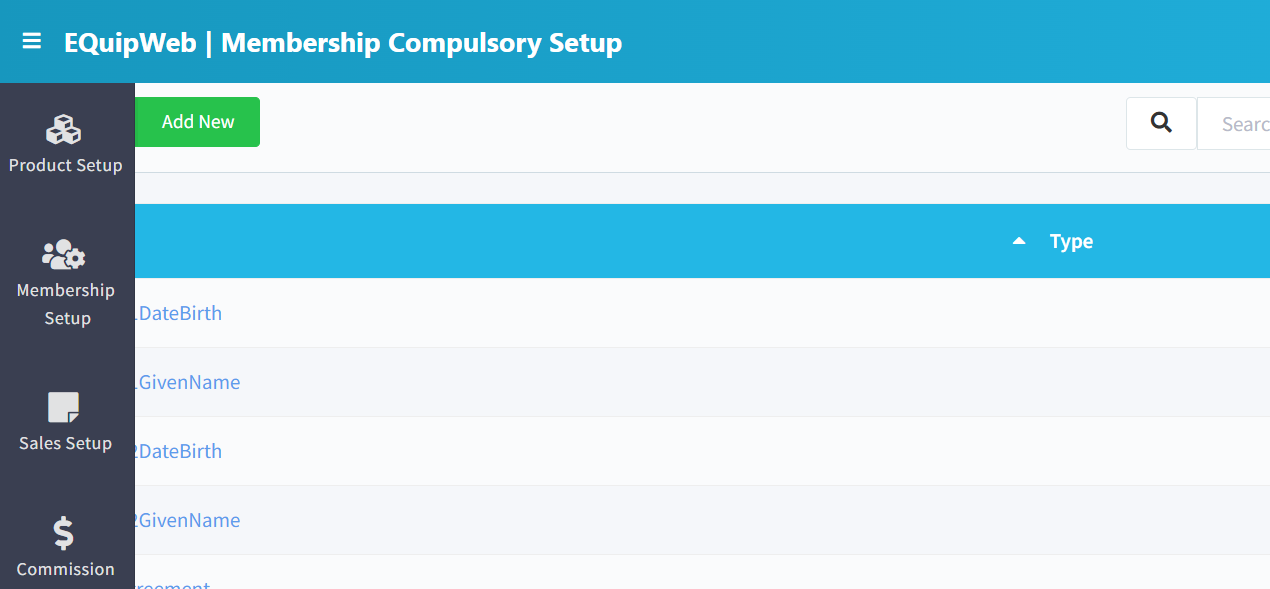
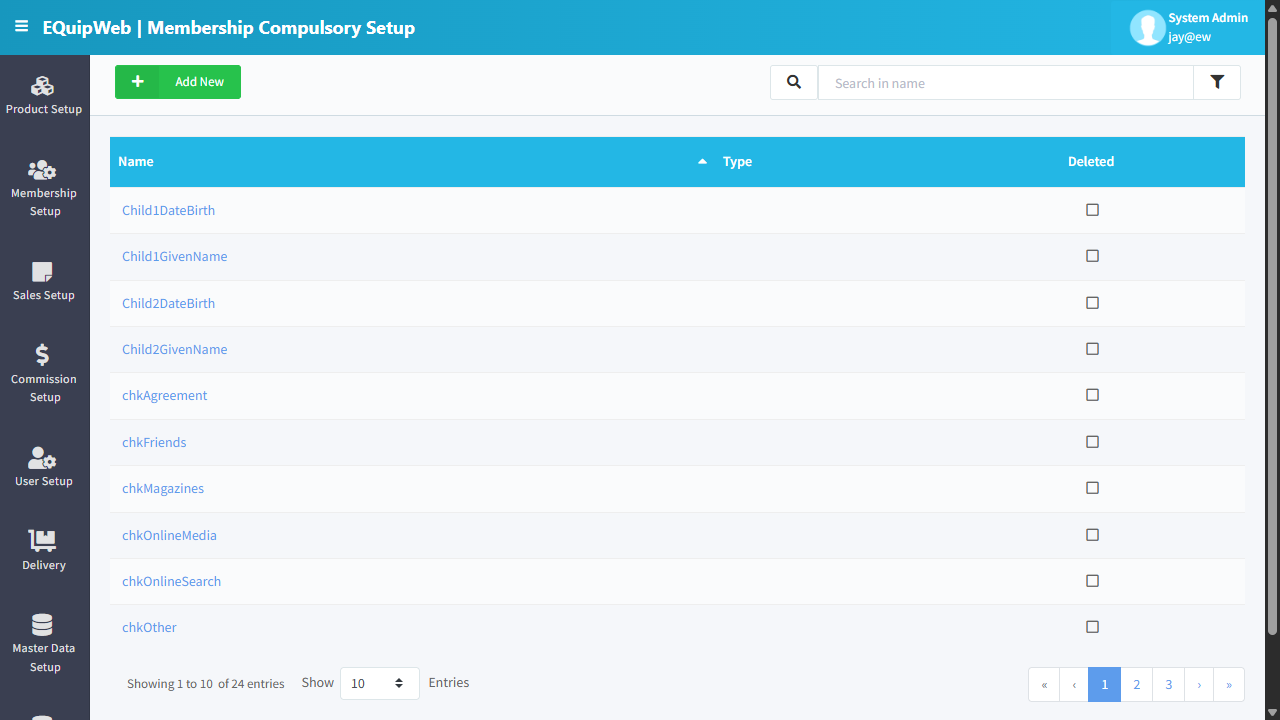
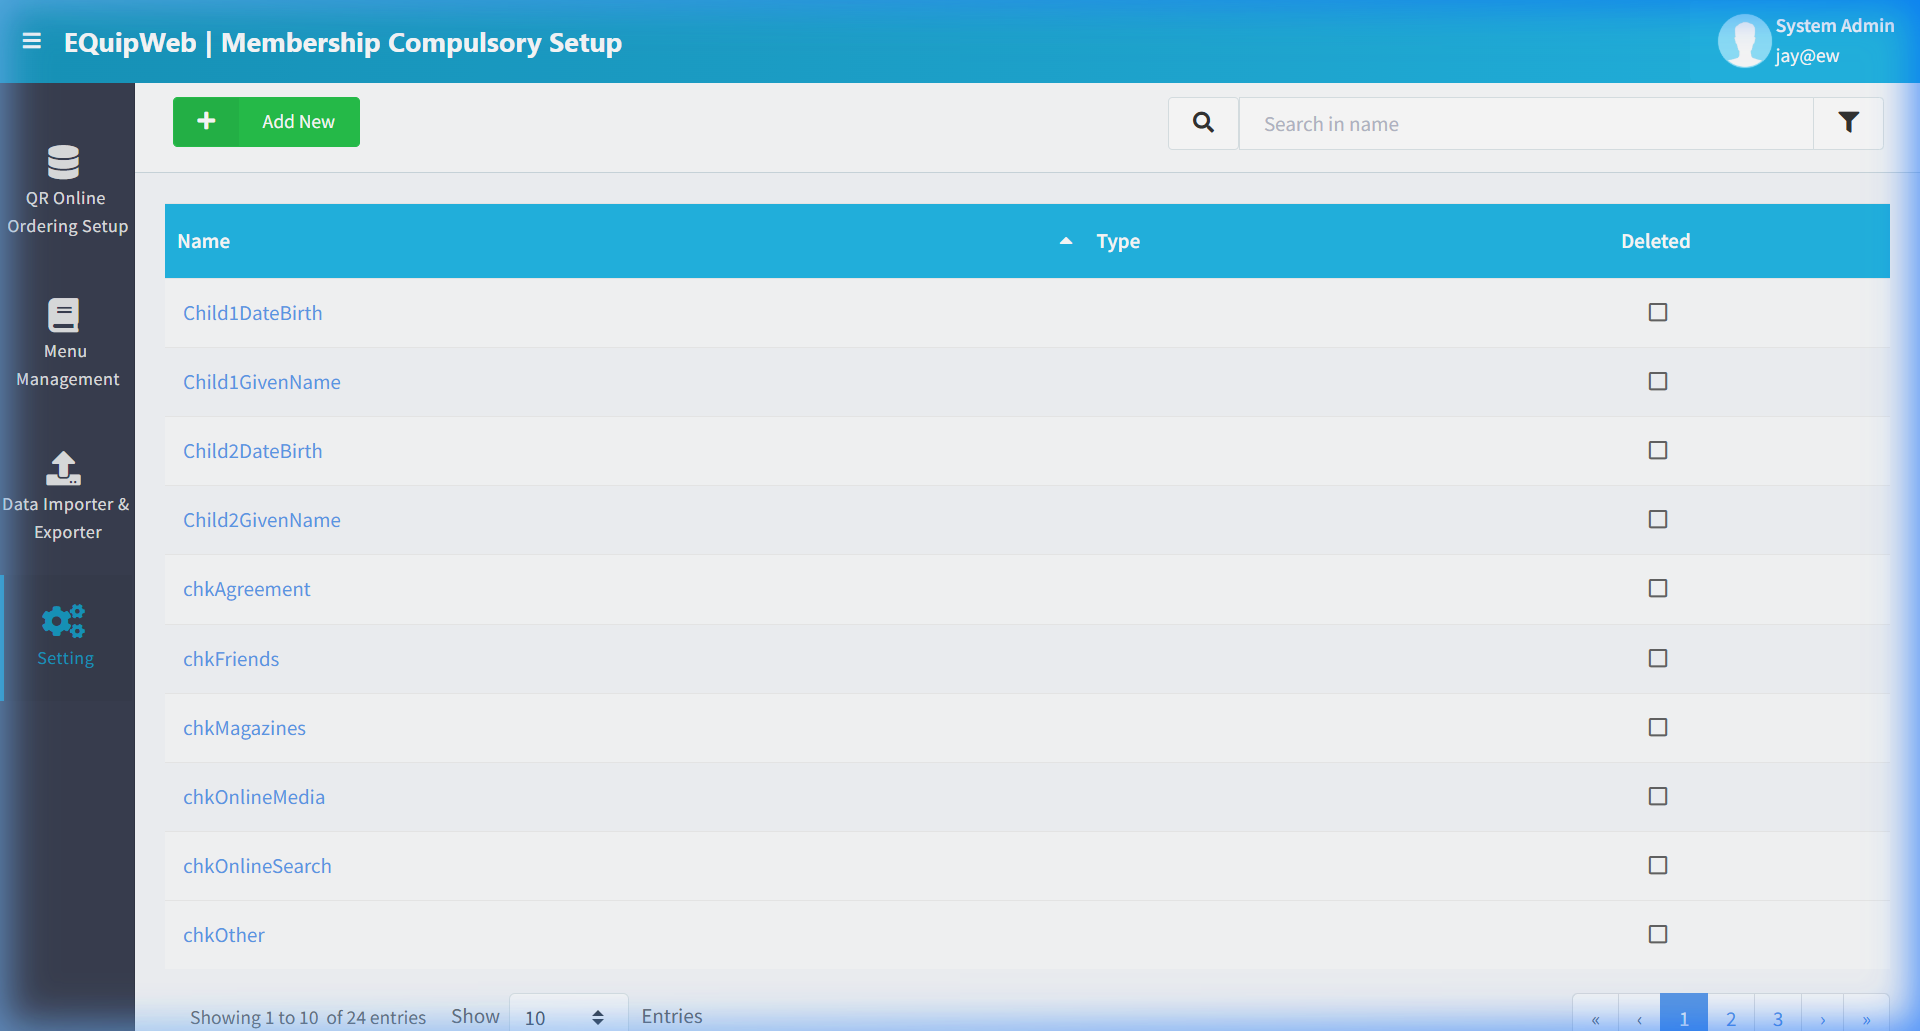
This page displays all available membership registration fields as a configurable list. Each field can be set as compulsory (required during registration) or optional, and can be shown or hidden on the guest book (self-service registration form). The system comes pre-populated with standard fields like date of birth, agreement checkboxes, contact preferences, and more.
⚙️ UI Elements
| Element | Type | Function |
|---|---|---|
| + Add New | Green Button | Create a new custom registration field |
| Search Bar | Text Input | Filter fields by name |
| Filter | Filter Icon | Advanced filtering options |
12.8.1 Data Grid Columns
| Column | Description |
|---|---|
| Name | Field identifier (e.g., Child1DateBirth, chkAgreement, chkEmail) — clickable → opens edit form |
| Type | Field category or data type |
| Deleted | Soft-delete checkbox |
Pre-configured Fields
The system includes these standard registration fields:
| Field Name | Purpose |
|---|---|
Child1DateBirth – Child4DateBirth | Children's date of birth (up to 4 children) |
chkAgreement | Terms & conditions agreement checkbox |
chkEmail | Email marketing opt-in |
chkFriends | Referral/friends opt-in |
chkPromotions | Promotions opt-in |
chkSMS | SMS notification opt-in |
chkWhatsApp | WhatsApp notification opt-in |
12.8.2 Edit Field Settings
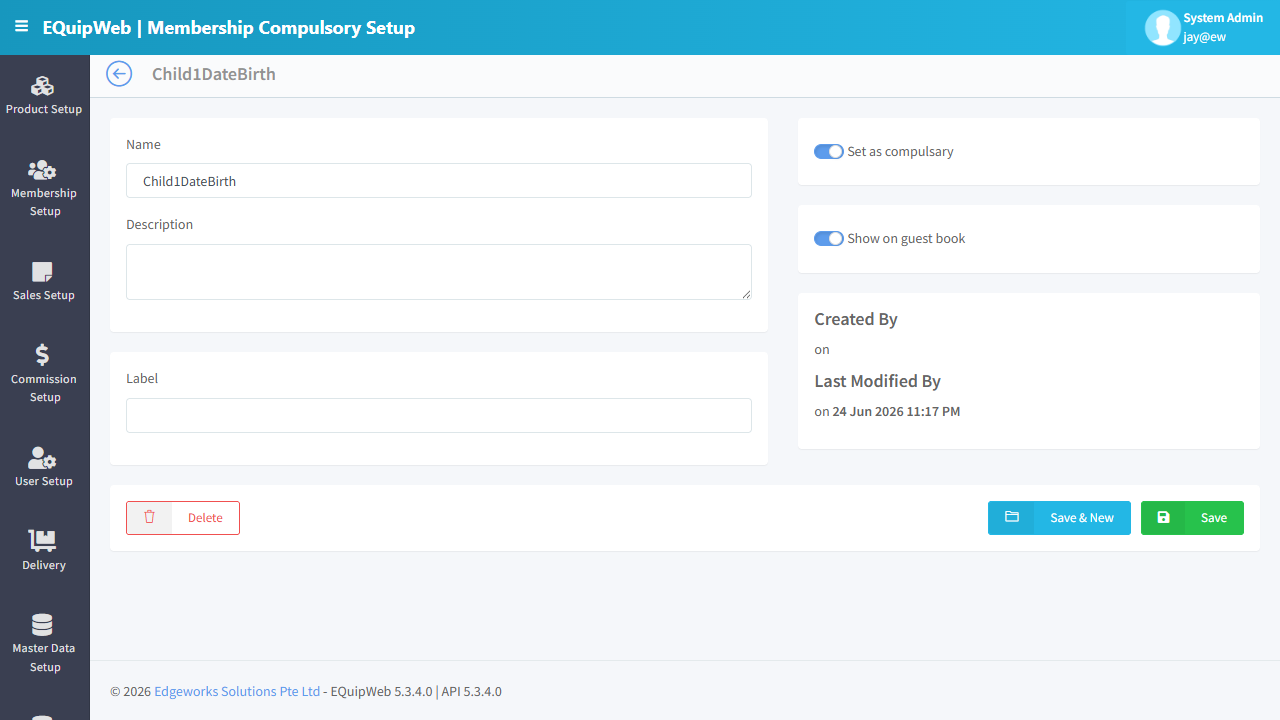
Clicking on any field name opens the edit form with these settings:
Form Fields
| Field | Type | Description |
|---|---|---|
| Name | Text (read-only for system fields) | The field identifier used internally |
| Description | Textarea | Optional description of the field's purpose |
| Label | Text | The display label shown to customers on the registration form (e.g., "Date of Birth", "I agree to Terms & Conditions") |
Toggle Settings
| Toggle | When ON | When OFF |
|---|---|---|
| Set as compulsory | Field is required — registration cannot proceed without filling this field | Field is optional — customer can skip it |
| Show on guest book | Field appears on the customer-facing self-service registration form | Field is hidden from the guest book (staff-only field) |
Action Buttons
| Button | Color | Function |
|---|---|---|
| Delete | Red (outline) | Soft-delete this field |
| Save & New | Green (outline) | Save and open a blank form |
| Save | Green (solid) | Save changes |
12.8.3 How to Make a Field Compulsory
- Navigate to Setting → Membership Compulsory Setup.
 2. Click on the field name you want to make required (e.g.,
 chkAgreement).
 3. Toggle Set as compulsory → ON.
 4. Optionally set the Label text that customers will see.
 5. Click Save.
Expected Result: The settings are saved.
12.8.4 How to Show/Hide a Field on the Guest Book
- Click on the field name.
2. Toggle Show on guest book → ON to display on the self-service form, or OFF to hide it.
3. Click Save.
How to Edit a compulsory field rule
- In the Membership Compulsory Setup page, find the compulsory field rule you want to change.
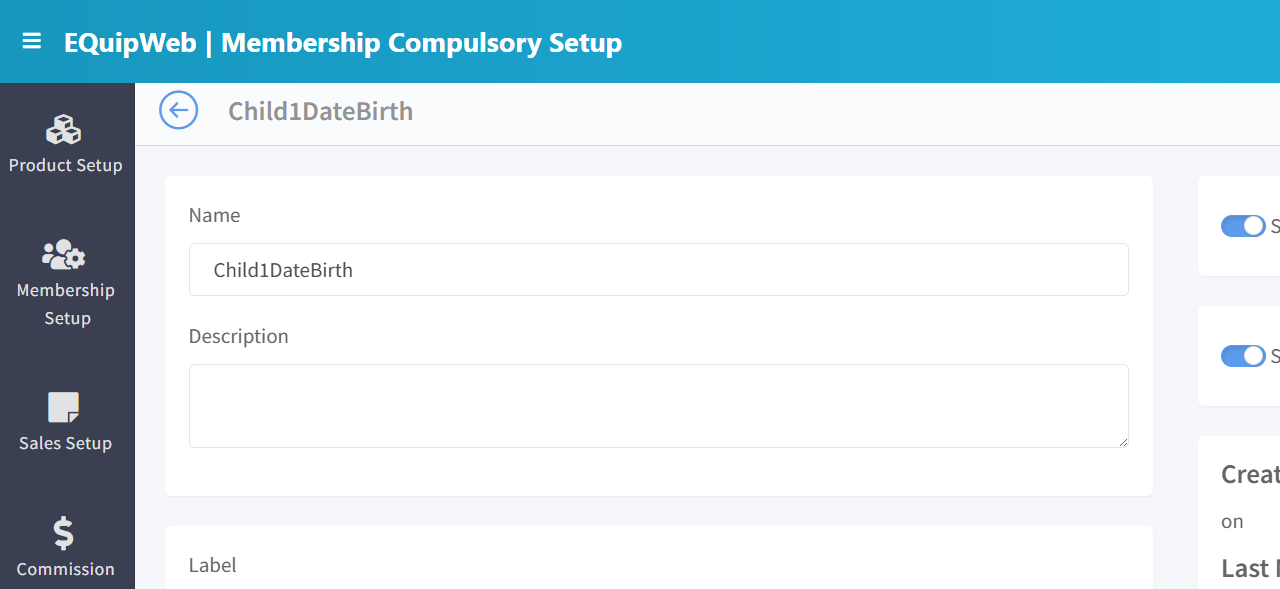
- Click the blue field name link. The edit form opens — it looks the same as the "Add New" form, but all fields are already filled in with the current values.
-
Change the fields you need to update.
-
Click Save to apply your changes.
[!TIP] To make changes, just click the name of any compulsory field rule in the list — the same form opens with everything already filled in. Change what you need and click Save.
💡 Example
Scenario: A retail chain wants customers to agree to terms and opt-in to email marketing during self-service registration, but make WhatsApp opt-in optional.
Setup:
- Click
chkAgreement→ Set as compulsory: ON, Show on guest book: ON, Label: "I agree to the Terms & Conditions".
2. Click chkEmail → Set as compulsory: ON, Show on guest book: ON, Label: "I agree to receive email promotions".
3. Click chkWhatsApp → Set as compulsory: OFF, Show on guest book: ON, Label: "I agree to receive WhatsApp notifications".
4. Click chkSMS → Set as compulsory: OFF, Show on guest book: OFF (hidden from customer form).
[!TIP] Use the Label field to write customer-friendly text. The Name field is an internal identifier — customers see the Label on the registration form.
[!WARNING] Making too many fields compulsory can increase registration abandonment. Only set fields as compulsory if they are genuinely required for your business operations.
Access & Permissions
| Role | View | Create | Edit | Delete |
|---|---|---|---|---|
| Admin | Yes | Yes | Yes | Yes |
| Supervisor | Yes | Yes | Yes | No |
| Cashier | No backend access | — | — | — |
[!NOTE] Exact permissions depend on the Privileges Setup configured for each role. Contact your administrator if you cannot access this page.
Business Rules
- Records that are linked to active transactions or other modules cannot be permanently deleted
- Changes made here will take effect on POS terminals after the next sync
- Deleted records can be restored from the list using the Show Deleted filter
- All changes are logged with the user who made them and the timestamp
How to Add a New Membership Compulsory
- Navigate to Membership Compulsory Setup from the sidebar menu.
-
Click the + Add New button (green button).
-
Fill in the required fields in the form.
-
Fill in any optional fields as needed.
-
Click Save to create the new membership compulsory.
✅ Expected Result: The new membership compulsory appears in the list and is available for use across the system.
How to Delete a Membership Compulsory
- Navigate to Membership Compulsory Setup from the sidebar menu.
-
Click on the name or code link (blue text) of the record you want to delete.
-
In the edit form, scroll down to the bottom.
- Click the Delete button (red button).
- A confirmation dialog appears — click Yes to confirm.
✅ Expected Result: The membership compulsory is soft-deleted — hidden from active lists and POS but can be restored later.
[!WARNING] Records linked to active transactions or other modules cannot be deleted. The system will display an error if deletion is not allowed.
FAQ
Q: Why are my setting changes not taking effect on POS? A: Settings need to sync to POS terminals. Check Terminal Status for sync timing, or trigger a manual sync.
Q: Can I revert a setting change? A: Yes. Simply toggle the setting back to its previous value and save. Changes take effect after the next POS sync.
Q: Who should configure these settings? A: Most settings should be configured by an administrator. Pages marked as "IT Admin only" (App Command, Webhook) require technical knowledge.
Troubleshooting
| Issue | Possible Cause | Solution |
|---|---|---|
| Setting changes not reflected in POS | POS has not synced since the change | Trigger a manual sync or wait for the next automatic sync |
| Toggle not saving | Page not fully loaded or session expired | Refresh the page and try again. Re-login if needed |
| Cannot access this setting | Insufficient permissions | Contact your administrator to check your role privileges |
| Setting reverts after saving | Conflicting setting in another module | Check related settings pages for overriding configurations |
| Page shows blank or error | Browser compatibility issue | Try a different browser (Chrome recommended) or clear cache |
Related Menus
- Master Data > Company Setup — company information
- User Setup > Privileges Setup — permission configuration
- Master Data > POS Setup — POS terminal settings
Open Questions / Confirmation Needed
[!NOTE] The following items may vary depending on your system version and configuration:
- Exact permission settings depend on your Privileges Setup configuration
- Sync timing to POS terminals depends on network conditions and sync schedule
- Some features may require additional licensing or module activation
- Field behavior may differ between EQuip versions
If you encounter behavior not described in this manual, contact your system administrator or EQuip support team.
Related Articles
Membership Setup
? Backend — EQuipWebRetail ModeMembership Setup Chapter 3: Membership Setup — 3.1 Membership List The Membership List is where you manage all your loyalty members. You can look up a customer, check their points balance, update their details, or see ...Membership Group Setup
? Backend — EQuipWebRetail ModeMembership Setup Chapter 3: Membership Setup — 3.2 Membership Group Setup Use Membership Group Setup to create your loyalty tiers — like Regular, Gold, Platinum, or Diamond. Each tier can have different benefits, ...Membership Benefit Setup
? Backend — EQuipWebRetail ModeMembership Setup Chapter 3: Membership Setup — 3.3 Membership Benefit Setup Use Membership Benefit Setup to give your loyalty members automatic discounts. For example, Gold members might get 10% off all purchases. Set ...Membership Integration Settings
? Backend — EQuipWebRetail ModeMembership Setup Chapter 3: Membership Setup — 3.4 Membership Integration Settings Use Membership Integration Settings to connect your EQuip loyalty system with external CRM or marketing platforms. This allows member ...Membership Importer
? Backend — EQuipWebRetail ModeData Importer & Exporter Chapter 10: Data Importer — 10.3 Membership Importer Use Importer to manage and configure this feature in your EQuipWeb system. Use the Membership Importer to add many members at once from a ...