Commission Setup
Chapter 5: Commission Setup — 5.1 Commission List
Use Commission Setup to set up sales commission rules for your staff. Define which products earn commission, set the percentage or fixed amount, and the system will calculate commissions automatically based on each salesperson's transactions.
When to use this: When you want to set up or review sales commission rates for your staff.
Prerequisites
- User must have appropriate role permissions (see Access & Permissions above)
Commission Scheme List
📝 General Description
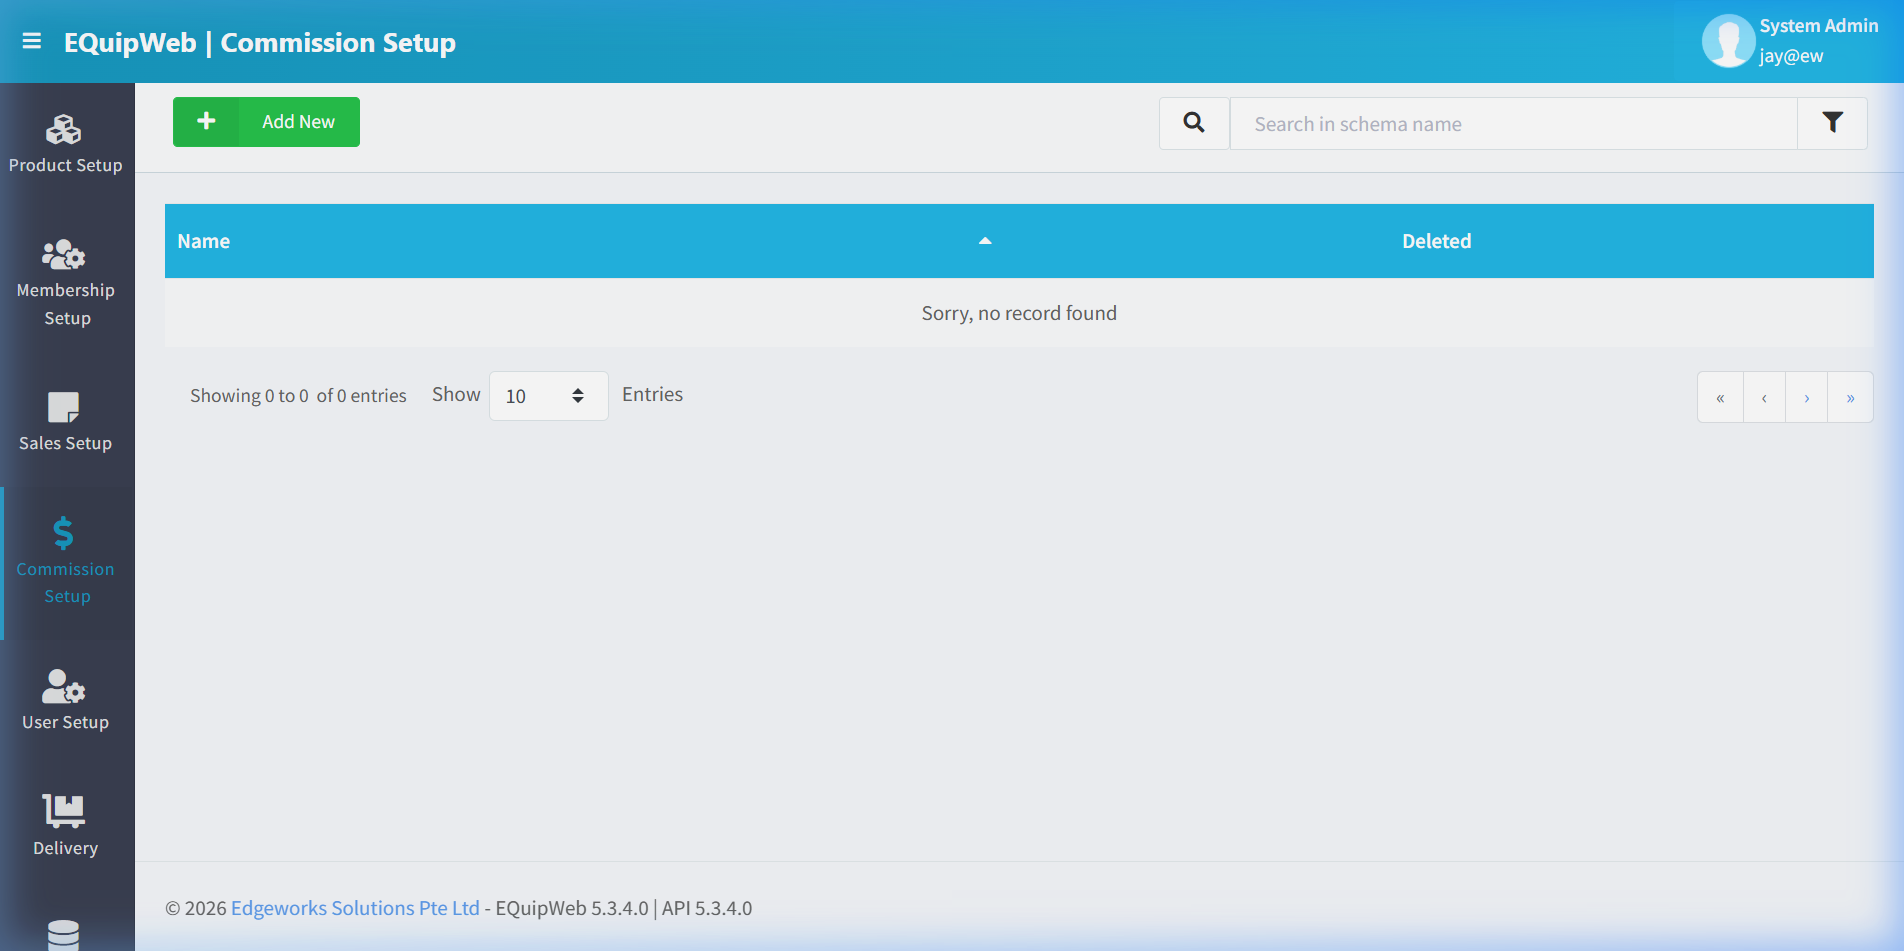
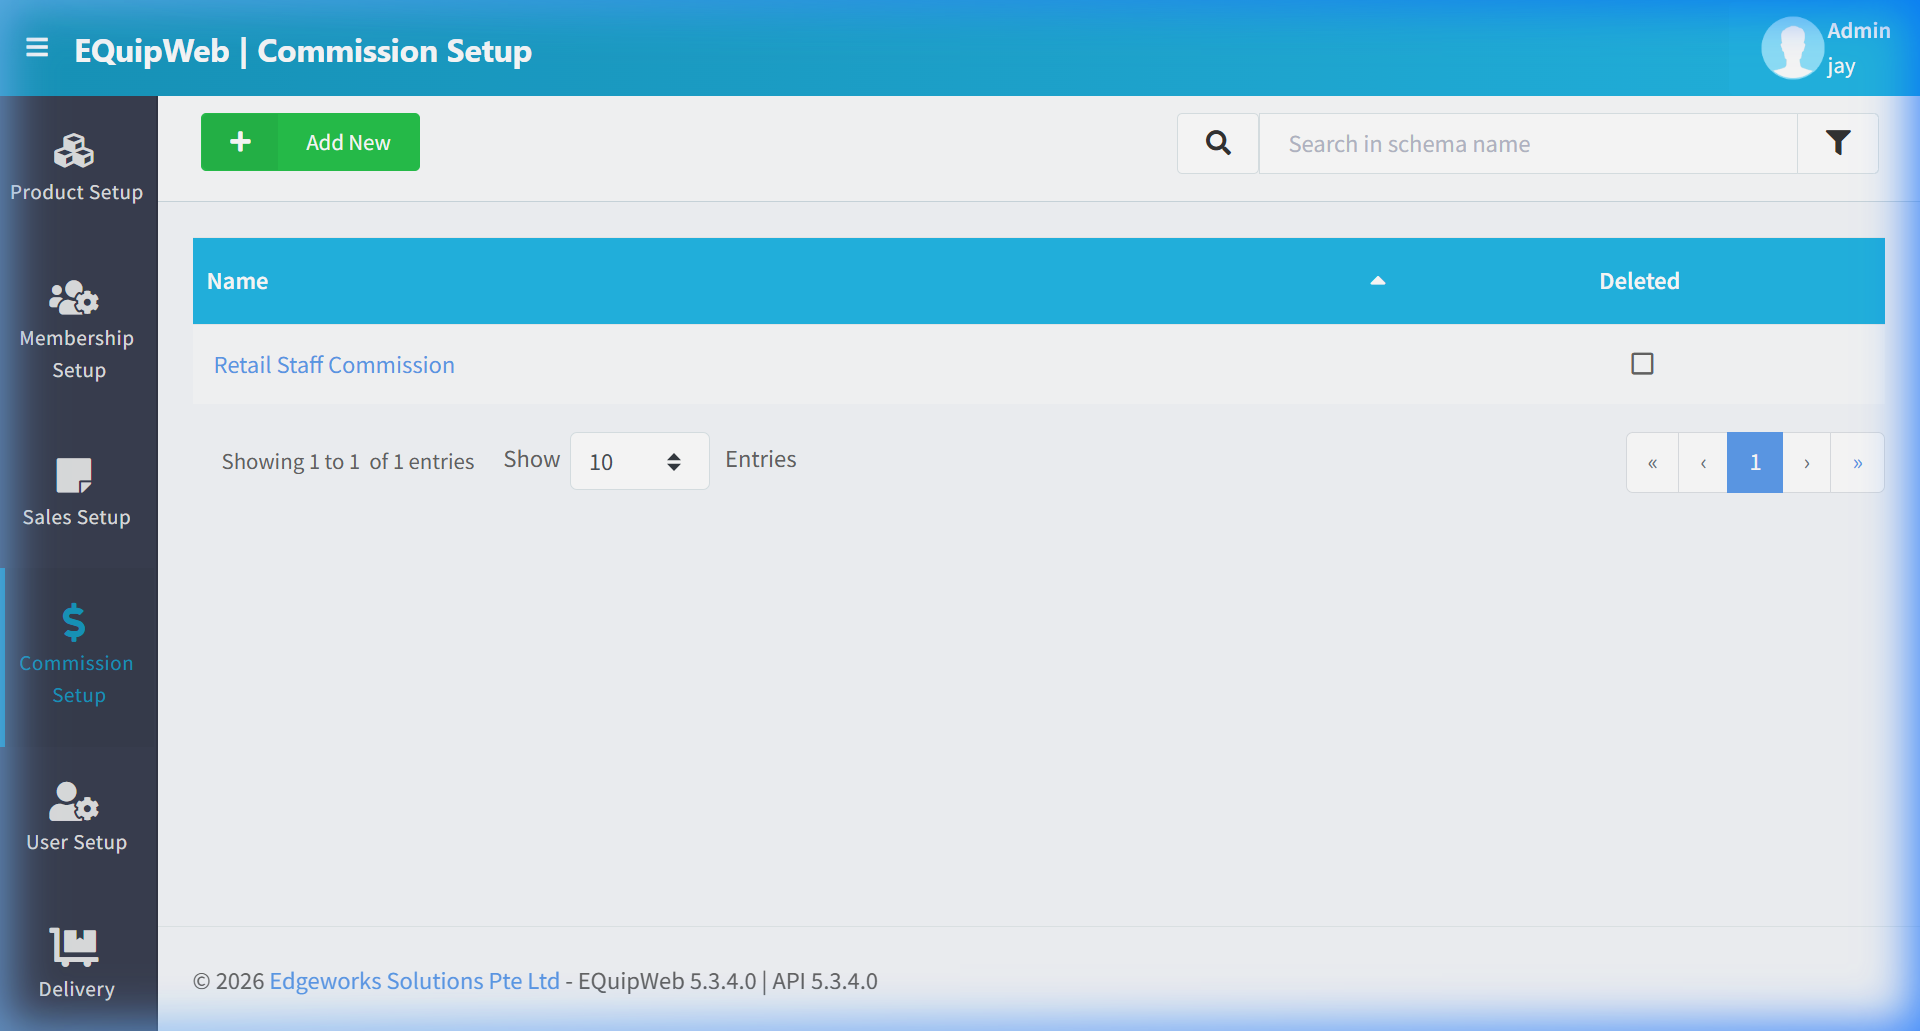
This page displays all configured commission schemes. Each scheme name is clickable to open the edit form. You can search schemes by name and filter to show or hide deleted schemes.
⚙️ UI Elements
| Element | Type | Function |
|---|---|---|
| + Add New | Green Button | Create a new commission scheme |
| 🔍 Search in schema name | Text Input | Search/filter by scheme name |
| 🔽 Filter | Funnel Icon | Show/hide deleted schemes |
Data Grid Columns
| Column | Description |
|---|---|
| Name | Commission scheme name (clickable → opens edit form) |
| Deleted | Hidden/deleted status — indicates whether the scheme has been removed |
5.1.1 How to Add a New Commission Scheme
Step 1 — Open the Add Form
- Navigate to Commission Setup from the sidebar.
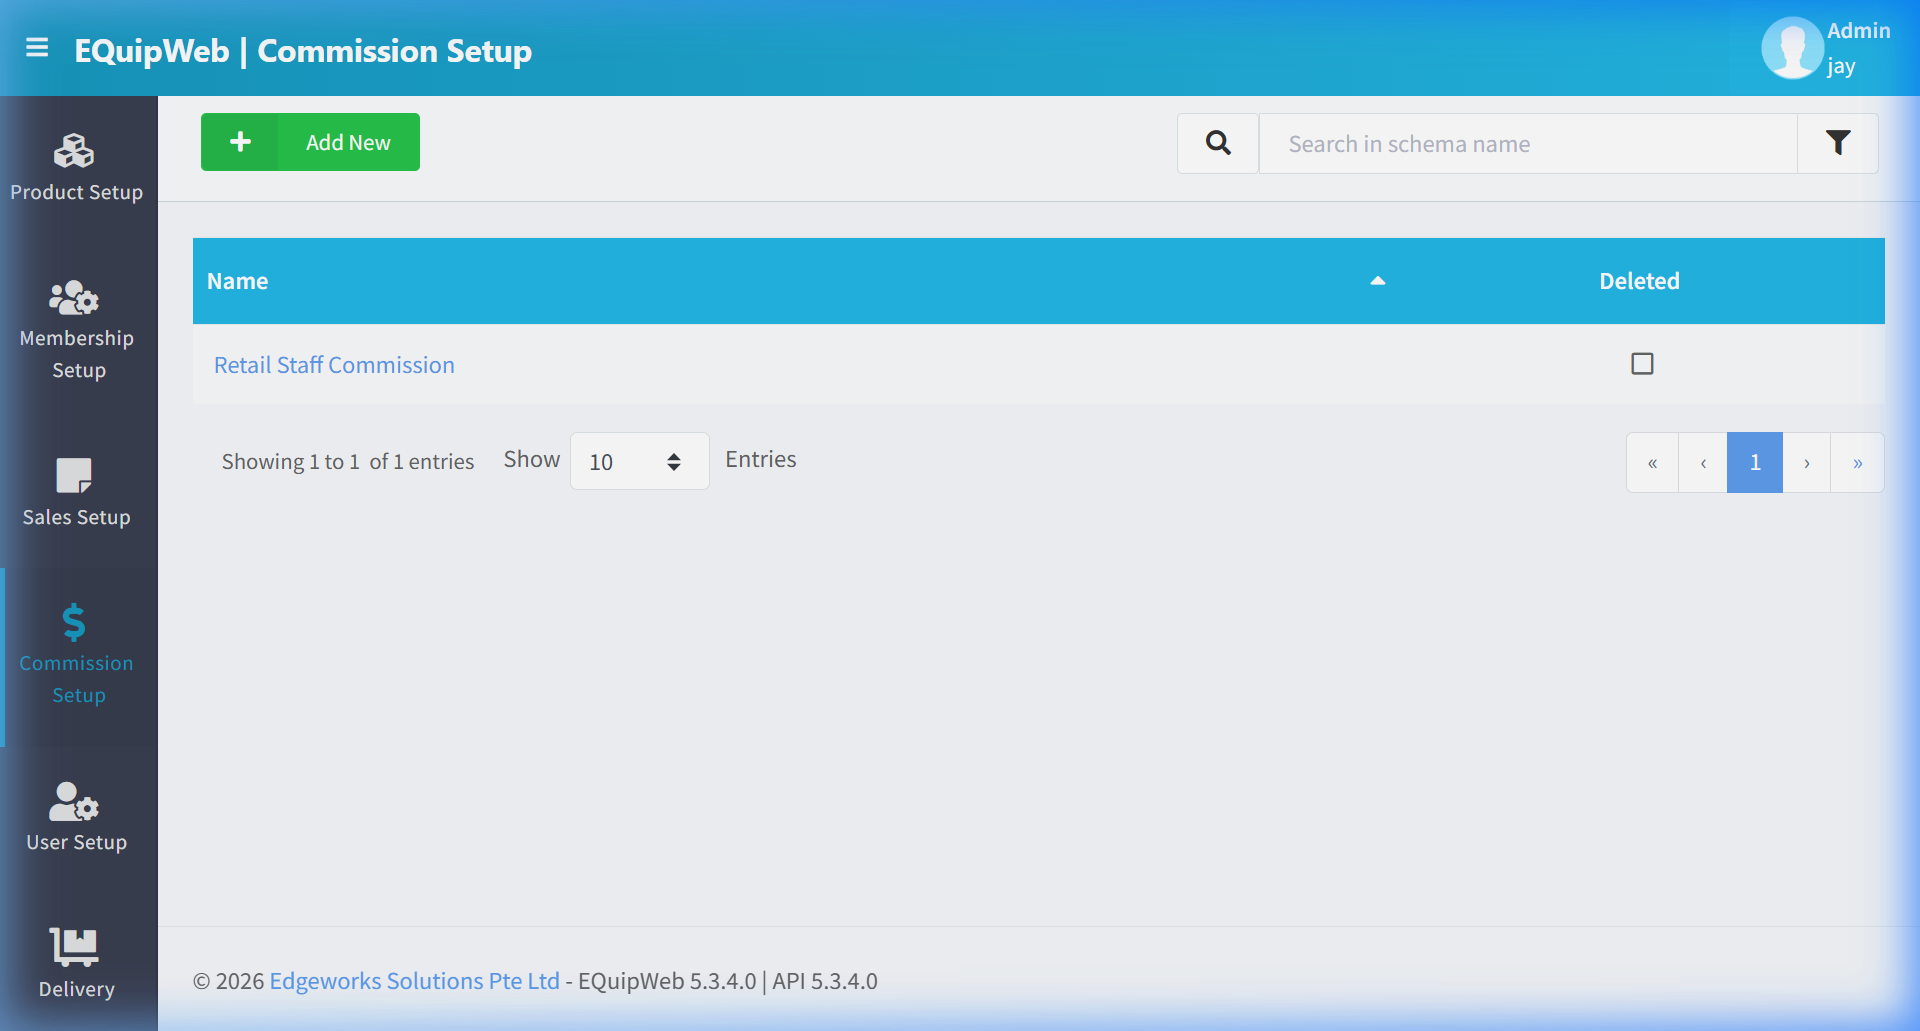 2. Click the green + Add New button.
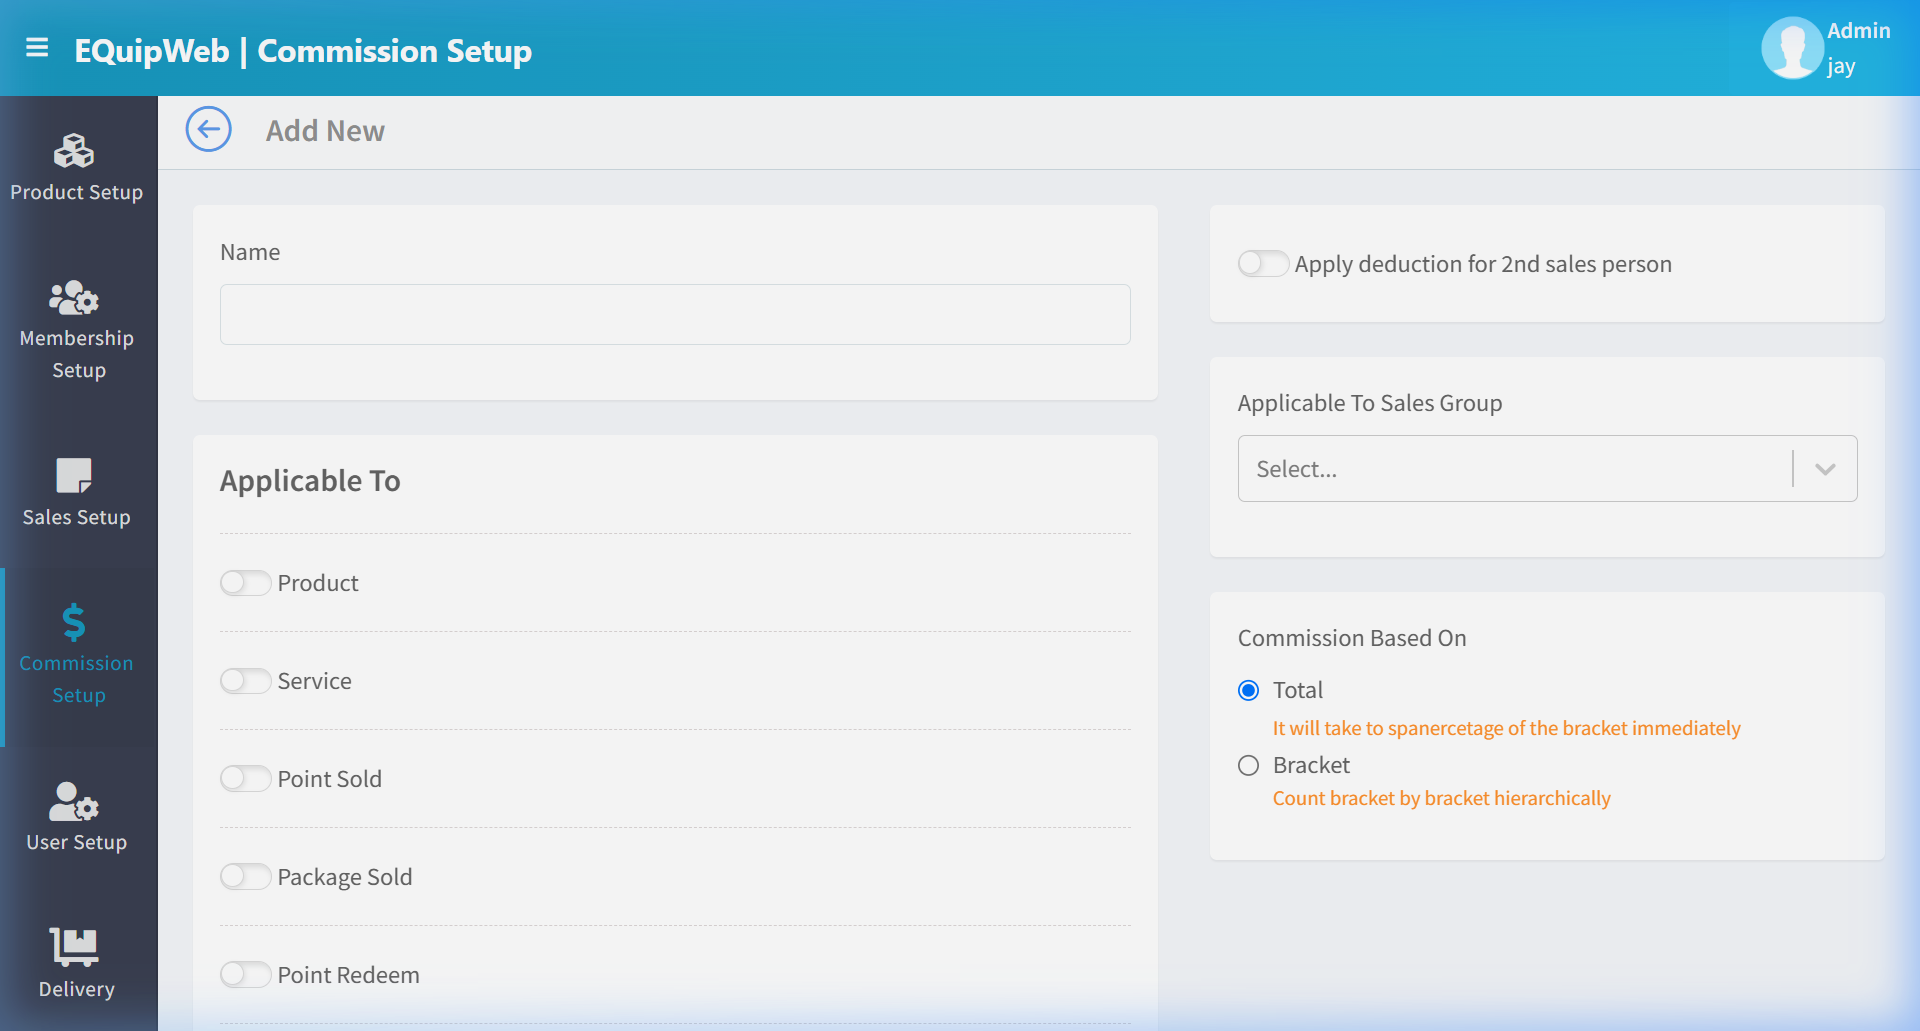 3. The Add New form opens with the following sections:
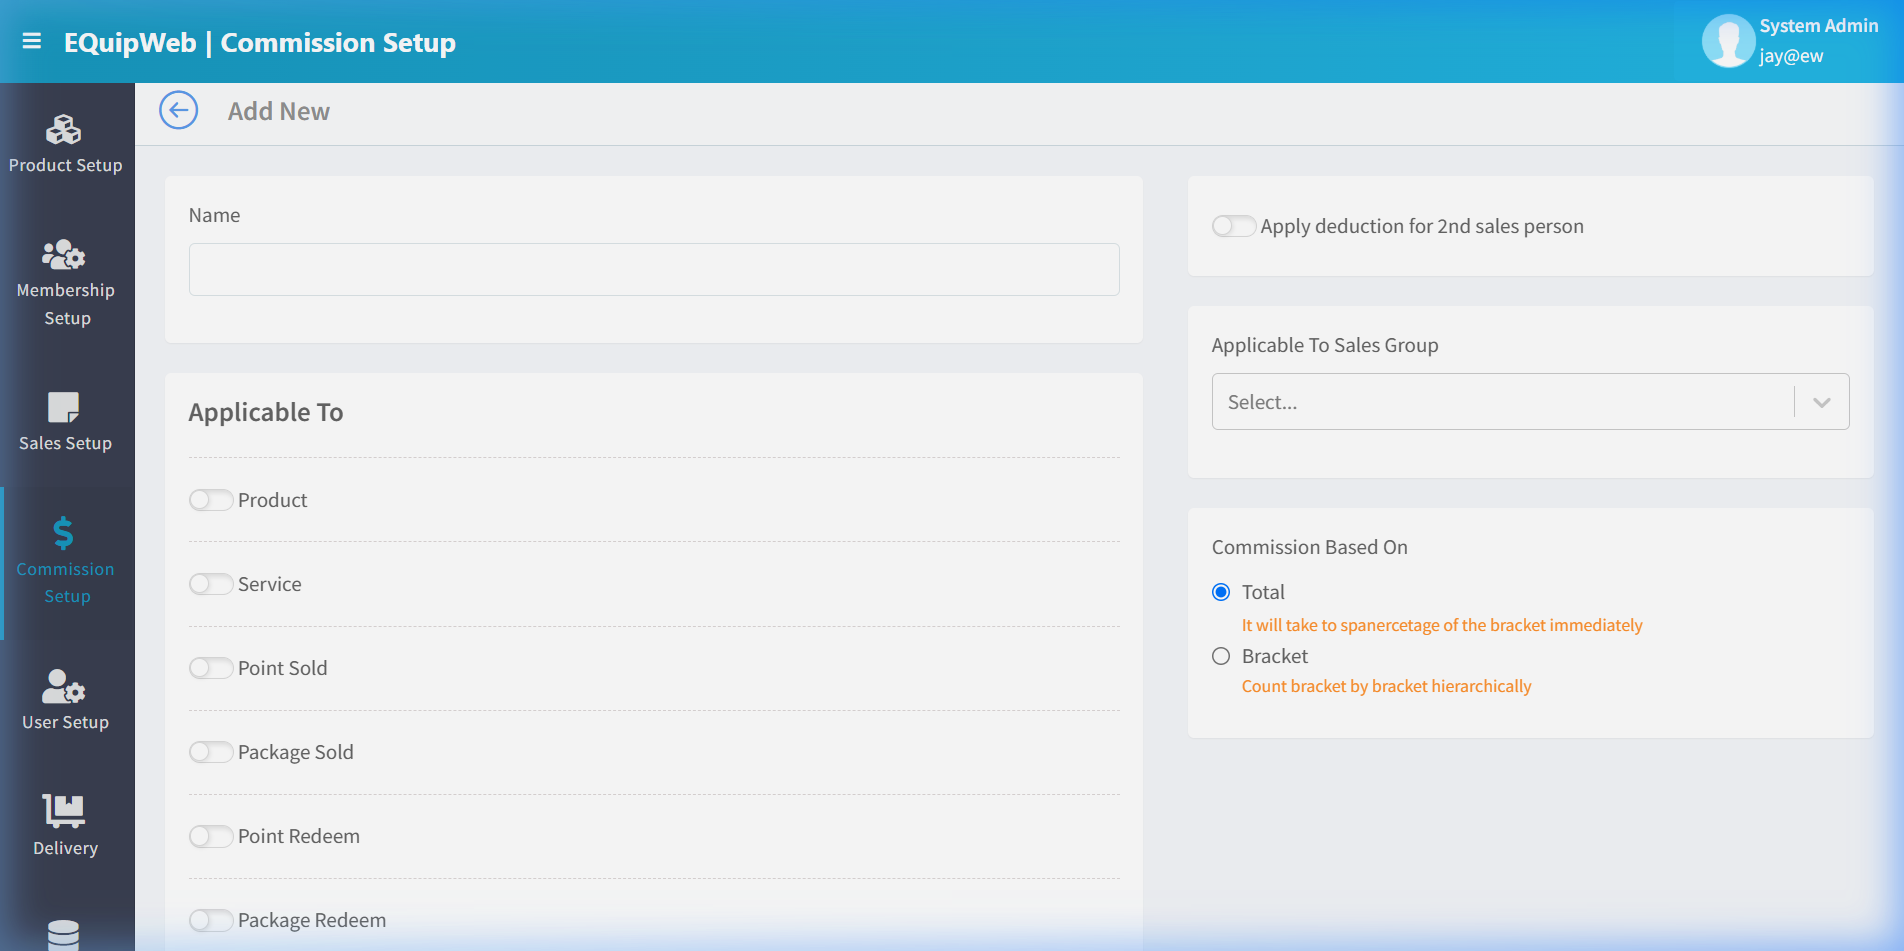
Step 2 — Enter Scheme Name
| Field | Type | Required | Description |
|---|---|---|---|
| Name | Text Input | ✅ Yes | The commission scheme name (e.g., "Retail Staff Commission") |
Step 3 — Configure "Applicable To"
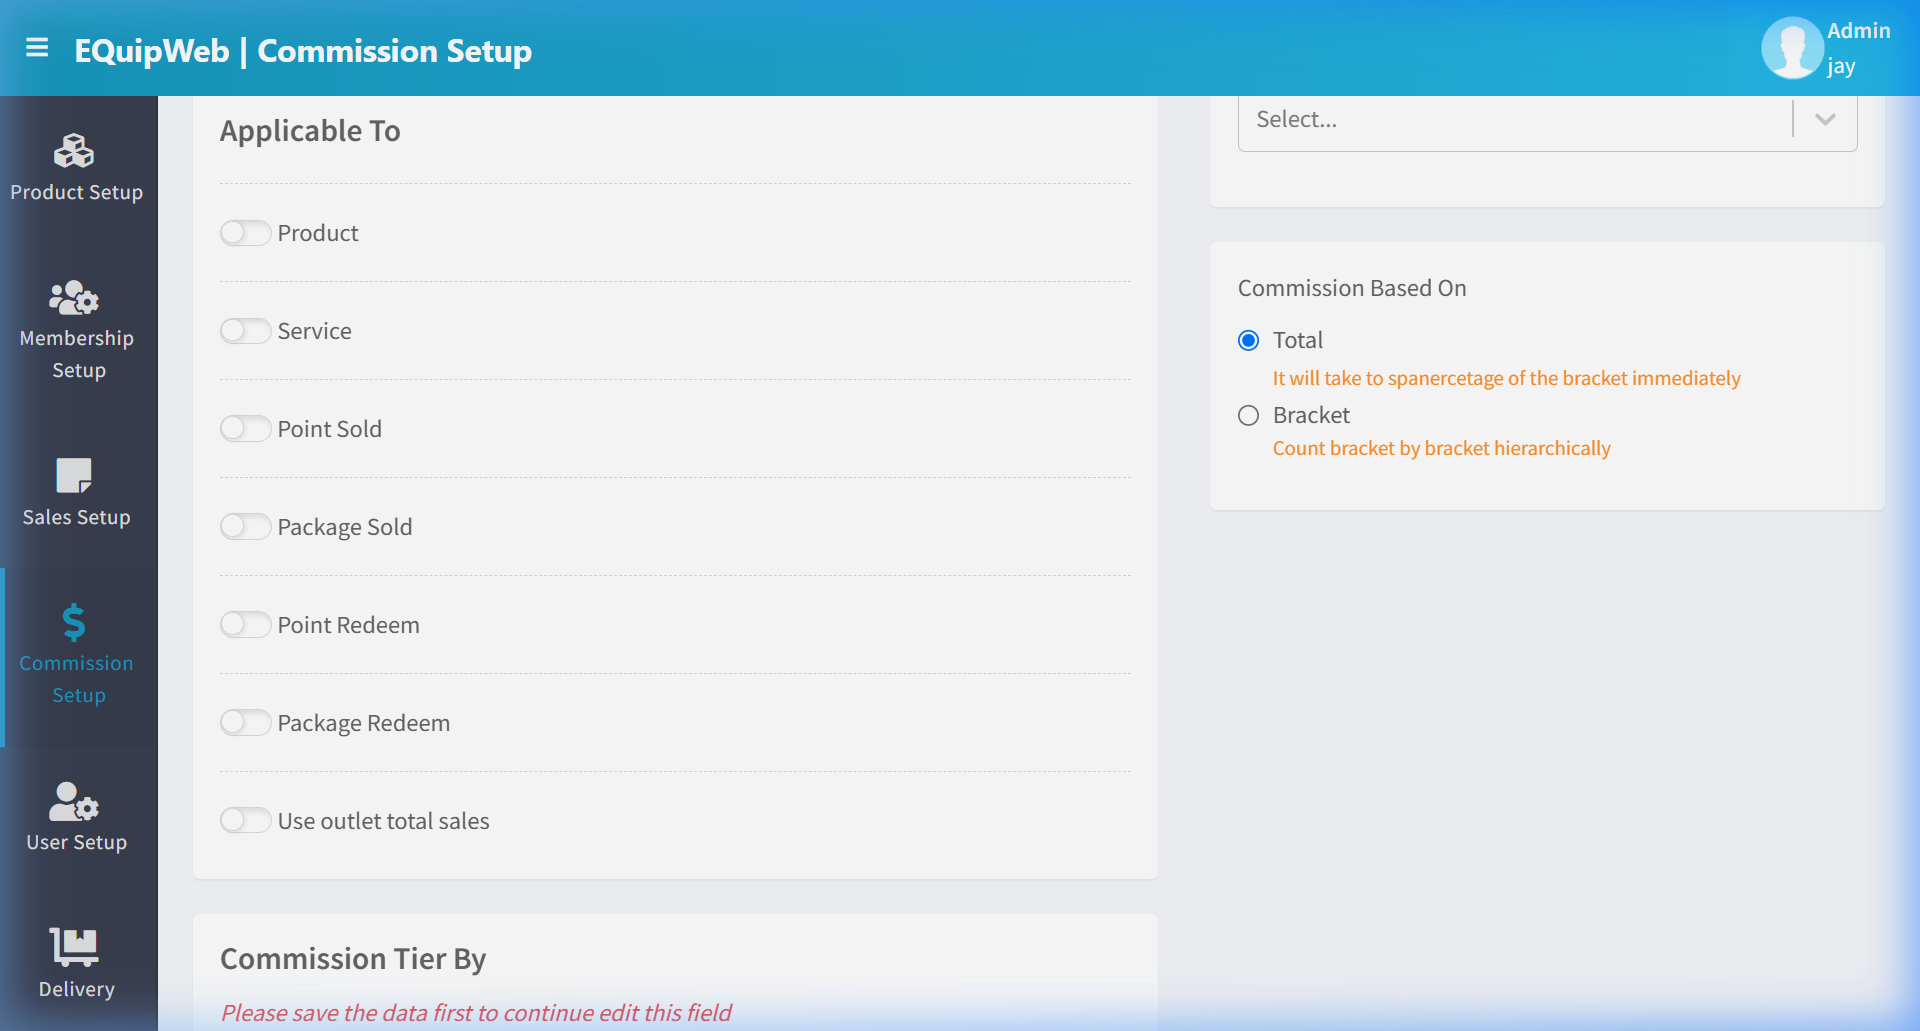
The Applicable To section determines which types of sales items are eligible for commission. Each item type has a toggle switch (ON/OFF) and a percentage (%) input field that appears when enabled.
| Toggle | Description | When Enabled |
|---|---|---|
| Product | Commission on product sales | Enter % rate for product commission |
| Service | Commission on service sales | Enter % rate for service commission |
| Point Sold | Commission when points are sold | Enter % rate for point sale commission |
| Package Sold | Commission when packages are sold | Enter % rate for package sale commission |
| Point Redeem | Commission when customer redeems points | Enter % rate for point redemption commission |
| Package Redeem | Commission when customer redeems packages | Enter % rate for package redemption commission |
| Use outlet total sales | Calculate commission based on outlet total sales, not per individual item | No % input — uses tier configuration instead |
[!TIP] You can enable multiple item types simultaneously. For example, enable both Product at 5% and Service at 8% to give staff different commission rates for products versus services.
Step 4 — Set Commission Options (Right Panel)
The right panel contains additional configuration:
| Field | Type | Description |
|---|---|---|
| Apply deduction for 2nd sales person | Toggle | When enabled, deducts commission if a second salesperson is tagged to the same transaction |
| Applicable To Sales Group | Dropdown | Restricts this commission scheme to a specific sales group. Leave as "Select..." for all groups |
Step 5 — Select "Commission Based On"
| Option | Description |
|---|---|
| Total | Takes the percentage of the bracket reached immediately. The entire sales amount is multiplied by the rate of the tier it falls into |
| Bracket | Counts bracket by bracket hierarchically. Commission is calculated separately for each tier range, then totaled |
[!IMPORTANT] Total = Flat rate based on final tier. Bracket = Progressive calculation across tiers. For most retail setups, "Total" is simpler. Use "Bracket" for tiered incentive programs where you want different rates at different sales volumes.
Step 6 — Click Save (First Save)
- Click the green Save button (bottom-right).
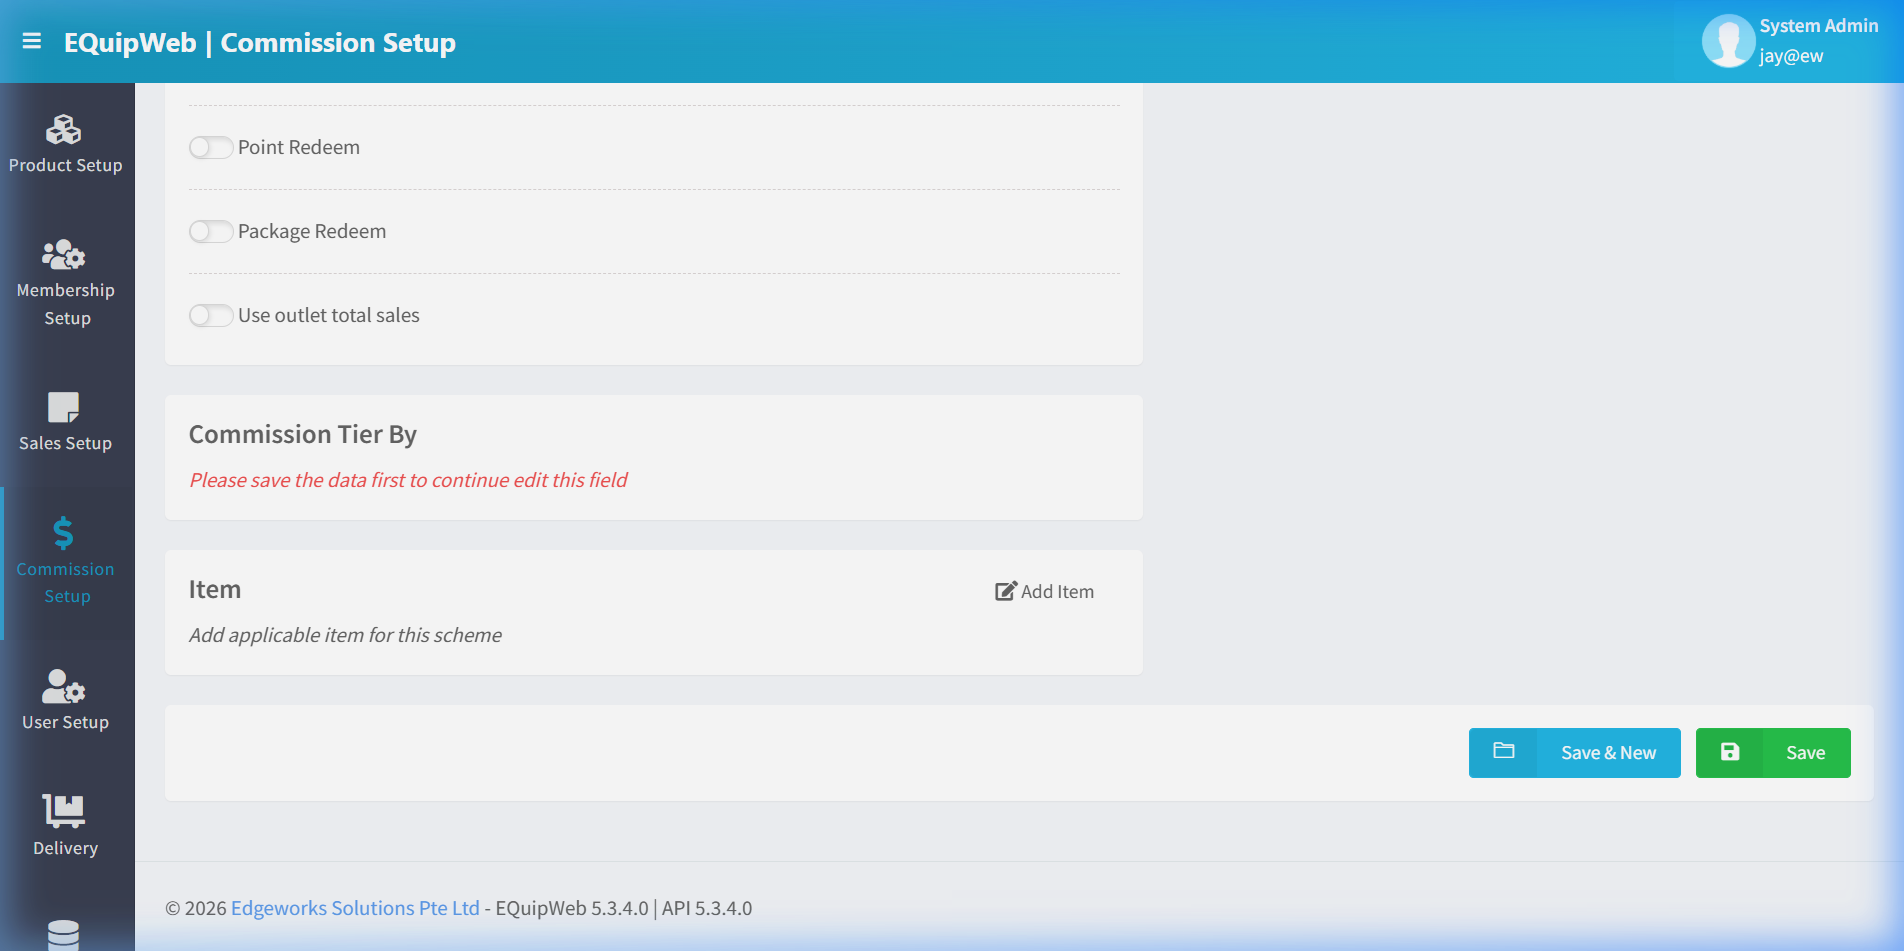
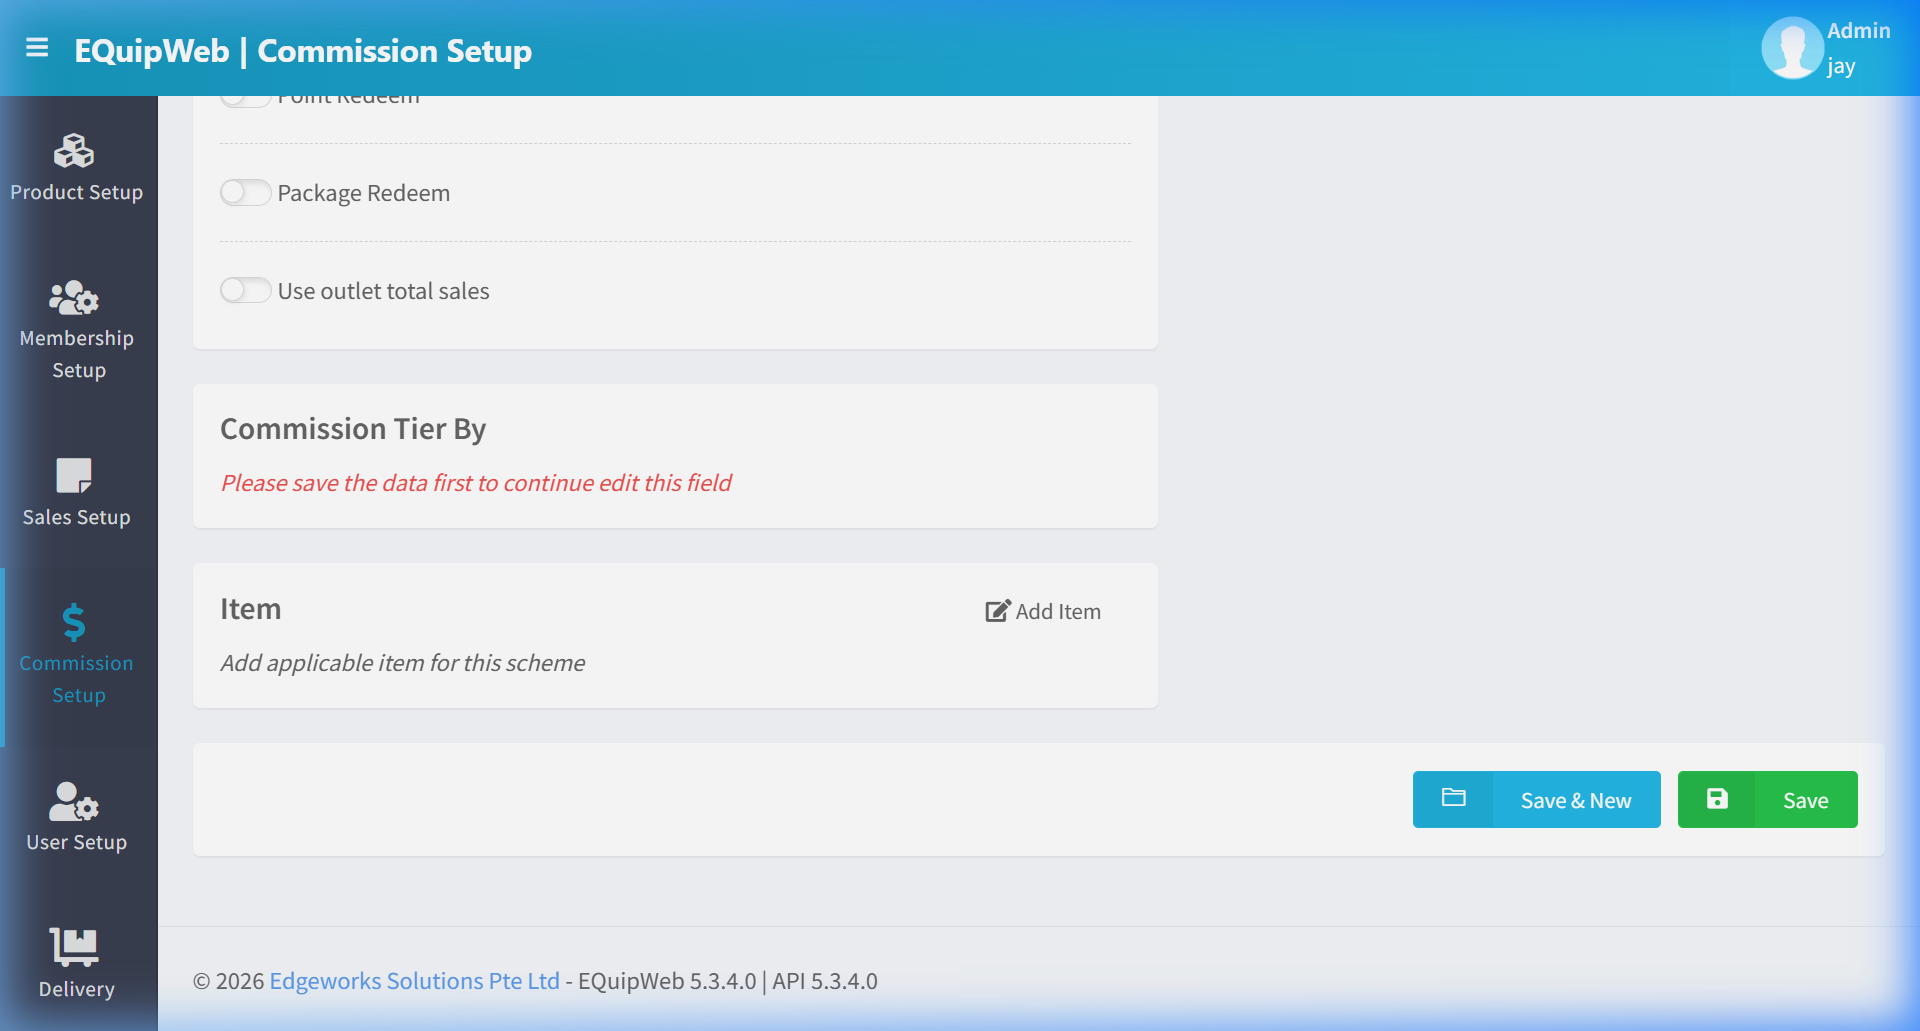
2. After saving, the Commission Tier By section and Item section become editable.
3. The page refreshes to show the edit form with all sections unlocked.
[!WARNING] The Commission Tier By section shows the message "Please save the data first to continue edit this field" on the Add New form. You must save once before you can configure tiers.
Step 7 — Configure "Commission Tier By"
After the first save, the Commission Tier By dropdown becomes available:
| Option | Description |
|---|---|
| Percentage | Tier brackets are defined by sales amount ranges with percentage-based commission |
| Quantity | Tier brackets are defined by quantity ranges (number of items sold) |
Step 8 — Set Up Tier Brackets
The tier configuration table appears below the dropdown:
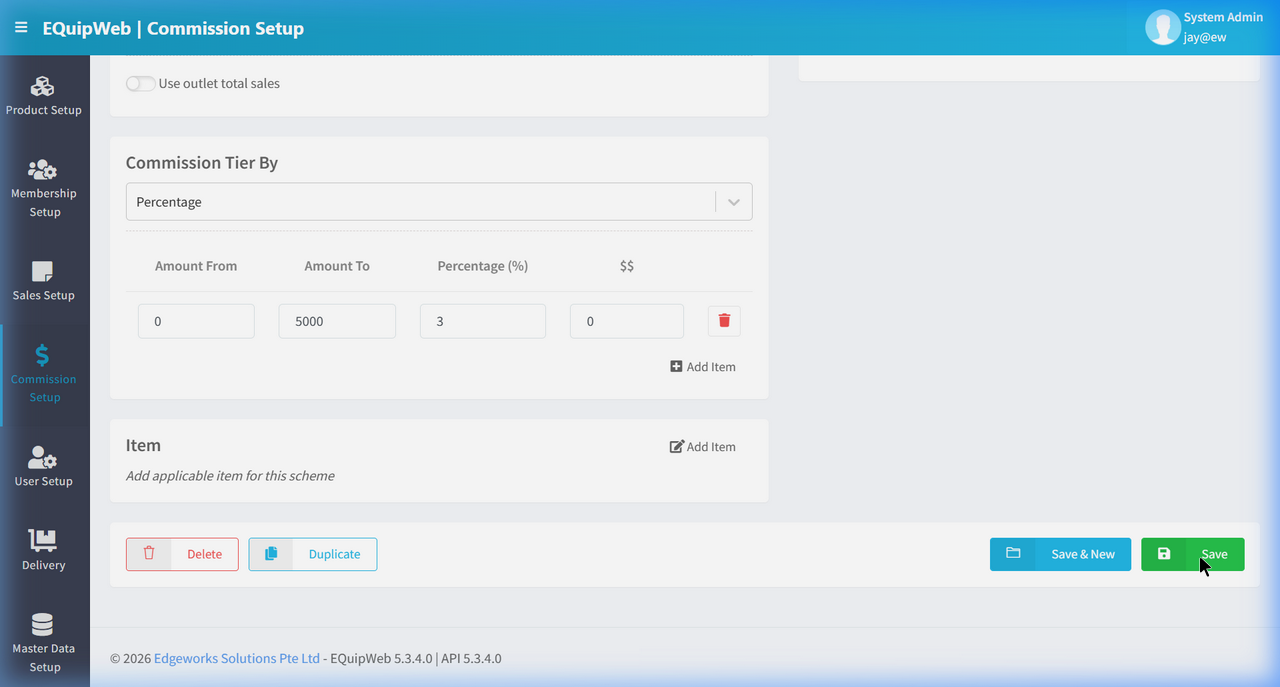
| Column | Type | Description |
|---|---|---|
| Amount From | Number | Starting amount/quantity for this tier |
| Amount To | Number | Ending amount/quantity for this tier |
| Percentage (%) | Number | Commission percentage rate for this tier |
| $$ (Fixed Amount) | Number | Fixed dollar amount commission for this tier (alternative to percentage) |
| 🗑️ Delete | Red Trash Icon | Remove this tier row |
Actions:
- Click ➕ Add Item to add another tier row.
- Click the 🗑️ trash icon to remove a tier row.
Step 9 — Add Applicable Items (Optional)
The Item section allows you to restrict this commission scheme to specific products:
| Element | Description |
|---|---|
| Add Item | Click to open the item picker and select specific products |
| "Add applicable item for this scheme" | Placeholder text — if no items are added, the scheme applies to ALL products |
Step 10 — Final Save
- Review all settings.
- Click Save to save the complete commission scheme.
✅ Expected Result: The commission rate is saved and applied to qualifying sales.
3. Alternatively, click Save & New to save and immediately create another scheme.
5.1.2 Completed Commission Scheme Example
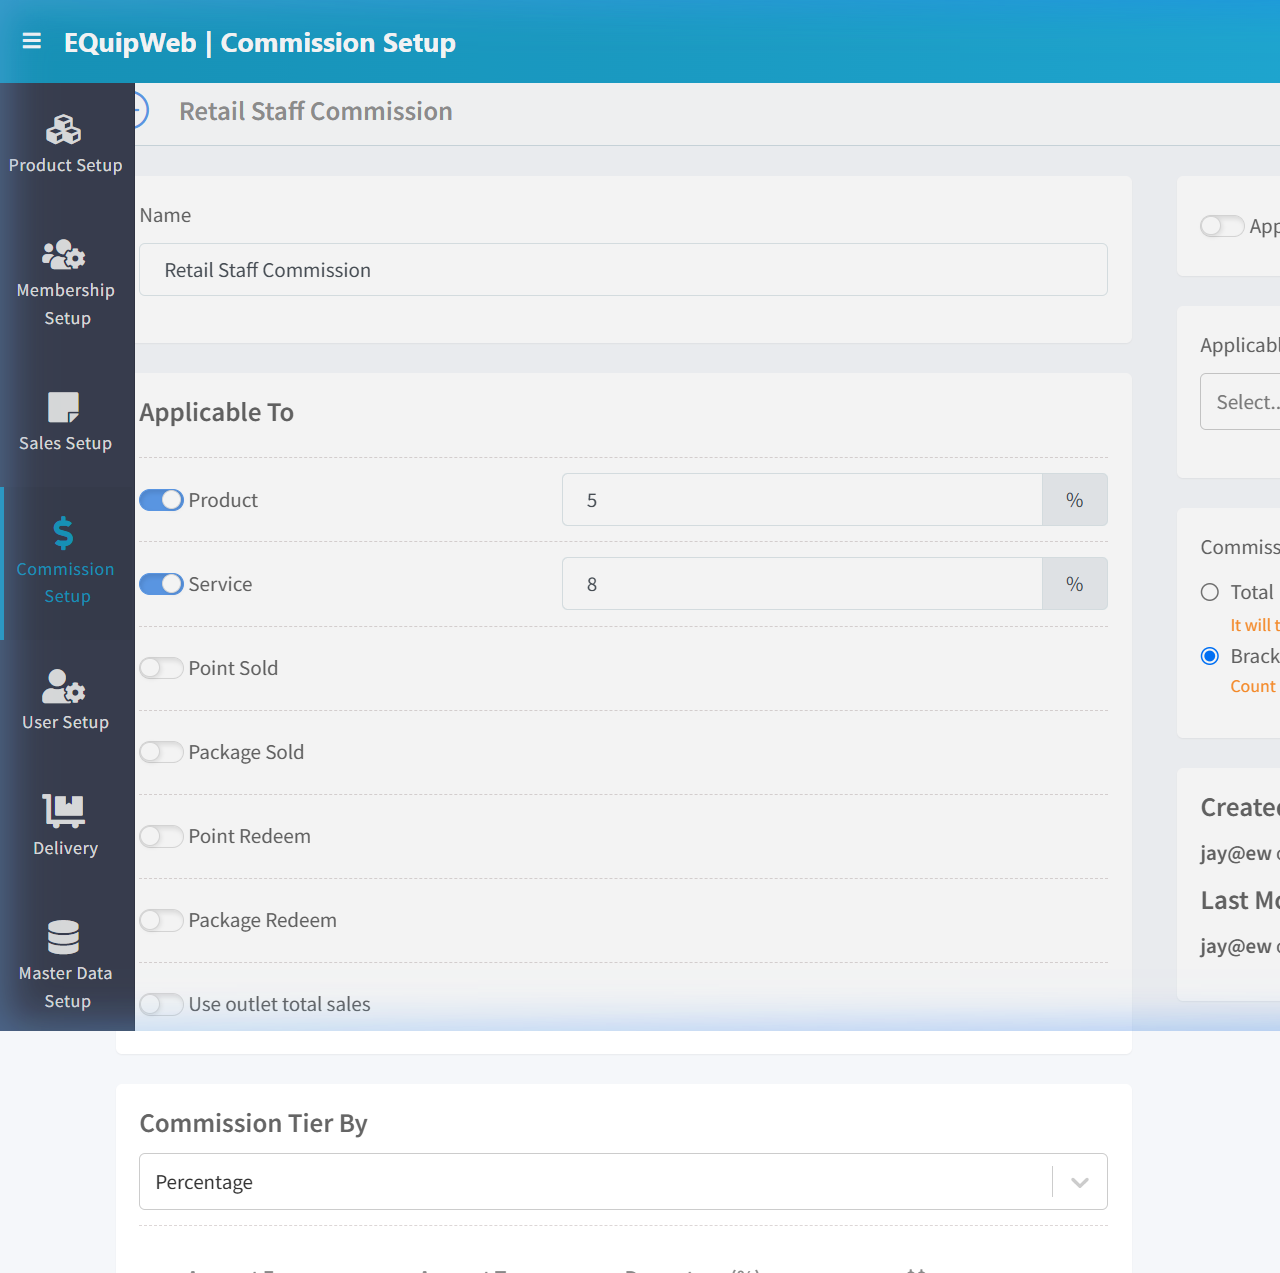
Below is a fully configured commission scheme showing all sections filled in:
Example Configuration:
- Name: Retail Staff Commission
- Product: ON — 5%
- Service: ON — 8%
- Point Sold / Package Sold / Point Redeem / Package Redeem: OFF
- Use outlet total sales: OFF
- Commission Based On: Bracket
- Commission Tier By: Percentage
- Tier 1: Amount From 0 → Amount To 5000 → 3% → $0
5.1.3 How to Edit a Commission Scheme
- Click on the scheme name in the Commission List data grid.
2. The edit form opens with all sections available (including Commission Tier By).
3. Modify any fields — name, toggles, percentages, tiers.
4. Click Save to apply changes.
[!NOTE] Changes apply to future sales only — they do not recalculate past commissions. The edit form also shows Created By and Last Modified By timestamps on the right panel.
5.1.4 How to Delete a Commission Scheme
- Open the edit form by clicking the scheme name.
2. Click the red Delete button (bottom-left).
3. The scheme is safely deleted and no longer applied to new sales.
4. Historical commission records are preserved.
5. To restore: Use the Filter button on the list → show deleted schemes → click the scheme → restore.
5.1.5 How to Duplicate a Commission Scheme
- Open the edit form by clicking the scheme name.
2. Click the blue Duplicate button (bottom-left, next to Delete).
3. A copy of the scheme is created with a new name.
4. Modify the duplicated scheme as needed → click Save.
Bottom Action Buttons Summary
| Button | Color | Position | Function |
|---|---|---|---|
| Delete | Red (outline) | Bottom-left | Soft-delete the commission scheme |
| Duplicate | Blue (outline) | Bottom-left | Create a copy of this scheme |
| Save & New | Green (outline) | Bottom-right | Save current scheme and open a blank Add New form |
| Save | Green (solid) | Bottom-right | Save the current scheme |
💡 Example
Scenario: A beauty salon wants to incentivize staff to sell both products and services, with higher commission for services.
Setup:
- Create scheme: "Salon Staff Commission"
- Enable Product → 3%
3. Enable Service → 8%
4. Set Commission Based On → Bracket
5. Set Commission Tier By → Percentage
6. Add tiers:
- Tier 1: $0–$3,000 → 3%
- Tier 2: $3,001–$8,000 → 5%
- Tier 3: $8,001–$99,999 → 8%
- Save → Commission is now automatically calculated based on each staff member's monthly sales volume.
[!TIP] Use the Commission Report in the Report Portal to review staff commissions monthly before payroll processing.
Access & Permissions
| Role | View | Create | Edit | Delete |
|---|---|---|---|---|
| Admin | Yes | Yes | Yes | Yes |
| Supervisor | Yes | Yes | Yes | No |
| Cashier | No backend access | — | — | — |
[!NOTE] Exact permissions depend on the Privileges Setup configured for each role. Contact your administrator if you cannot access this page.
Business Rules
- Records that are linked to active transactions or other modules cannot be permanently deleted
- Changes made here will take effect on POS terminals after the next sync
- Deleted records can be restored from the list using the Show Deleted filter
- All changes are logged with the user who made them and the timestamp
How to Add a New Commission
- Navigate to Commission Setup from the sidebar menu.
-
Click the + Add New button (green button).
-
Fill in the required fields in the form.
-
Fill in any optional fields as needed.
-
Click Save to create the new commission.
✅ Expected Result: The new commission appears in the list and is available for use across the system.
How to Edit a Commission
- Navigate to Commission Setup from the sidebar menu.
-
Click on the name or code link (blue text) of the record you want to edit.
-
The edit form opens with all current values pre-filled. Modify the fields as needed.
- Click Save to apply your changes.
✅ Expected Result: The commission is updated and changes take effect immediately.
How to Delete a Commission
- Navigate to Commission Setup from the sidebar menu.
-
Click on the name or code link (blue text) of the record you want to delete.
-
In the edit form, scroll down to the bottom.
- Click the Delete button (red button).
- A confirmation dialog appears — click Yes to confirm.
✅ Expected Result: The commission is soft-deleted — hidden from active lists and POS but can be restored later.
[!WARNING] Records linked to active transactions or other modules cannot be deleted. The system will display an error if deletion is not allowed.
FAQ
Q: Why is the commission not calculating for a staff member? A: Verify the staff has a commission plan assigned in their user profile, and the products sold are commission-eligible.
Q: Can commission rates be different per outlet? A: Yes, if configured. Check the commission plan's outlet assignment settings.
Troubleshooting
| Issue | Possible Cause | Solution |
|---|---|---|
| Cannot save the record | Required fields are empty or invalid | Check all fields marked with * and fill in valid data |
| Record not appearing in POS | POS terminal has not synced yet | Wait for the next sync cycle or manually trigger sync from Terminal Status |
| Cannot delete the record | Record is being used by other modules | Check if the record is linked to active transactions, products, or other settings |
| Changes not taking effect | Browser cache showing old data | Refresh the page (Ctrl+F5) or clear browser cache |
| "Duplicate" error on save | A record with the same name/code already exists | Search the list (including deleted records) for duplicates |
| Page not loading | Session expired or network issue | Log out and log back in. Check your internet connection |
Related Menus
- User Setup > User List — assign commission plans to staff
- Product Setup > Product List — commission-eligible products
- Sales Setup > Payment Mode — payment methods for commission calculation
Open Questions / Confirmation Needed
[!NOTE] The following items may vary depending on your system version and configuration:
- Exact permission settings depend on your Privileges Setup configuration
- Sync timing to POS terminals depends on network conditions and sync schedule
- Some features may require additional licensing or module activation
- Field behavior may differ between EQuip versions
If you encounter behavior not described in this manual, contact your system administrator or EQuip support team.
Related Articles
Feature Setup
? Backend — EQuipWebRetail ModeSetting Setting — 12.5 Feature Setup: Toggle product features, pricing display, and system options Use Feature Setup to turn features on or off across your system. Each feature has a simple toggle switch — flip it ON ...Privileges Setup
? Backend — EQuipWebRetail ModeUser Setup Chapter 6: User Setup — 6.4 Privileges Setup Use Setup to manage and configure this feature in your EQuipWeb system. Privileges Setup is the master list of all permissions available in the system. Each ...Setup Module Overview
? Backend — EQuipWebRetail ModeChapter 1: Getting Started Backend Setup — Module Overview and Getting Started Guide The Setup Overview provides a quick-reference guide for initial system configuration. This page summarizes the recommended setup ...Role Privileges Setup
? Backend — EQuipWebRetail ModeUser Setup Chapter 6: User Setup — 6.3 Role Privileges Use Role Privileges to decide exactly what each role can see and do. For example, you might let Cashiers process sales but block them from viewing reports or ...Company Setup
? Backend — EQuipWebRetail ModeMaster Data Setup Chapter 8: Master Data Setup — 8.9 Company Setup Use Company Setup (under Master Data) to enter your company's official business details — company name, registration number, address, and contact ...