Company Setup
Chapter 8: Master Data Setup — 8.9 Company Setup
Use Company Setup (under Master Data) to enter your company's official business details — company name, registration number, address, and contact information. This information appears on receipts, invoices, and official reports.
When to use this: When you need to update your company name, address, or receipt header/footer text that appears on printed receipts.
Prerequisites
- No prerequisites — company setup is foundational
Company Setup Form
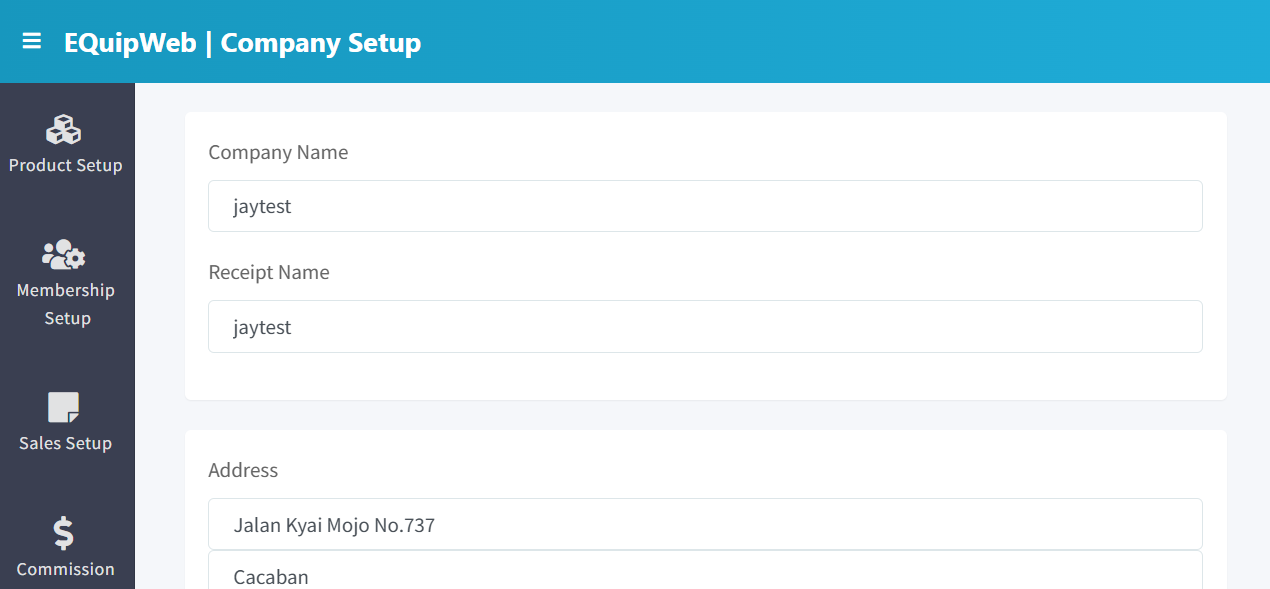
📝 General Description
Unlike other Master Data pages, Company Setup is a single-form page (not a list). There is only one company record per system. This page controls the company identity that prints on all POS receipts and documents.
8.9.1 Form Fields
| Field | Type | Required | Description |
|---|---|---|---|
| Company Name | Text | ✅ Yes | The legal company name used in the system and reports |
| Receipt Name | Text | No | The name printed on POS receipts — can be different from the legal company name (e.g., trading name) |
| Address Line 1 | Text | No | Primary street address |
| Address Line 2 | Text | No | Secondary address line |
| City | Text | No | City name |
| Zip Code | Text | No | Postal/ZIP code |
| Country | Text | No | Country name |
| Phone | Text | No | Company phone number |
| Fax | Text | No | Fax number (if applicable) |
| No | Company email address | ||
| Website | URL | No | Company website |
8.9.2 How to Update Company Information
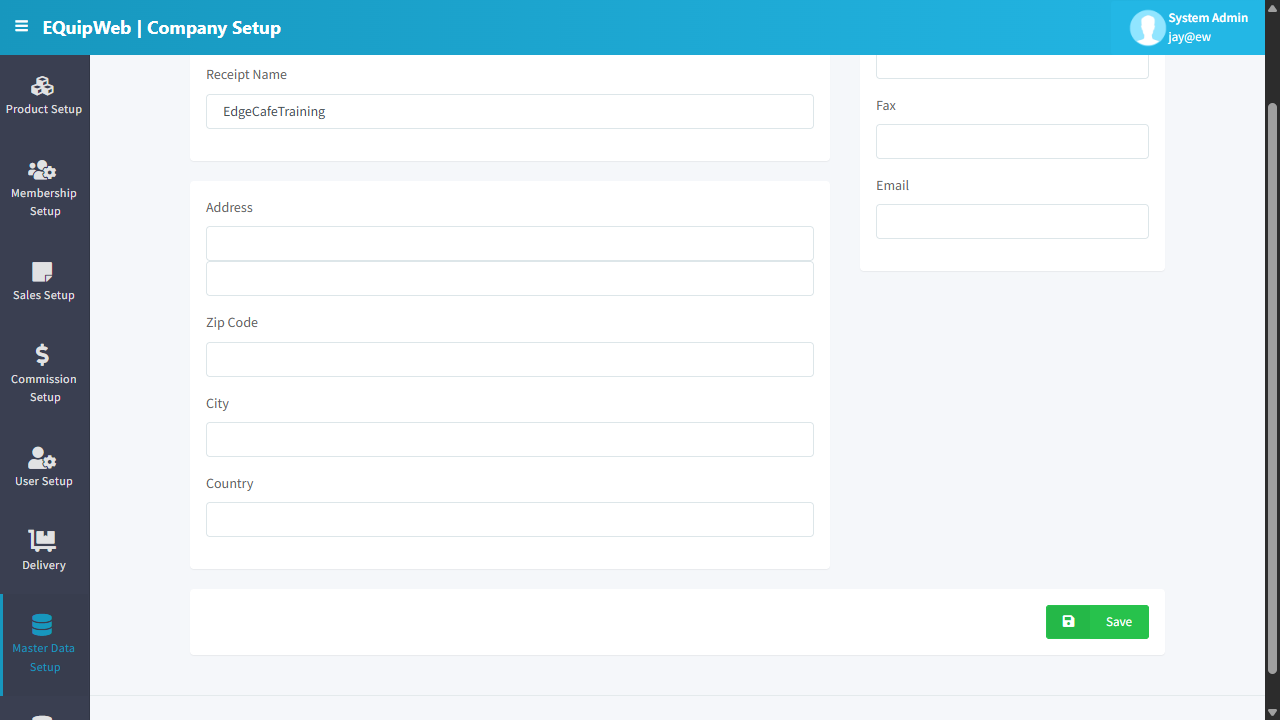
- Navigate to Master Data → Company Setup.
 2. Update any fields as needed:
- Change the Company Name if the legal entity name changes.
- Update the Receipt Name to reflect a rebranding.
- Modify the Address if the company relocates.
- Click Save.
Expected Result: Settings are saved and apply system-wide.
 4. The updated information will appear on all future POS receipts and reports.
[!NOTE] Changes do not retroactively update old receipts or documents. Only new transactions will show the updated company information.
8.9.3 Where Company Info Appears
| Location | Fields Used |
|---|---|
| POS Receipt Header | Receipt Name, Address, Phone |
| Reports (PDF/Excel) | Company Name, Address |
| Invoices | Company Name, Address, Phone, Email |
| Online Ordering Page | Company Name (displayed in footer) |
| Member Registration | Company Name (in terms & conditions) |
8.9.4 Company Setup vs. Setting > Company Setup
| Page | URL | Purpose |
|---|---|---|
| Master Data → Company Setup (this page) | /Setup/new/companysetup | Receipt name, address, contact info |
| Setting → Company Setup (Section 12.2) | /Setup/new/setting/company | GST registration, logo upload, system-level settings |
[!IMPORTANT] These are two different pages that configure different aspects of the company. This page handles receipt/contact info. The Setting page handles tax registration and branding.
💡 Example
Scenario: A company rebrands from "ABC Fashion Pte Ltd" to "XYZ Style Co." but keeps the same legal entity.
Steps:
- Navigate to Master Data → Company Setup.
2. Keep Company Name as ABC Fashion Pte Ltd (legal name unchanged).
3. Change Receipt Name to XYZ Style Co..
4. Click Save.
 5. All new receipts will print "XYZ Style Co." while the legal name remains intact in official reports.
[!TIP] If you operate under a different trading name than your registered company name, use the Receipt Name field for the trading name. Customers see the receipt name; legal documents use the company name.
Access & Permissions
| Role | View | Create | Edit | Delete |
|---|---|---|---|---|
| Admin | Yes | Yes | Yes | Yes |
| Supervisor | Yes | Yes | Yes | No |
| Cashier | No backend access | — | — | — |
[!NOTE] Exact permissions depend on the Privileges Setup configured for each role. Contact your administrator if you cannot access this page.
FAQ
Q: Can I delete an outlet that has transaction history? A: You can soft-delete it, but it cannot be permanently removed if it has linked transactions or POS terminals.
Q: Why are changes not showing on the POS terminal? A: The POS needs to sync. Check Terminal Status for the last sync time and trigger a manual sync if needed.
Q: What happens if I change the company name? A: The change will appear on all new receipts after the next POS sync. Existing printed receipts are not affected.
Troubleshooting
| Issue | Possible Cause | Solution |
|---|---|---|
| Cannot save the record | Required fields are empty or invalid | Check all fields marked with * and fill in valid data |
| Record not appearing in POS | POS terminal has not synced yet | Wait for the next sync cycle or manually trigger sync from Terminal Status |
| Cannot delete the record | Record is being used by other modules | Check if the record is linked to active transactions, products, or other settings |
| Changes not taking effect | Browser cache showing old data | Refresh the page (Ctrl+F5) or clear browser cache |
| "Duplicate" error on save | A record with the same name/code already exists | Search the list (including deleted records) for duplicates |
| Page not loading | Session expired or network issue | Log out and log back in. Check your internet connection |
Related Menus
- Product Setup > Product List — products linked to outlets
- User Setup > User List — users assigned to outlets
- Sales Setup > Payment Mode — payment methods per outlet
- Setting > Company Setup — company-wide settings
Open Questions / Confirmation Needed
[!NOTE] The following items may vary depending on your system version and configuration:
- Exact permission settings depend on your Privileges Setup configuration
- Sync timing to POS terminals depends on network conditions and sync schedule
- Some features may require additional licensing or module activation
- Field behavior may differ between EQuip versions
If you encounter behavior not described in this manual, contact your system administrator or EQuip support team.
Related Articles
Company Setup (Settings)
Chapter 12: Setting — 12.9 Company Setup (System Level) Use Setup to manage and configure this feature in your EQuipWeb system. Use Company Setup (under Settings) to configure system-wide business settings — like your GST registration number, ...Supplier Setup
? Backend — EQuipWebRetail ModeMaster Data Setup Chapter 8: Master Data Setup — 8.8 Supplier Setup Use Supplier Setup to keep track of your vendors and distributors. Store their contact details, payment terms, and product catalogs here. When you ...Outlet Setup
? Backend — EQuipWebRetail ModeMaster Data Setup Chapter 8: Master Data Setup — 8.3 Outlet Setup Use Outlet Setup to add and manage your store locations. Each outlet has its own address, contact details, operating hours, and receipt settings. When ...Feature Setup
? Backend — EQuipWebRetail ModeSetting Setting — 12.5 Feature Setup: Toggle product features, pricing display, and system options Use Feature Setup to turn features on or off across your system. Each feature has a simple toggle switch — flip it ON ...Currency Setup
? Backend — EQuipWebRetail ModeSales Setup Chapter 4: Sales Setup — 4.8 Currency Setup Use Currency Setup to add the currencies your business accepts. If you only accept one currency (e.g., SGD), it's already set up for you. Multi-currency ...