Supplier Setup
Chapter 8: Master Data Setup — 8.8 Supplier Setup
Use Supplier Setup to keep track of your vendors and distributors. Store their contact details, payment terms, and product catalogs here. When you create Purchase Orders later, the system will pull supplier information from this page. Suppliers are referenced in Purchase Orders, product sourcing, and supplier-product mapping.
When to use this: When you need to add a new supplier, update supplier contact details, or manage supplier records.
Prerequisites
- No prerequisites — suppliers are independent master data
Supplier List
📝 General Description
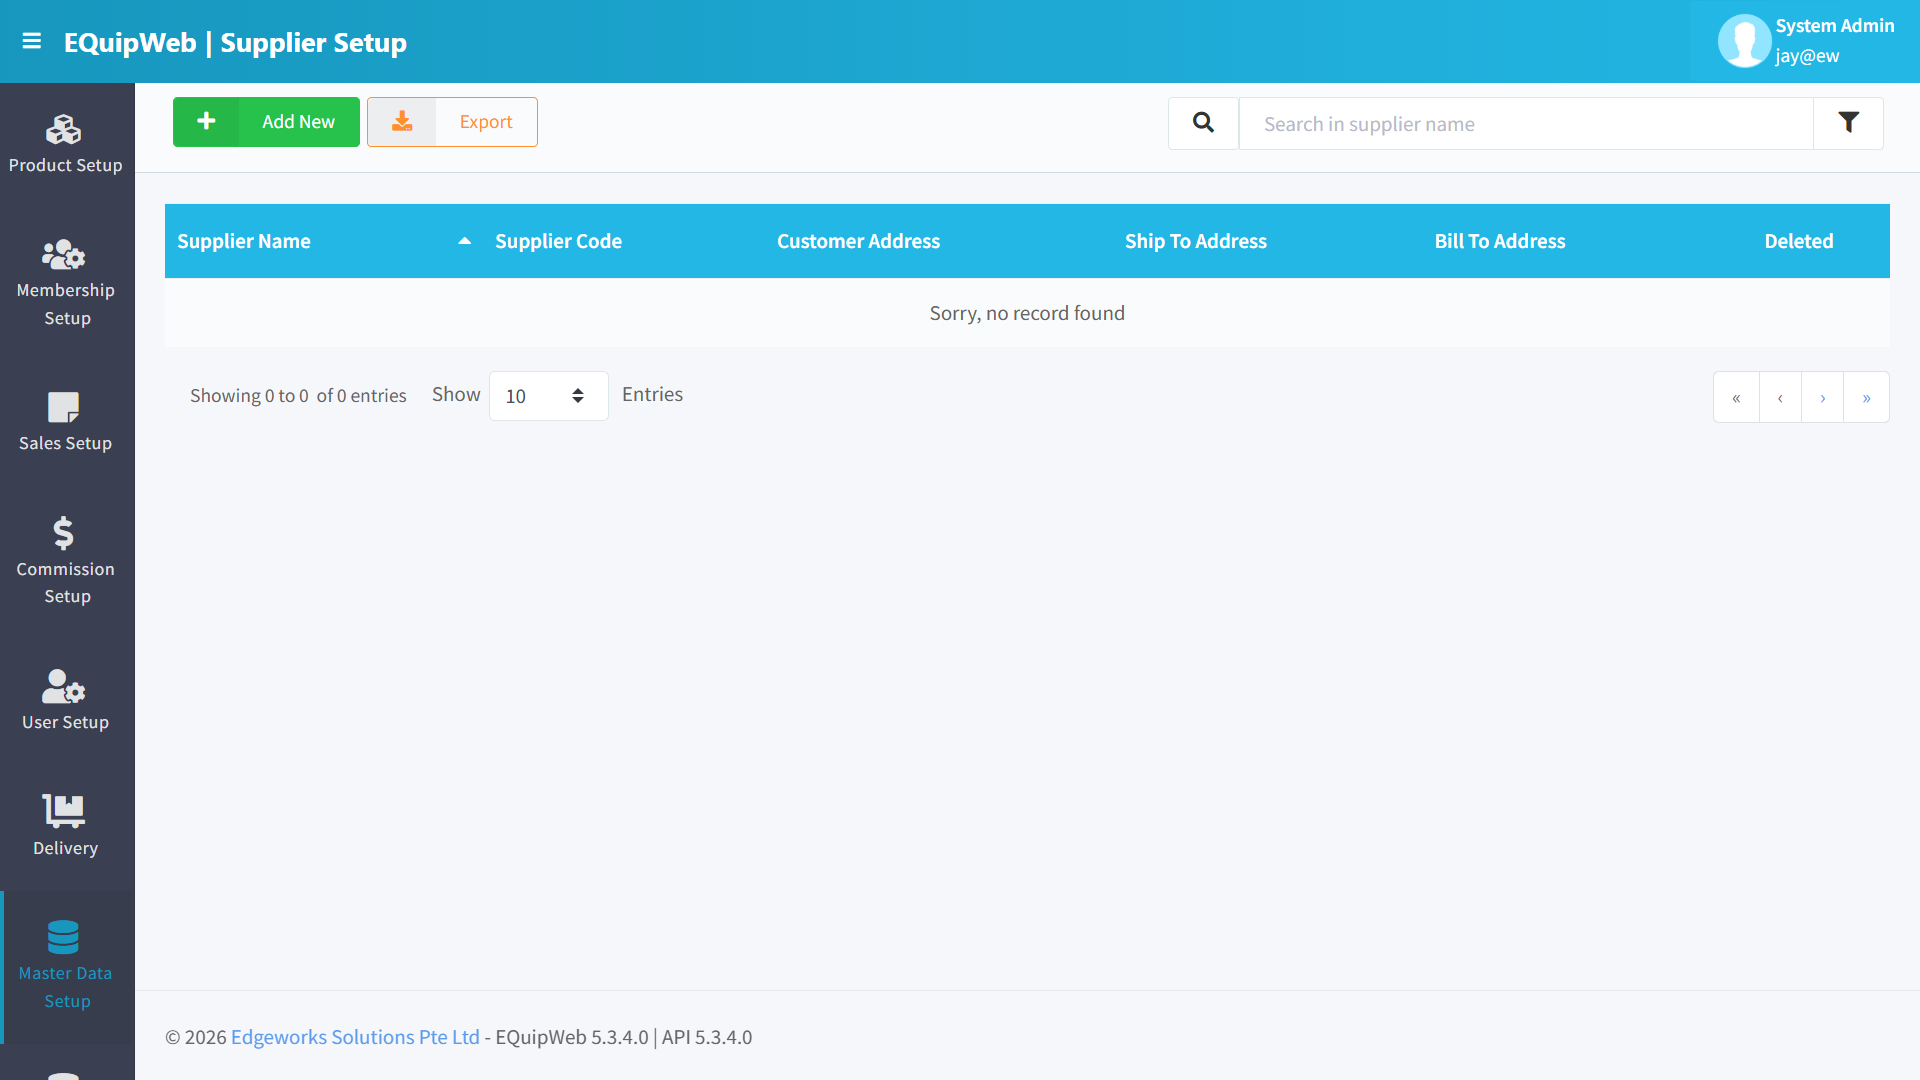
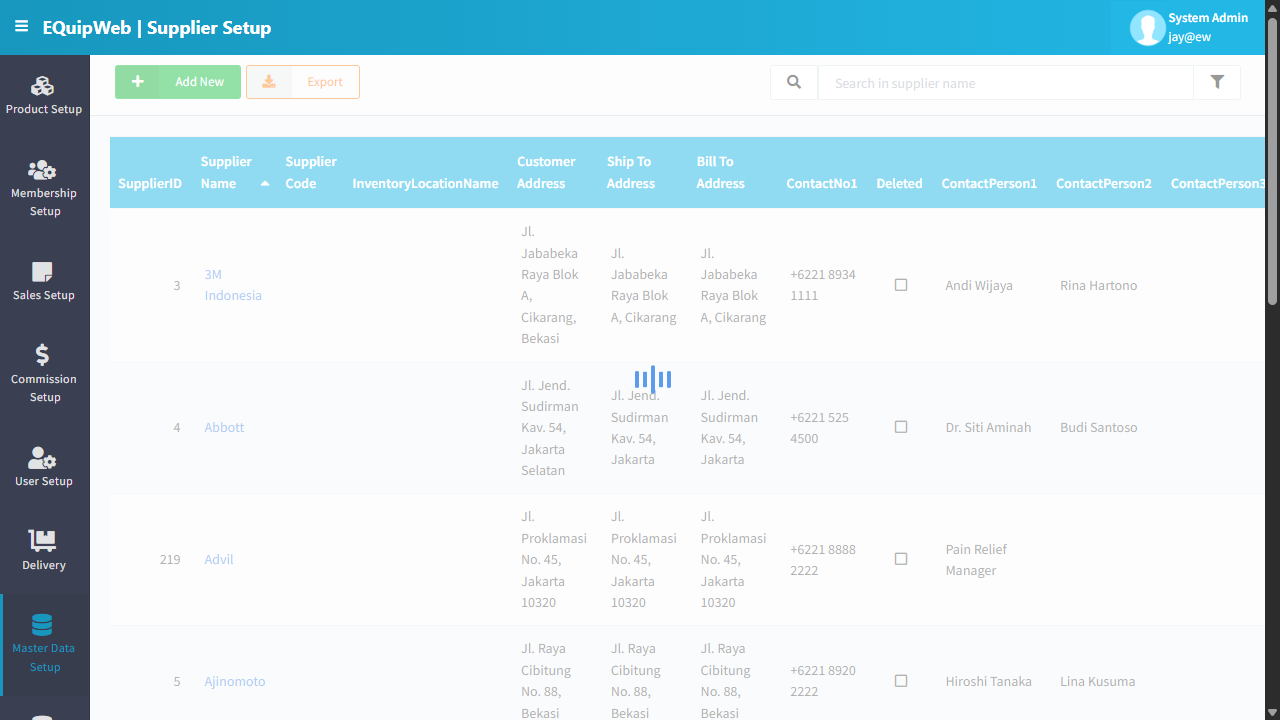
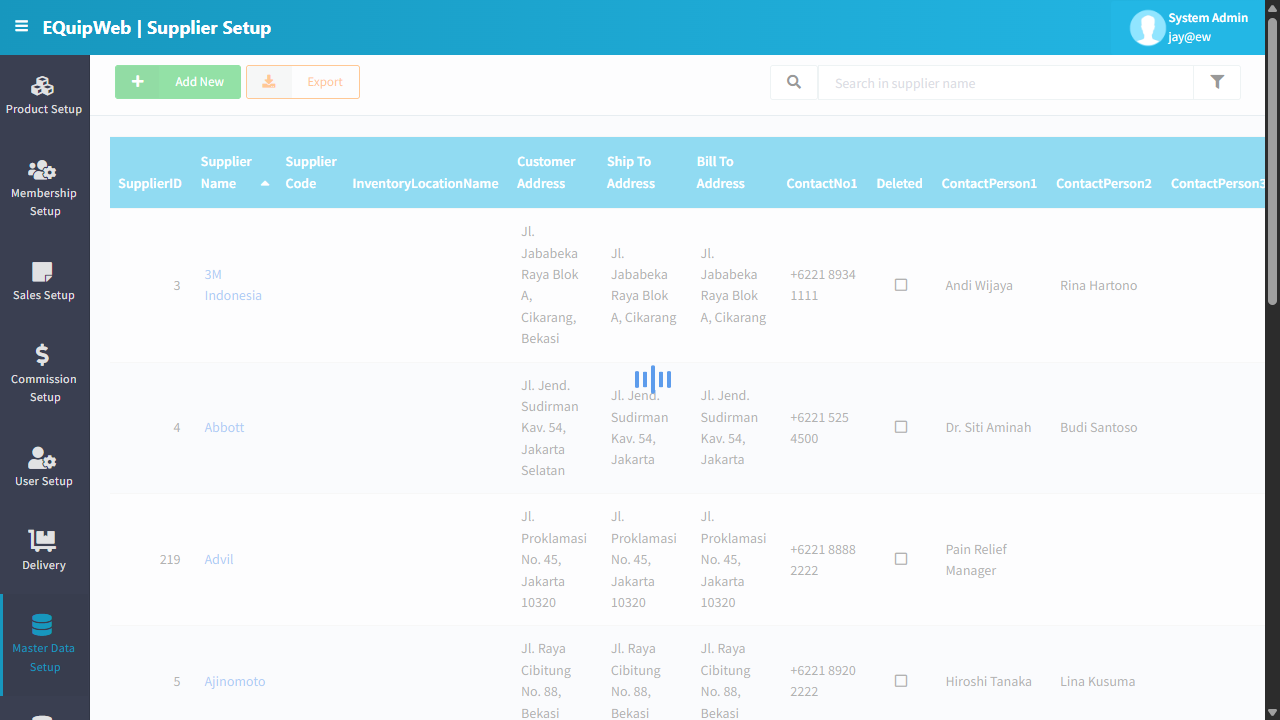
This page displays all registered suppliers in a data grid. Each supplier record includes contact details, payment terms, and lead time information used in purchase order management.
⚙️ UI Elements
| Element | Type | Function |
|---|---|---|
| + Add New | Green Button | Create a new supplier |
| Export | Orange Button | Export supplier list to Excel |
| Search Bar | Text Input | Filter by supplier name |
| 🔽 Filter | Funnel Icon | Toggle show/hide deleted suppliers |
8.8.1 Data Grid Columns
| Column | Description |
|---|---|
| Supplier Name | Name of the supplier (clickable → opens edit form) |
| Contact Person | Primary contact name |
| Phone | Contact phone number |
| Contact email address | |
| Deleted | Hidden/deleted status |
8.8.2 How to Add a New Supplier
- Navigate to Master Data → Supplier Setup.
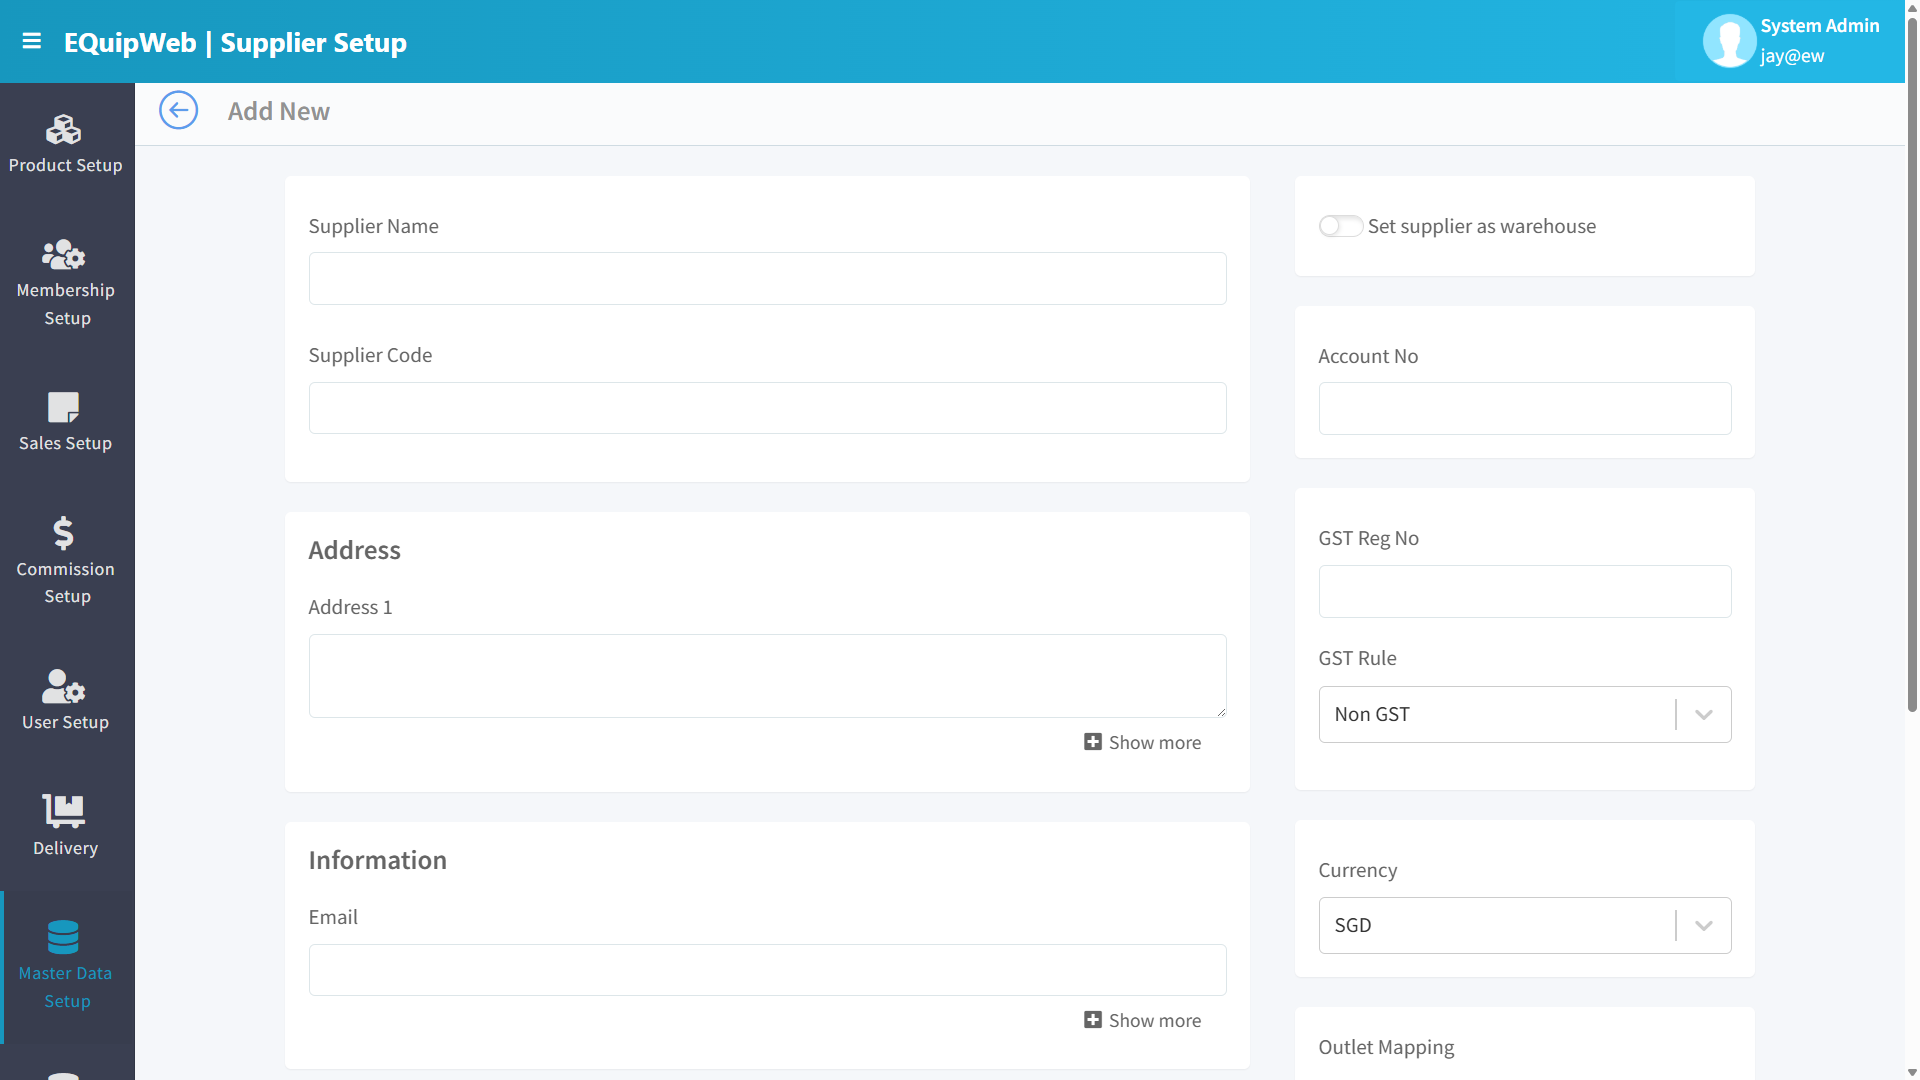 2. Click + Add New.
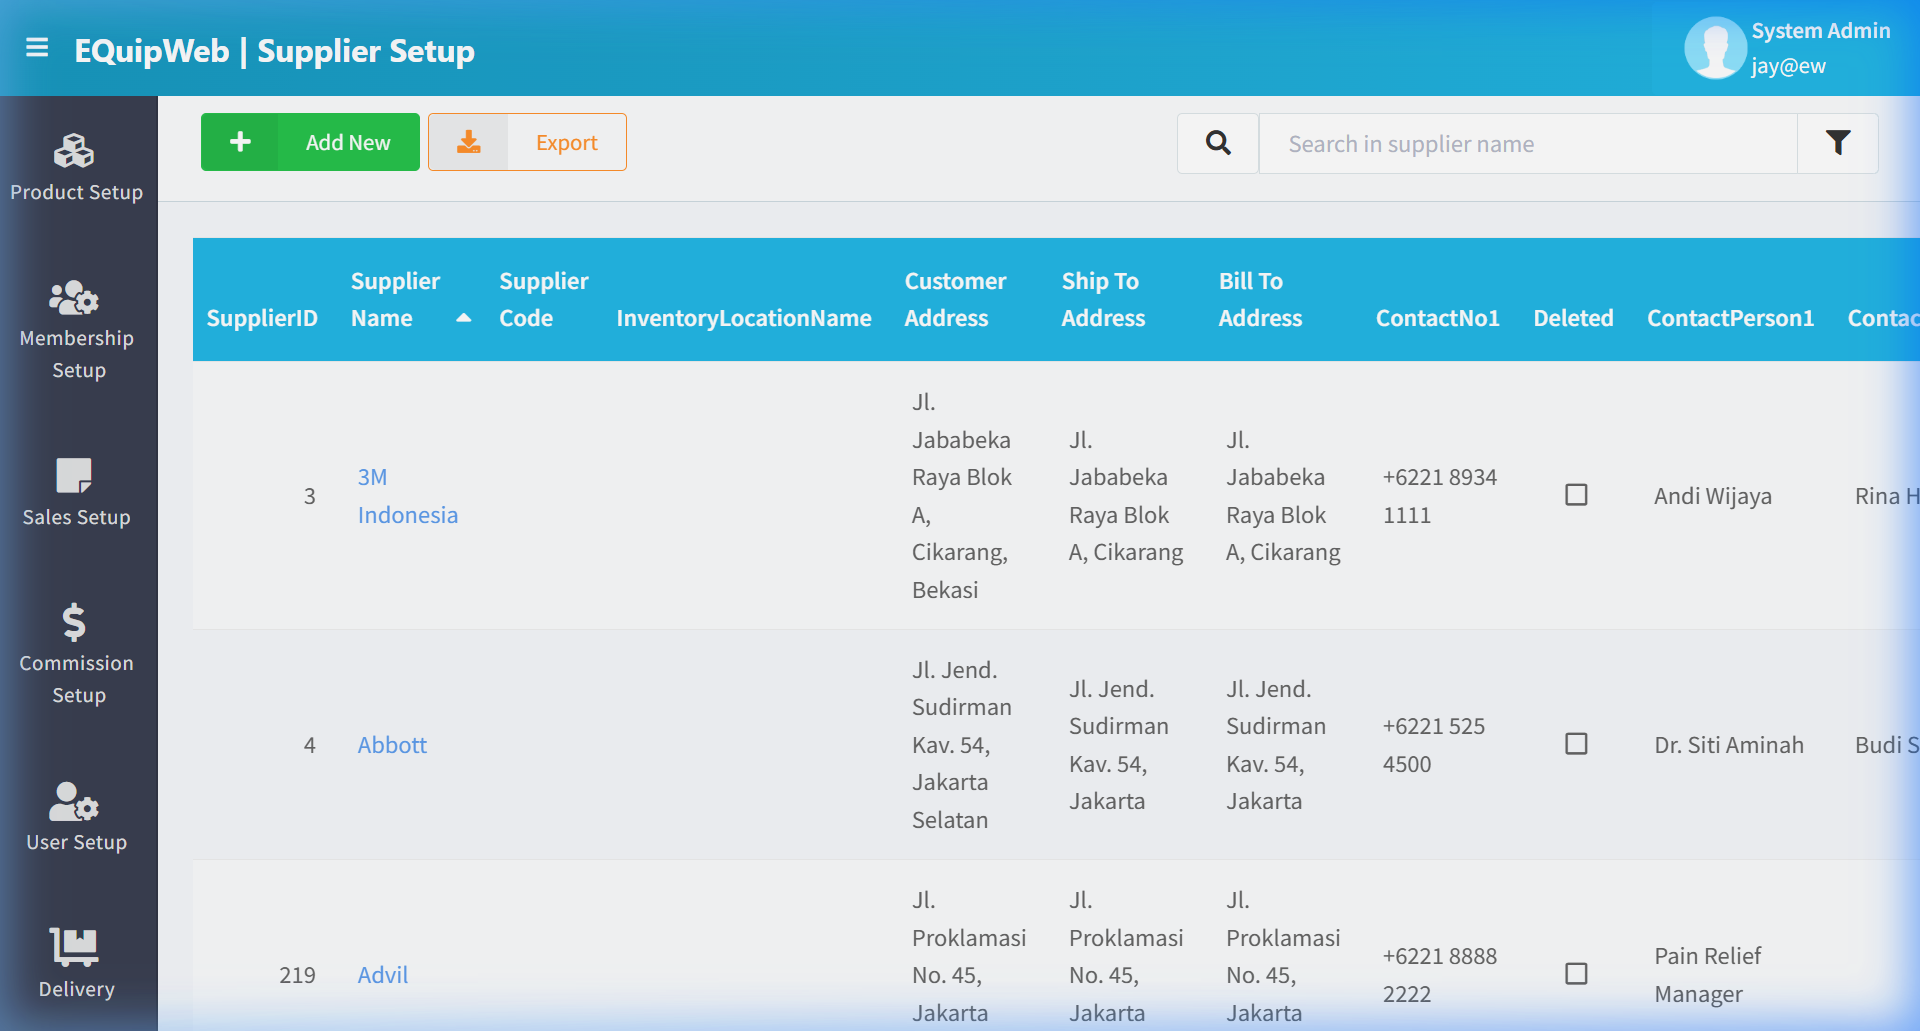
- Fill in the required fields:
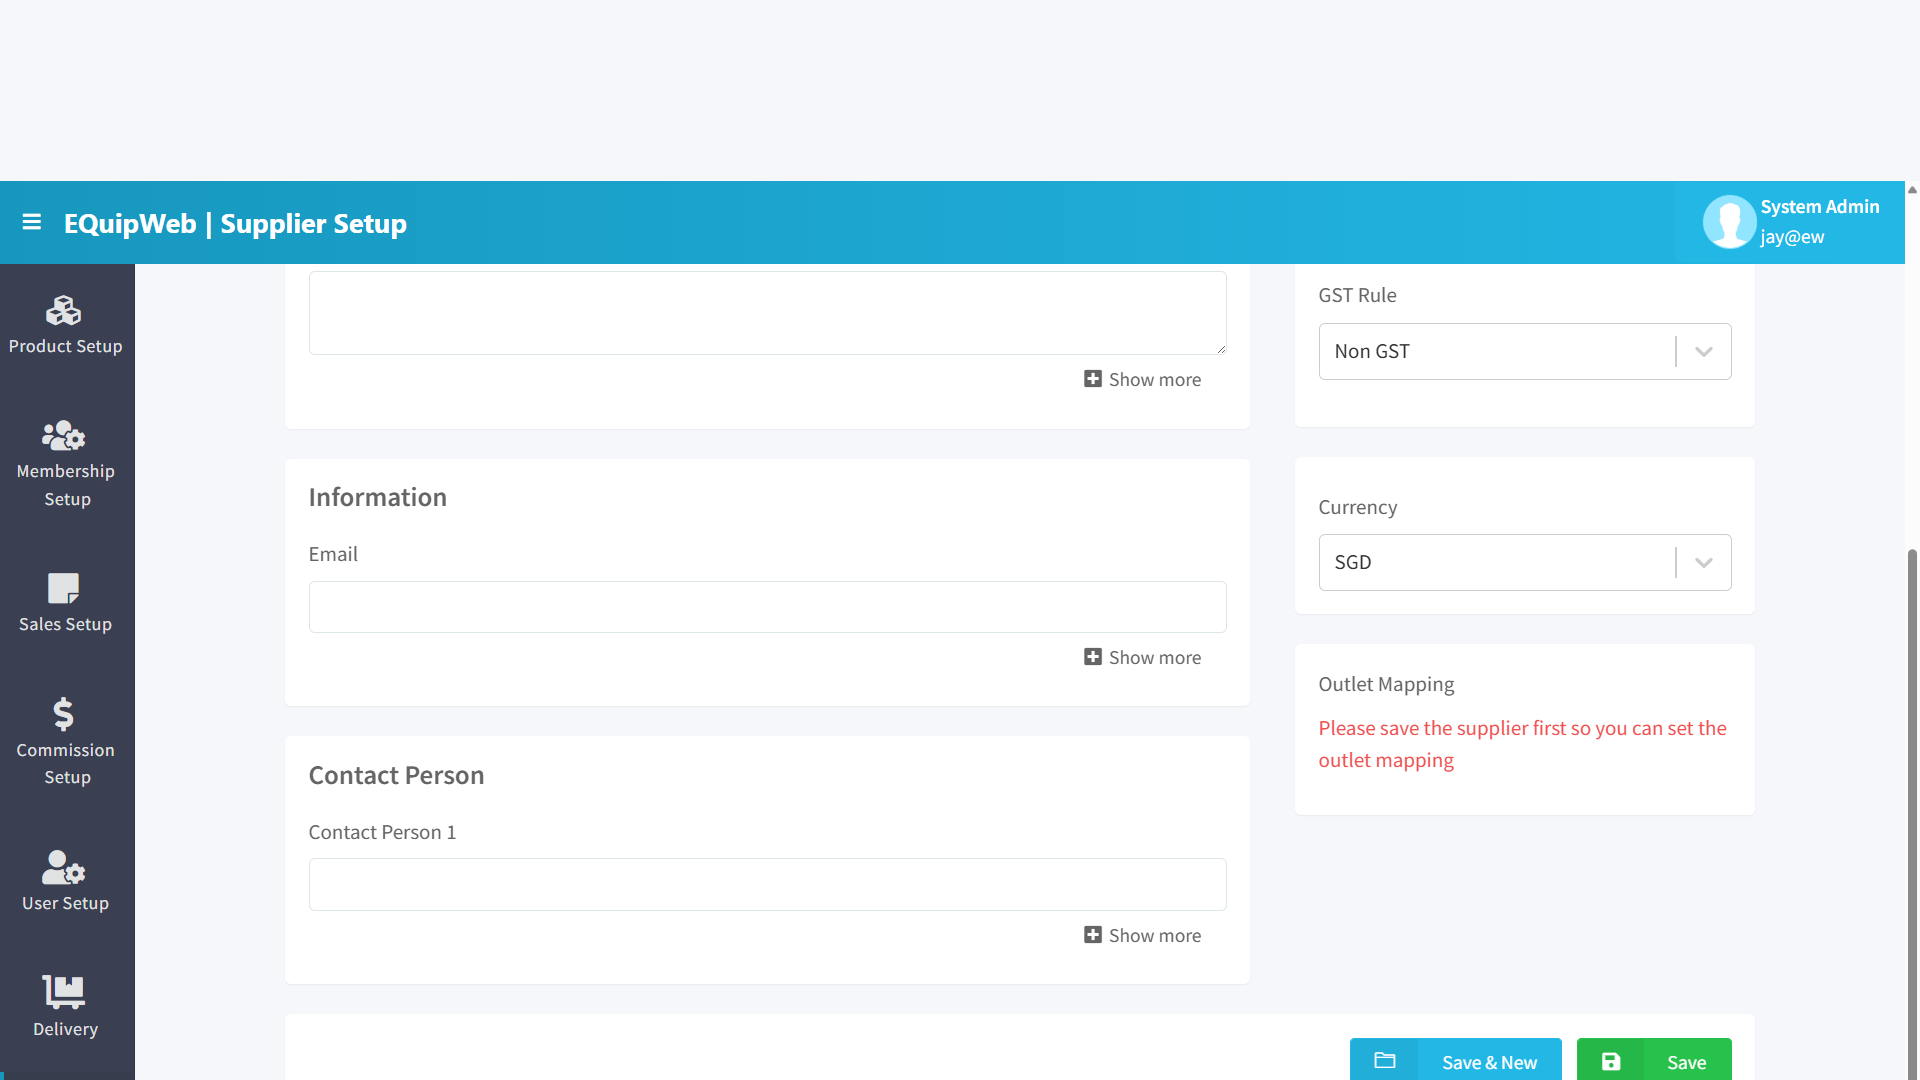
- Supplier Name: Company or vendor name (e.g., "ABC Trading Pte Ltd").
- Fill in optional fields:
- Contact Person: Primary contact name.
- Phone / Email: Contact details.
- Address: Supplier's physical address.
- Payment Terms: Net 30, Net 60, COD, etc.
- Lead Time (Days): Average delivery lead time — used in PO planning.
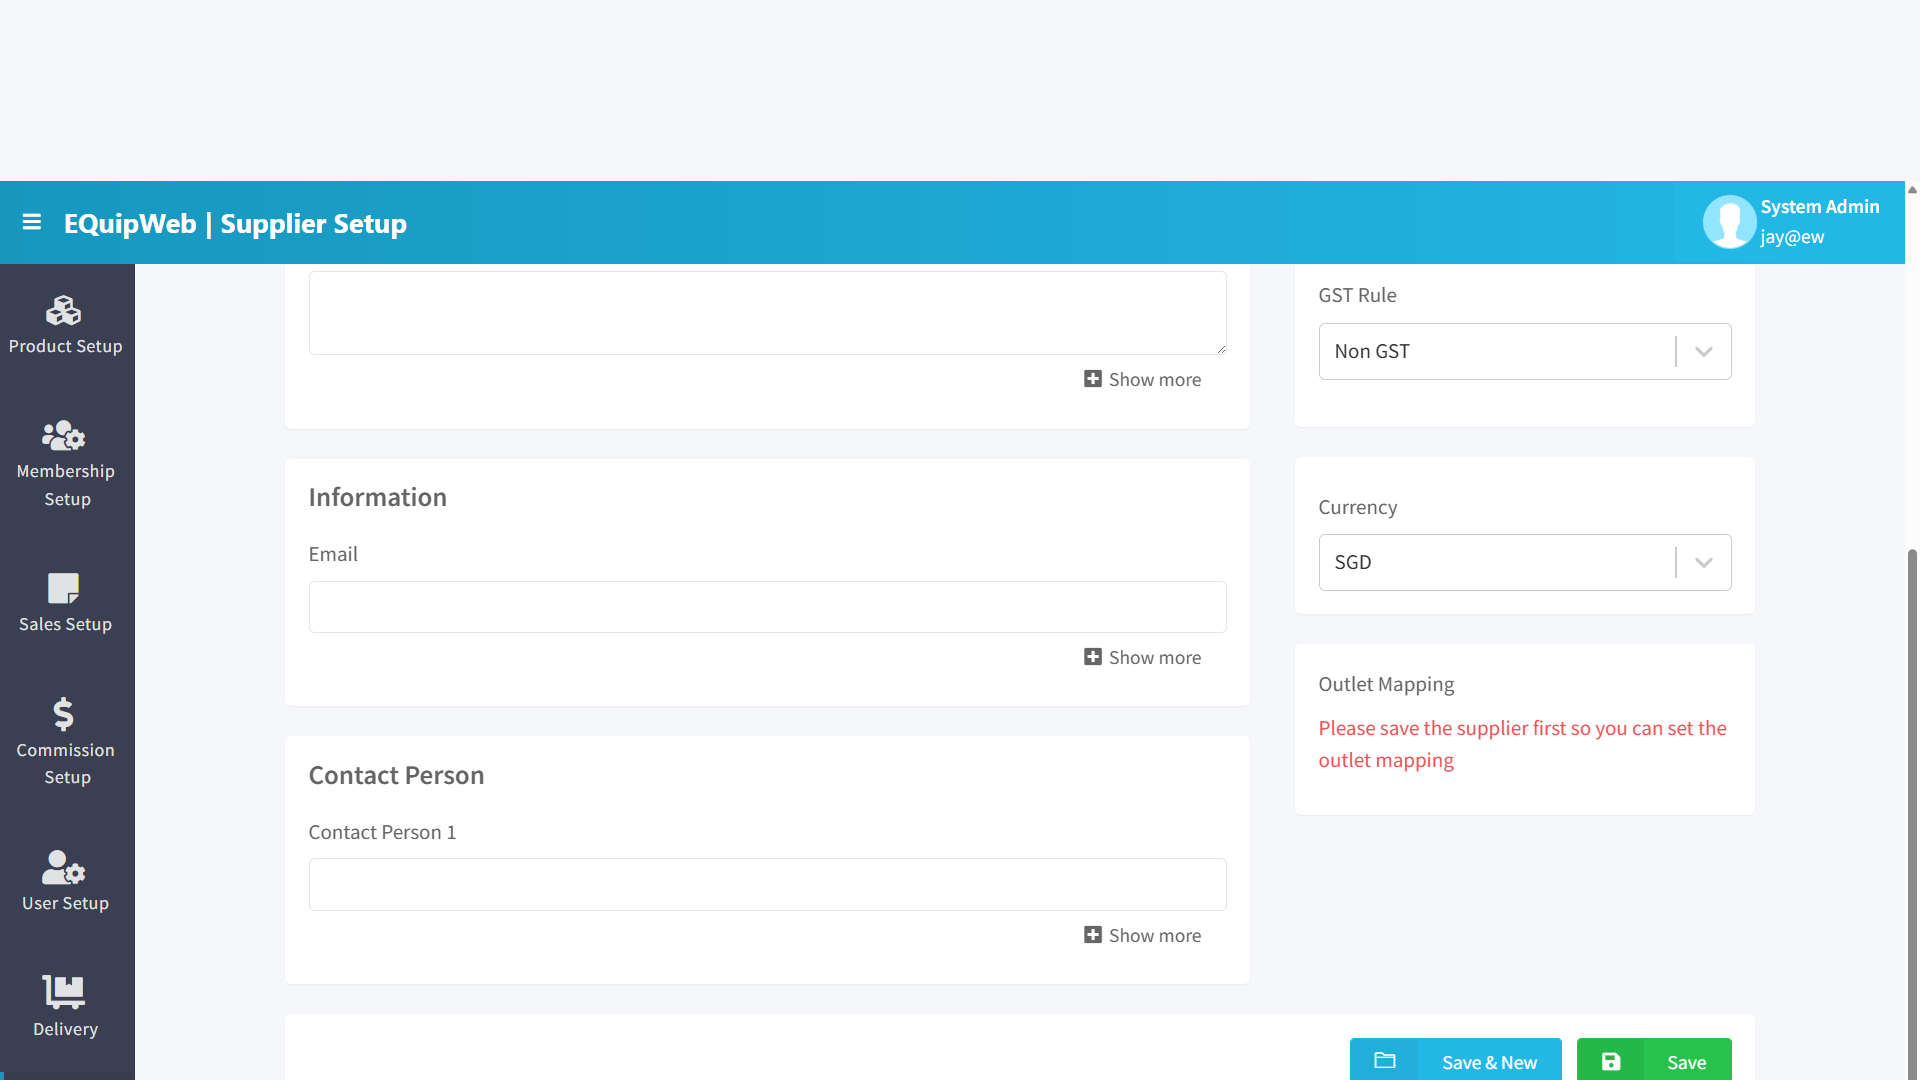
- Currency: Default currency for orders from this supplier.
- Click Save.
Expected Result: The supplier record is saved.
Form Fields
| Field | Type | Required | Description |
|---|---|---|---|
| Supplier Name | Text | ✅ Yes | Company or vendor name |
| Supplier Code | Text | No | Short code for quick reference (e.g., "ABC", "SUP-001") |
| Contact Person | Text | No | Primary contact name |
| Phone | Text | No | Contact phone number |
| No | Contact email | ||
| Address | Textarea | No | Full physical address |
| Payment Terms | Dropdown | No | Net 30, Net 60, COD, Prepaid |
| Lead Time (Days) | Number | No | Average delivery time in business days |
| Currency | Dropdown | No | Default transaction currency (SGD, MYR, IDR, USD) |
| Remark | Textarea | No | Internal notes about the supplier |
8.8.3 How to Edit a Supplier
- Navigate to Supplier Setup.
2. Click on the Supplier Name link in the data grid.
 3. Modify the fields as needed.
4. Click Save.
3. Modify the fields as needed.
4. Click Save.
8.8.4 How to Delete a Supplier
- Open the supplier's edit form.
2. Click the Delete button.
3. The supplier is safely deleted — hidden from dropdowns but existing PO history is preserved.
4. To restore: Filter → Show deleted → Click supplier → Click Restore.
[!NOTE] Deleting a supplier does not affect existing Purchase Orders or product-supplier mappings. Historical data remains intact.
8.8.5 Where Suppliers Are Used
| Module | Usage |
|---|---|
| Purchase Orders | Select supplier when creating a PO |
| Supplier-Product Mapping | Link products to their suppliers with cost prices |
| Stock In (Goods Received) | Auto-populated from PO when receiving goods |
| Supplier Product Importer | Bulk import supplier-product relationships |
| Reports | Supplier-wise purchase analysis |
💡 Example
Scenario: A retailer adds a new beverage supplier to the system.
Setup:
- Navigate to Supplier Setup → Click + Add New.
2. Fill in:
- Supplier Name:
Fresh Beverages Pte Ltd - Supplier Code:
FBEV - Contact Person:
David Tan - Phone:
+65 6543 2100 - Email:
orders@freshbev.sg - Payment Terms:
Net 30 - Lead Time:
3days
- Click Save.
4. Now when creating Purchase Orders, "Fresh Beverages Pte Ltd" appears in the supplier dropdown.
[!TIP] Set accurate Lead Time values for each supplier — this helps with purchase planning and ensures you place orders early enough to avoid stockouts.
Access & Permissions
| Role | View | Create | Edit | Delete |
|---|---|---|---|---|
| Admin | Yes | Yes | Yes | Yes |
| Supervisor | Yes | Yes | Yes | No |
| Cashier | No backend access | — | — | — |
[!NOTE] Exact permissions depend on the Privileges Setup configured for each role. Contact your administrator if you cannot access this page.
How to Add a New Supplier
- Navigate to Supplier Setup from the sidebar menu.
-
Click the + Add New button (green button).
-
Fill in the required fields in the form.
-
Fill in any optional fields as needed.
-
Click Save to create the new supplier.
✅ Expected Result: The new supplier appears in the list and is available for use across the system.
How to Edit a Supplier
- Navigate to Supplier Setup from the sidebar menu.
-
Click on the name or code link (blue text) of the record you want to edit.
-
The edit form opens with all current values pre-filled. Modify the fields as needed.
- Click Save to apply your changes.
✅ Expected Result: The supplier is updated and changes take effect immediately.
How to Delete a Supplier
- Navigate to Supplier Setup from the sidebar menu.
-
Click on the name or code link (blue text) of the record you want to delete.
-
In the edit form, scroll down to the bottom.
- Click the Delete button (red button).
- A confirmation dialog appears — click Yes to confirm.
✅ Expected Result: The supplier is soft-deleted — hidden from active lists and POS but can be restored later.
[!WARNING] Records linked to active transactions or other modules cannot be deleted. The system will display an error if deletion is not allowed.
FAQ
Q: Can I delete an outlet that has transaction history? A: You can soft-delete it, but it cannot be permanently removed if it has linked transactions or POS terminals.
Q: Why are changes not showing on the POS terminal? A: The POS needs to sync. Check Terminal Status for the last sync time and trigger a manual sync if needed.
Q: What happens if I change the company name? A: The change will appear on all new receipts after the next POS sync. Existing printed receipts are not affected.
Troubleshooting
| Issue | Possible Cause | Solution |
|---|---|---|
| Cannot save the record | Required fields are empty or invalid | Check all fields marked with * and fill in valid data |
| Record not appearing in POS | POS terminal has not synced yet | Wait for the next sync cycle or manually trigger sync from Terminal Status |
| Cannot delete the record | Record is being used by other modules | Check if the record is linked to active transactions, products, or other settings |
| Changes not taking effect | Browser cache showing old data | Refresh the page (Ctrl+F5) or clear browser cache |
| "Duplicate" error on save | A record with the same name/code already exists | Search the list (including deleted records) for duplicates |
| Page not loading | Session expired or network issue | Log out and log back in. Check your internet connection |
Related Menus
- Product Setup > Product List — products linked to outlets
- User Setup > User List — users assigned to outlets
- Sales Setup > Payment Mode — payment methods per outlet
- Setting > Company Setup — company-wide settings
Open Questions / Confirmation Needed
[!NOTE] The following items may vary depending on your system version and configuration:
- Exact permission settings depend on your Privileges Setup configuration
- Sync timing to POS terminals depends on network conditions and sync schedule
- Some features may require additional licensing or module activation
- Field behavior may differ between EQuip versions
If you encounter behavior not described in this manual, contact your system administrator or EQuip support team.
Related Articles
Supplier Product Importer
? Backend — EQuipWebRetail ModeData Importer & Exporter Chapter 10: Data Importer — 10.5 Supplier Product Importer Use Importer to manage and configure this feature in your EQuipWeb system. Use the Supplier Product Importer to link many products to ...Feature Setup
? Backend — EQuipWebRetail ModeSetting Setting — 12.5 Feature Setup: Toggle product features, pricing display, and system options Use Feature Setup to turn features on or off across your system. Each feature has a simple toggle switch — flip it ON ...Product Setup
? Backend — EQuipWebRetail ModeProduct Setup Chapter 2: Product Setup — 2.1 Product List The Product List is where you see all your products in one place. From here, you can search, filter, edit, or delete any product. Think of it as your master ...Stock Out Reason Setup
? Backend — EQuipWebRetail ModeMaster Data Setup Chapter 8: Master Data Setup — 8.10 Stock Out Reason Use Stock Out Reason to create a list of reasons why stock might be removed — like "Damaged", "Expired", "Sample/Tester", or "Staff Consumption". ...Privileges Setup
? Backend — EQuipWebRetail ModeUser Setup Chapter 6: User Setup — 6.4 Privileges Setup Use Setup to manage and configure this feature in your EQuipWeb system. Privileges Setup is the master list of all permissions available in the system. Each ...