Department Setup
Chapter 2: Product Setup — 2.4 Department Setup
Use Department Setup to create broad groupings for your products — like "Food & Beverage", "Retail", or "Services". Departments sit above categories, giving you a bigger-picture way to organize and report on your business.
When to use this: When you need to create or manage product departments for grouping and reporting.
Prerequisites
- No prerequisites — departments are top-level groupings
Department List
📝 General Description
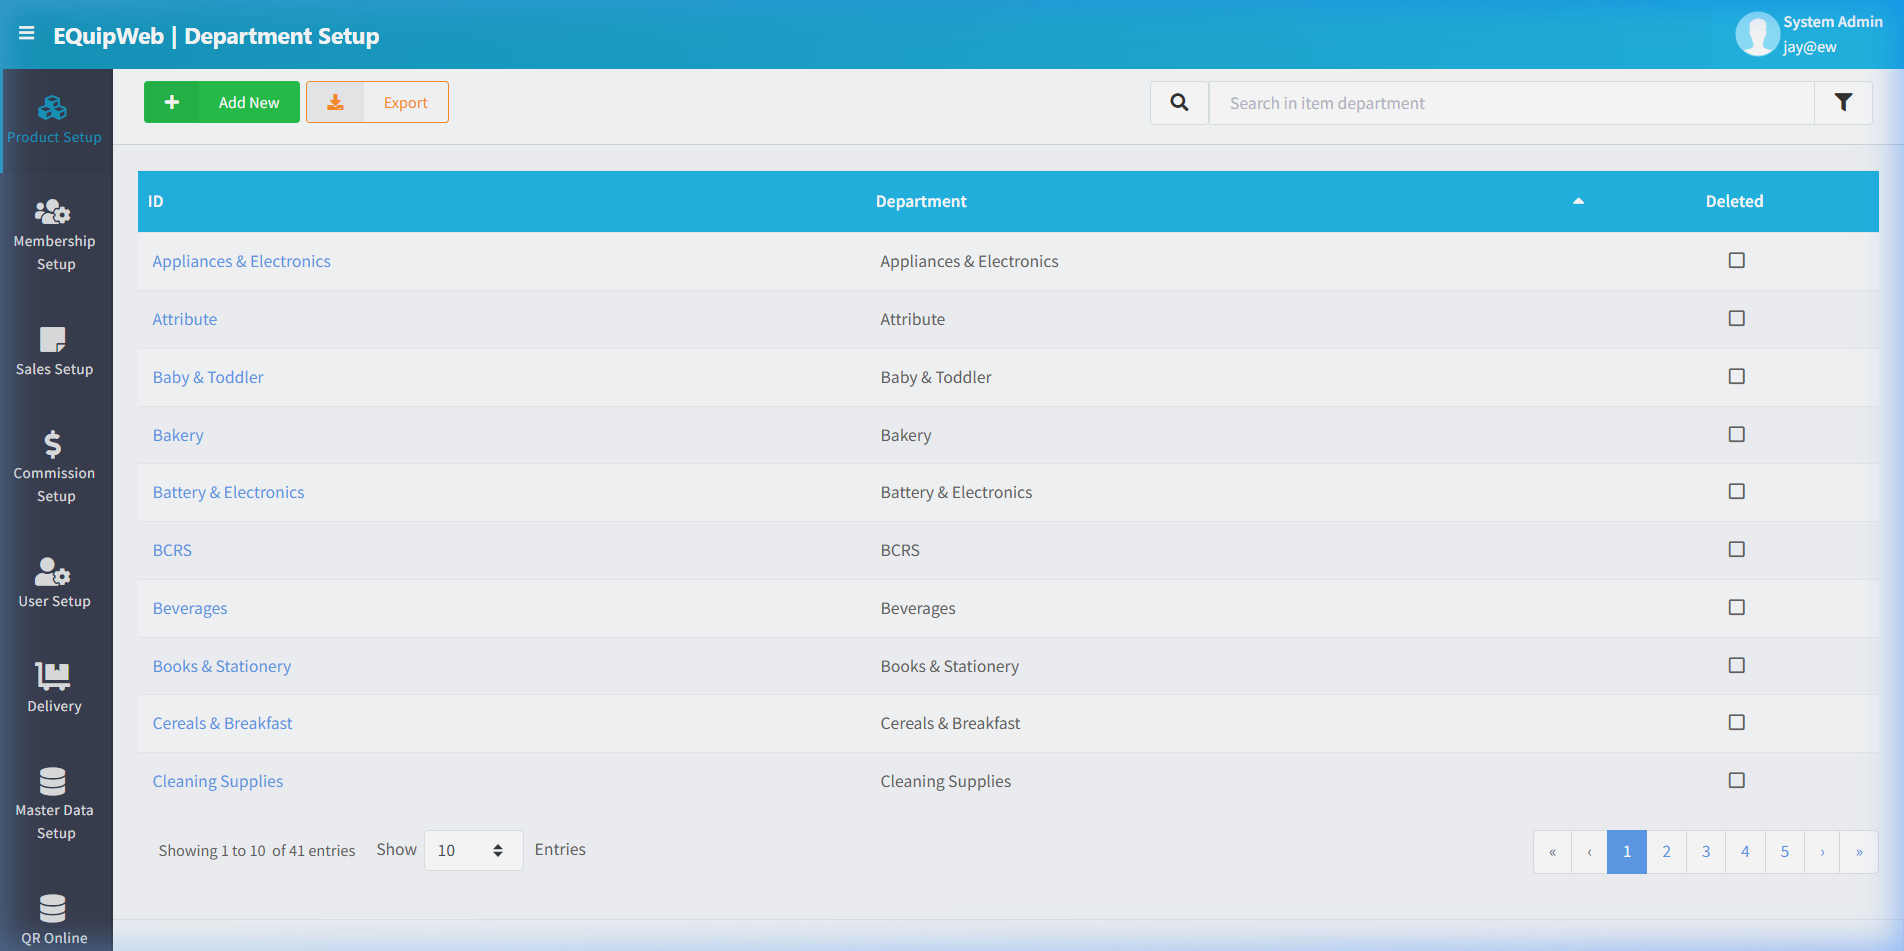
The Department list shows all departments in a data grid. Departments are used for organizing products at a macro level (e.g., "Food", "Retail", "Services"). Each product can belong to one department and one category.
⚙️ UI Elements
| Element | Type | Function |
|---|---|---|
| + Add New | Green Button | Create a new department |
| Export | Orange Button | Download department list |
| Search Bar | Text Input | Filter by department name |
| 🔽 Filter | Funnel Icon | Opens the Column Visibility Panel — toggle columns ON/OFF to customize the data grid view |
2.4.1 Column Visibility Filter Panel
Click the 🔽 funnel icon (top-right of the toolbar) to open the Column Visibility Panel. Each toggle switches a column ON (visible, blue) or OFF (hidden, grey).
Default Visible Columns (🔵 ON)
| Toggle | Column | Description |
|---|---|---|
| 🔵 ID | ID | Department identifier (matches the Department ID field on the edit form) |
| 🔵 Department | Department | Department display name (clickable → edit form) |
| 🔵 Deleted | Deleted | Hidden/deleted status — checked means the department has been safely deleted |
Hidden Columns (⚪ OFF by default)
| Toggle | When ON (Visible) | When OFF (Hidden) |
|---|---|---|
| ⚪ Description | Shows the description/notes entered on the department form | Column hidden |
| ⚪ CreatedBy | Shows who created this department | Column hidden |
| ⚪ CreatedOn | Shows when this department was created | Column hidden |
| ⚪ ModifiedBy | Shows who last modified this department | Column hidden |
| ⚪ ModifiedOn | Shows when the last modification occurred | Column hidden |
[!TIP] The Department filter panel is simpler than Category because departments have fewer fields. Toggle CreatedBy and ModifiedBy ON if you need to audit who created or changed department records.
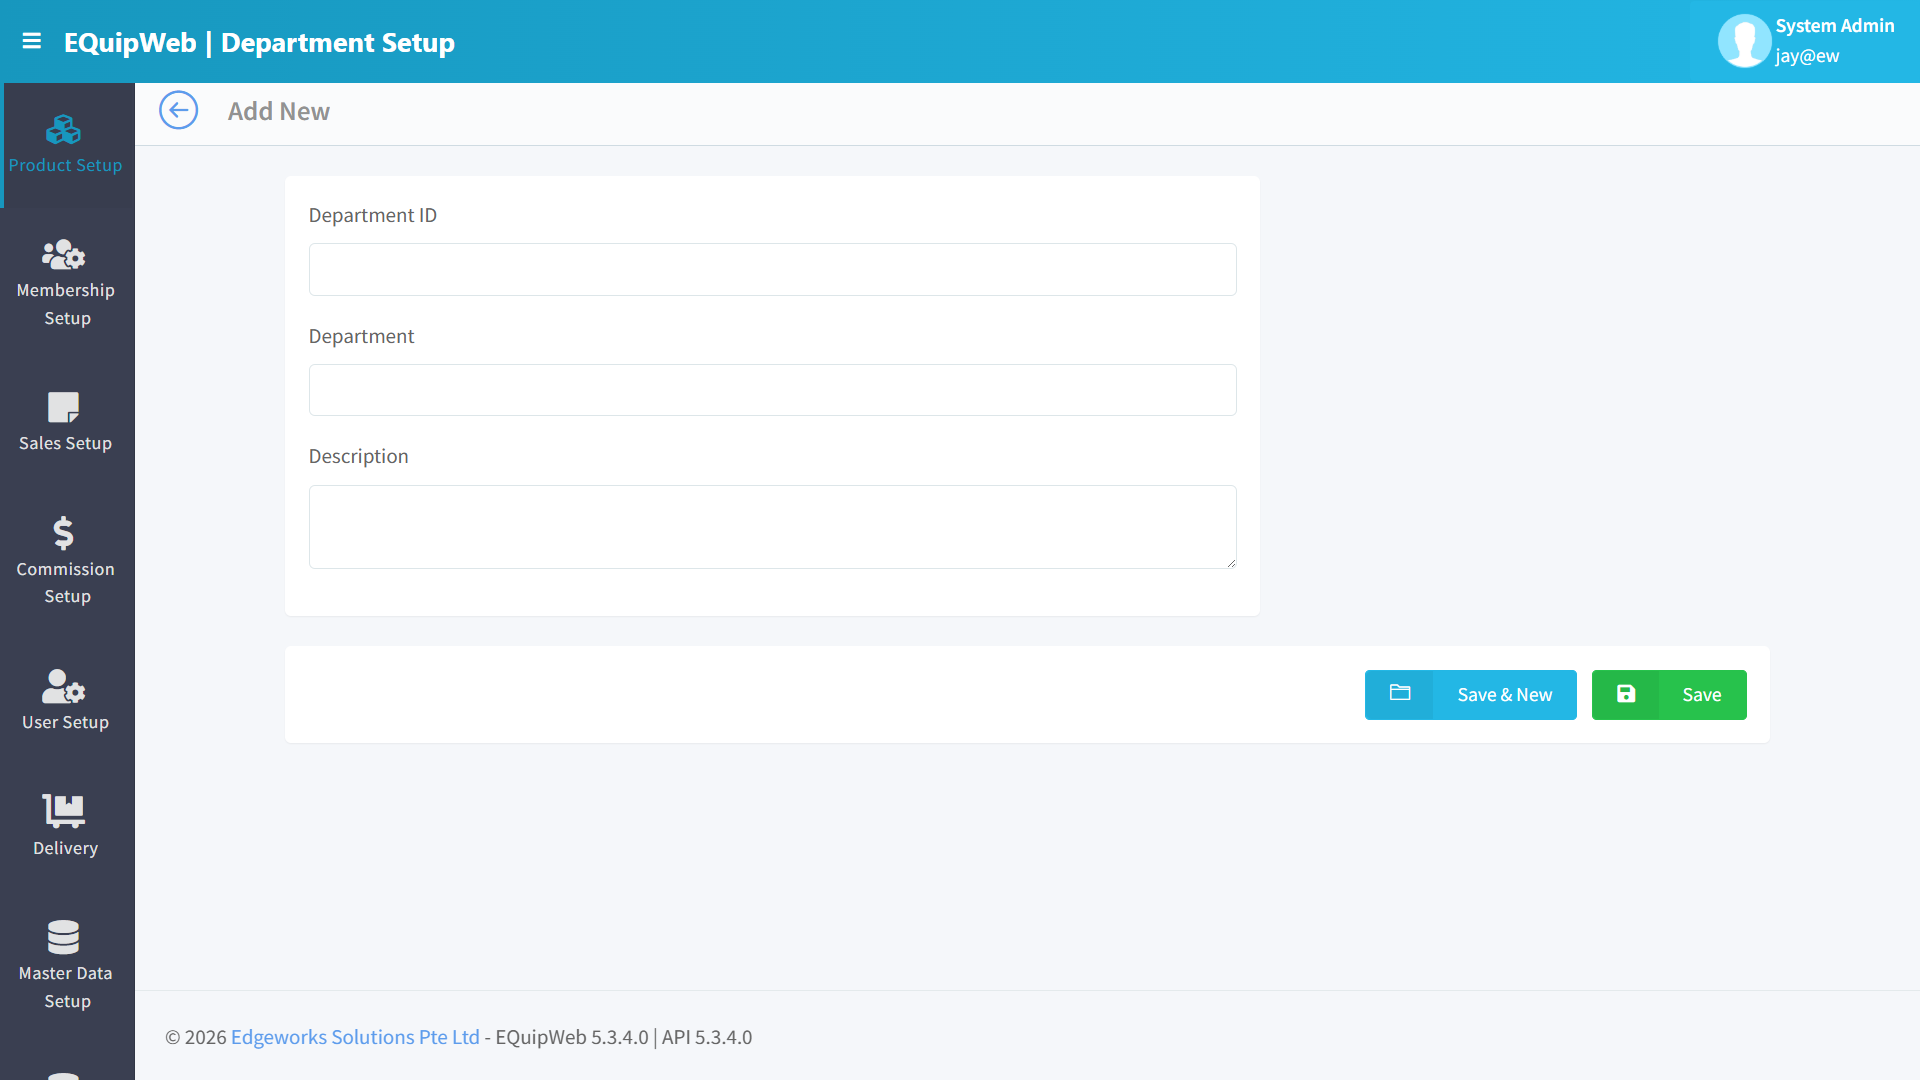
2.4.2 Add / Edit Department
Form Fields
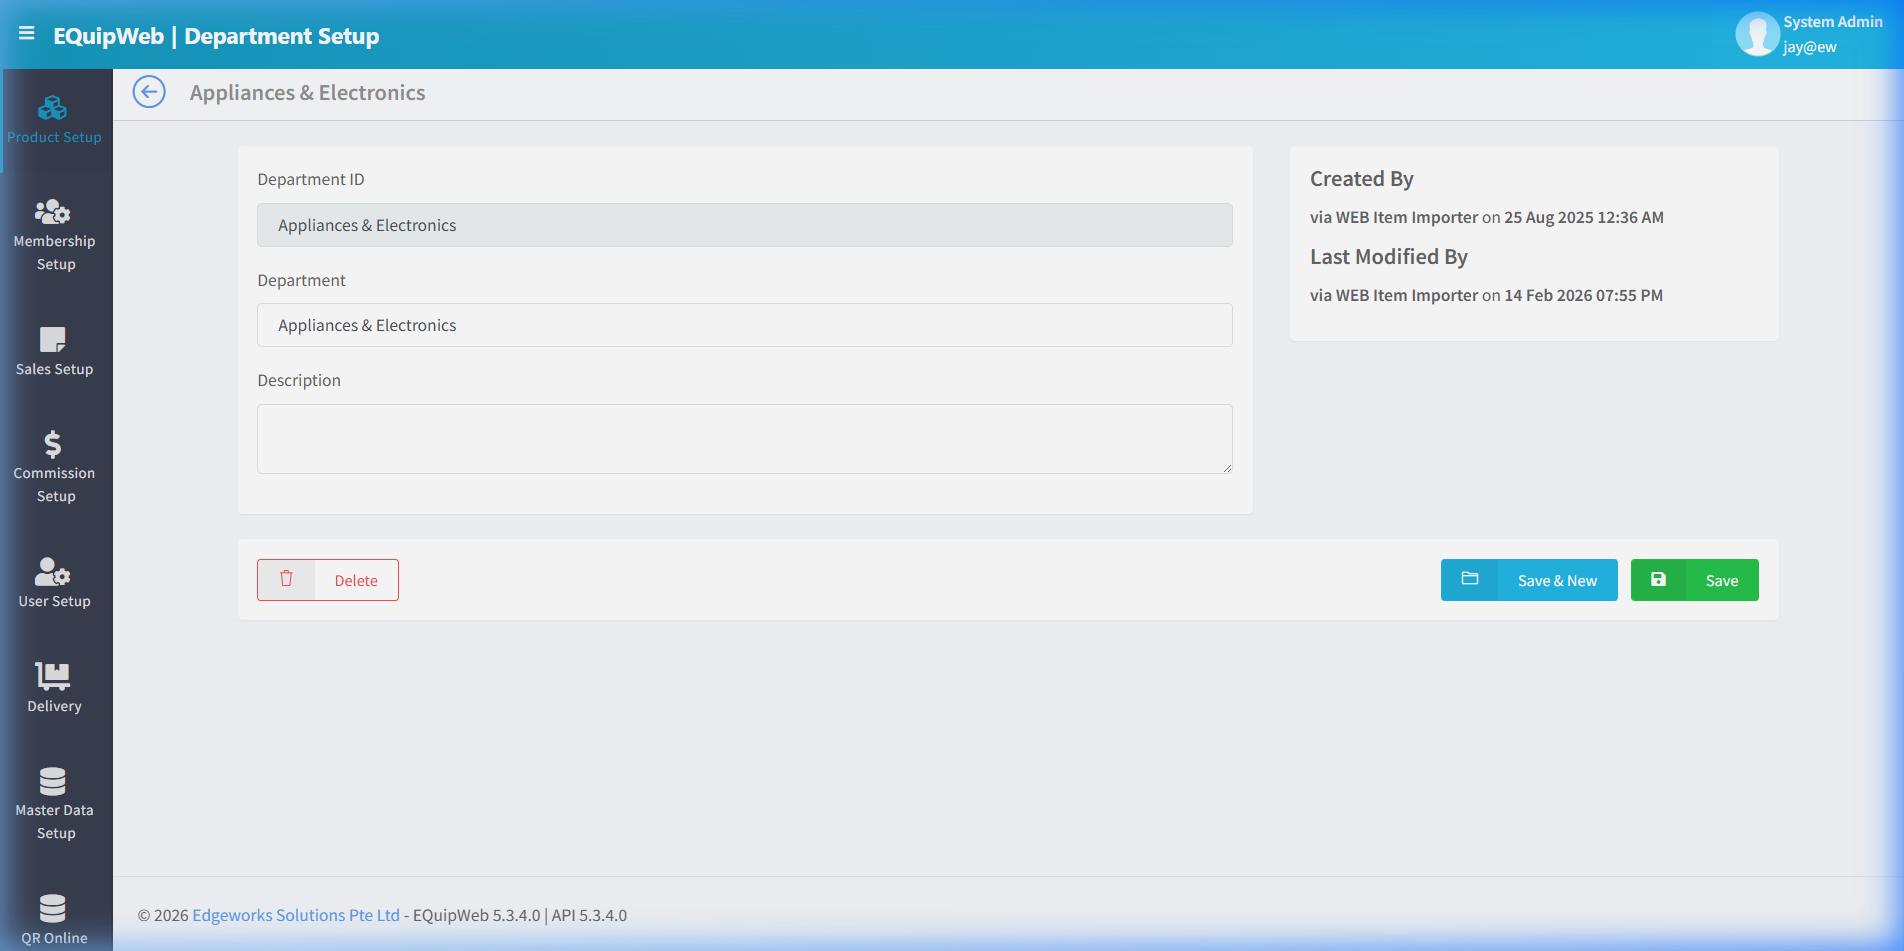
| Field | Type | Required | Description |
|---|---|---|---|
| Department ID | Text | Auto | System-generated unique ID (read-only, shown in grey) |
| Department | Text | ✅ Yes | Display name (e.g., "Appliances & Electronics", "Food & Beverage", "Fashion") |
| Description | Textarea | No | Notes about this department |
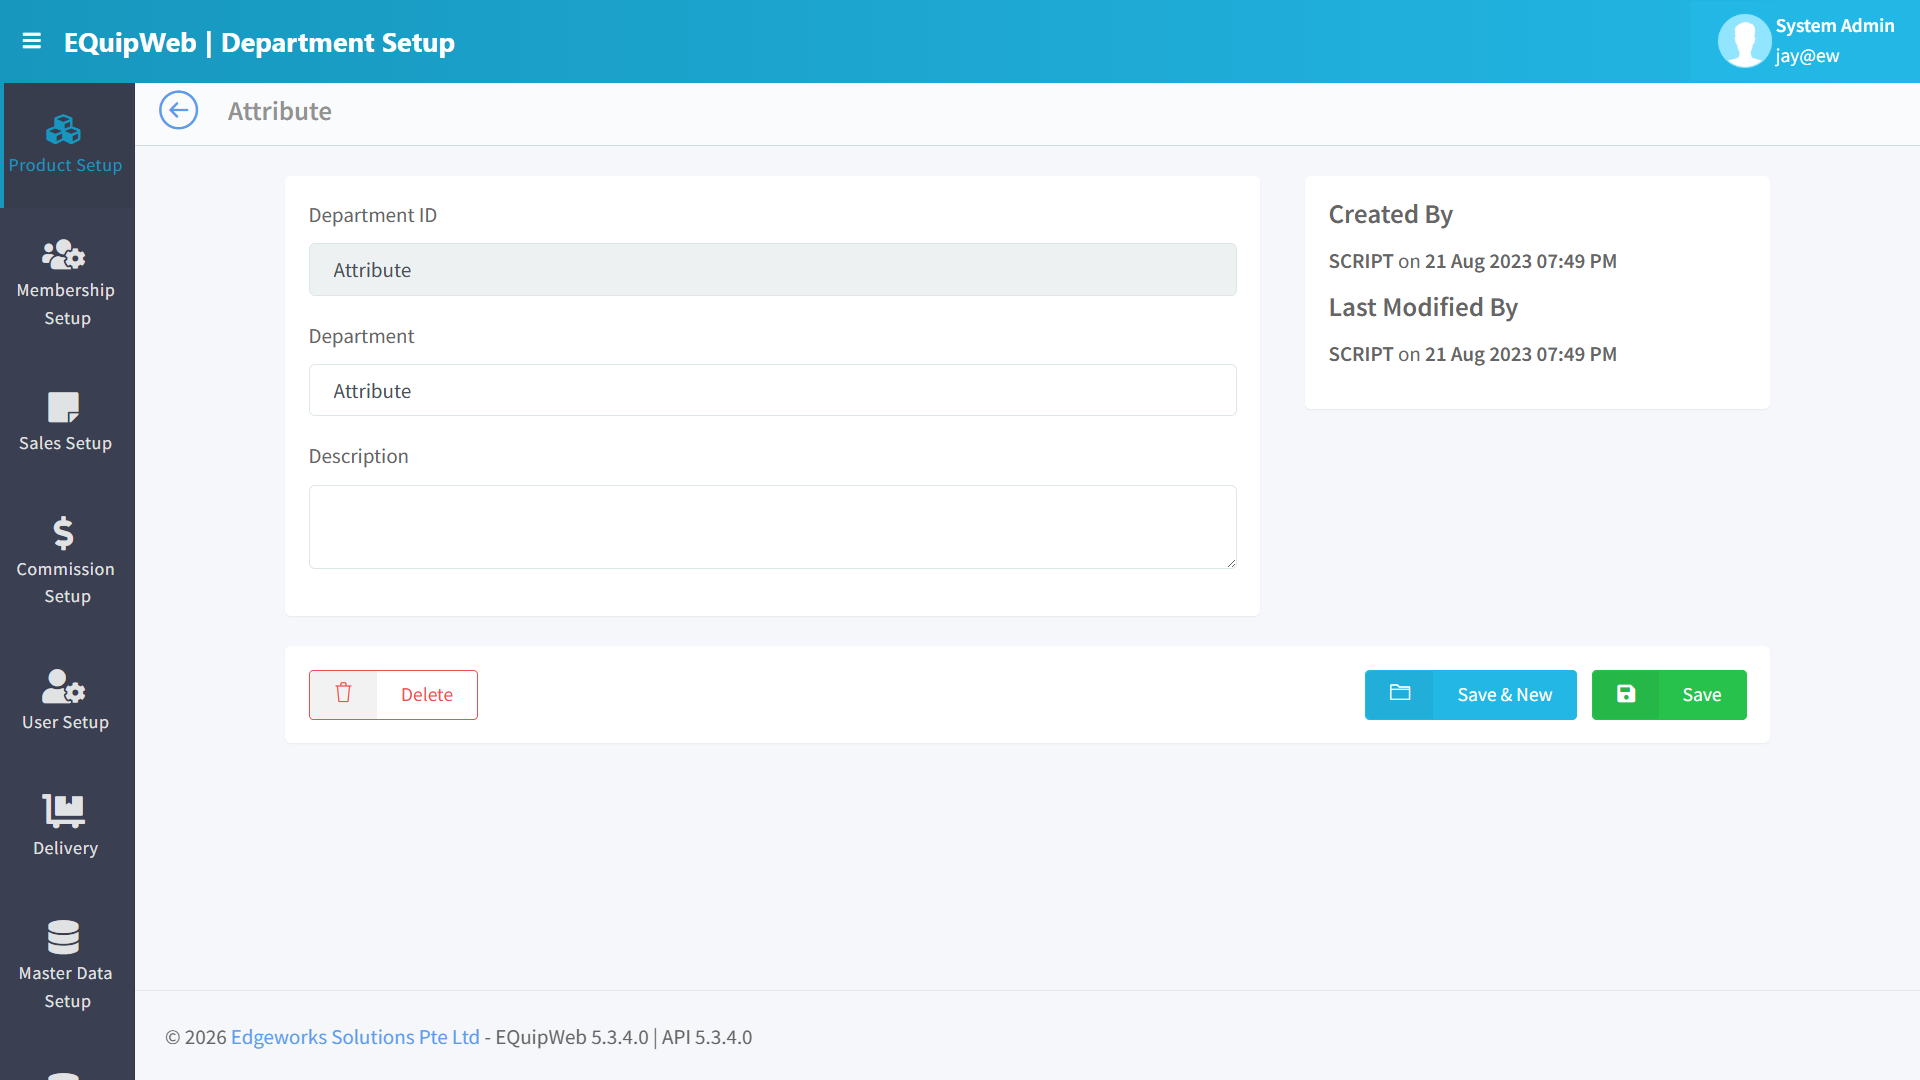
Audit Trail (Right Panel)
| Field | Description |
|---|---|
| Created By | User who created this department and timestamp |
| Last Modified By | User who last edited this department and timestamp |
How to Edit a department
- In the Department Setup page, find the department you want to change.
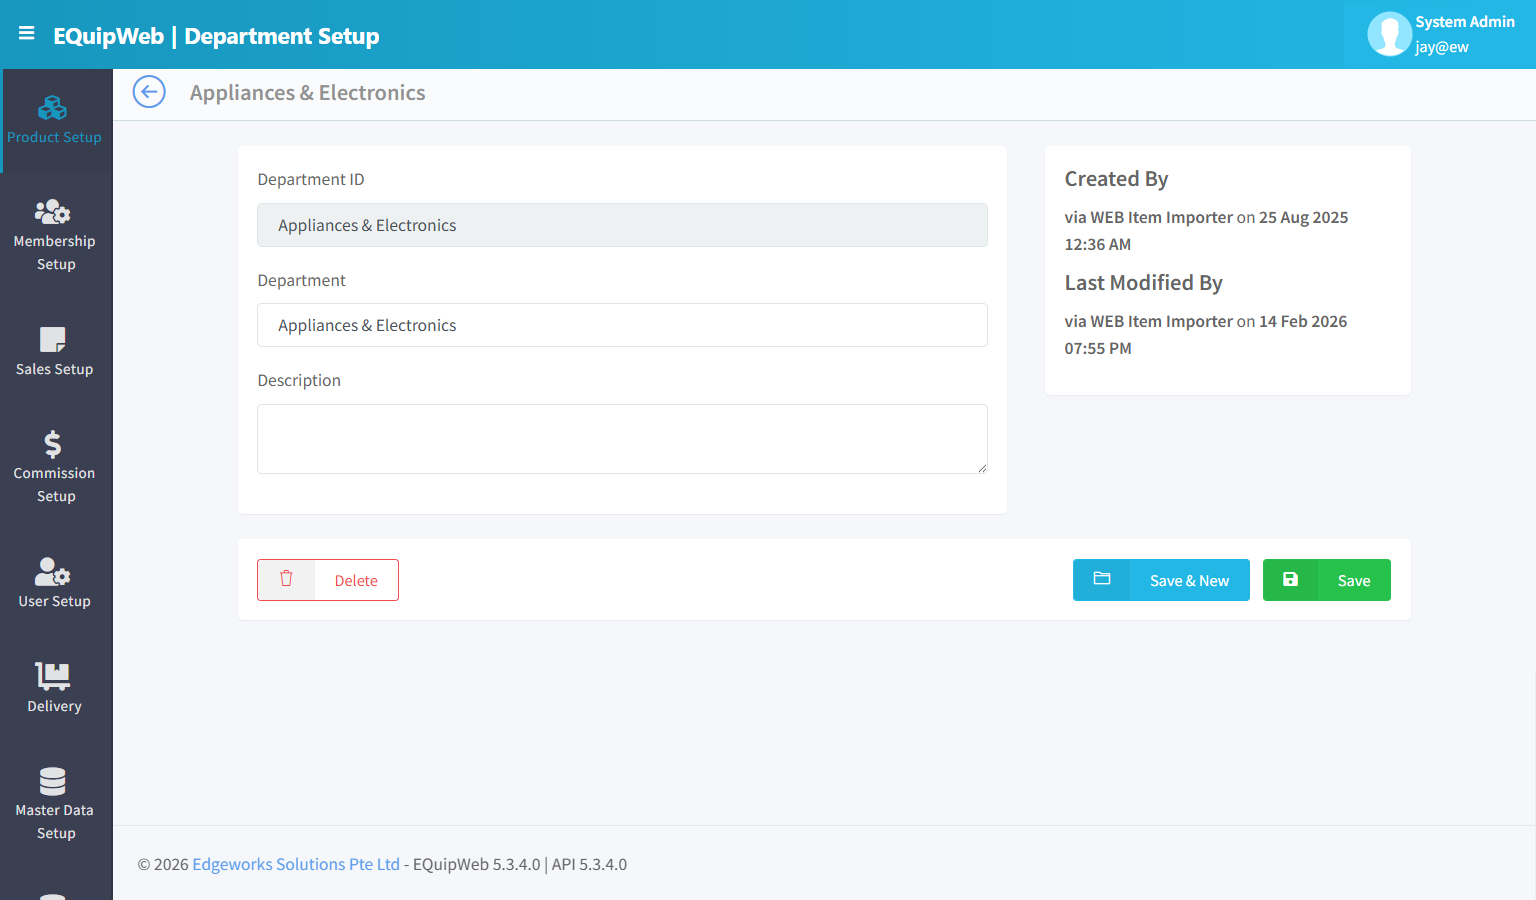
- Click the blue department name link. The edit form opens — it looks the same as the "Add New" form, but all fields are already filled in with the current values.
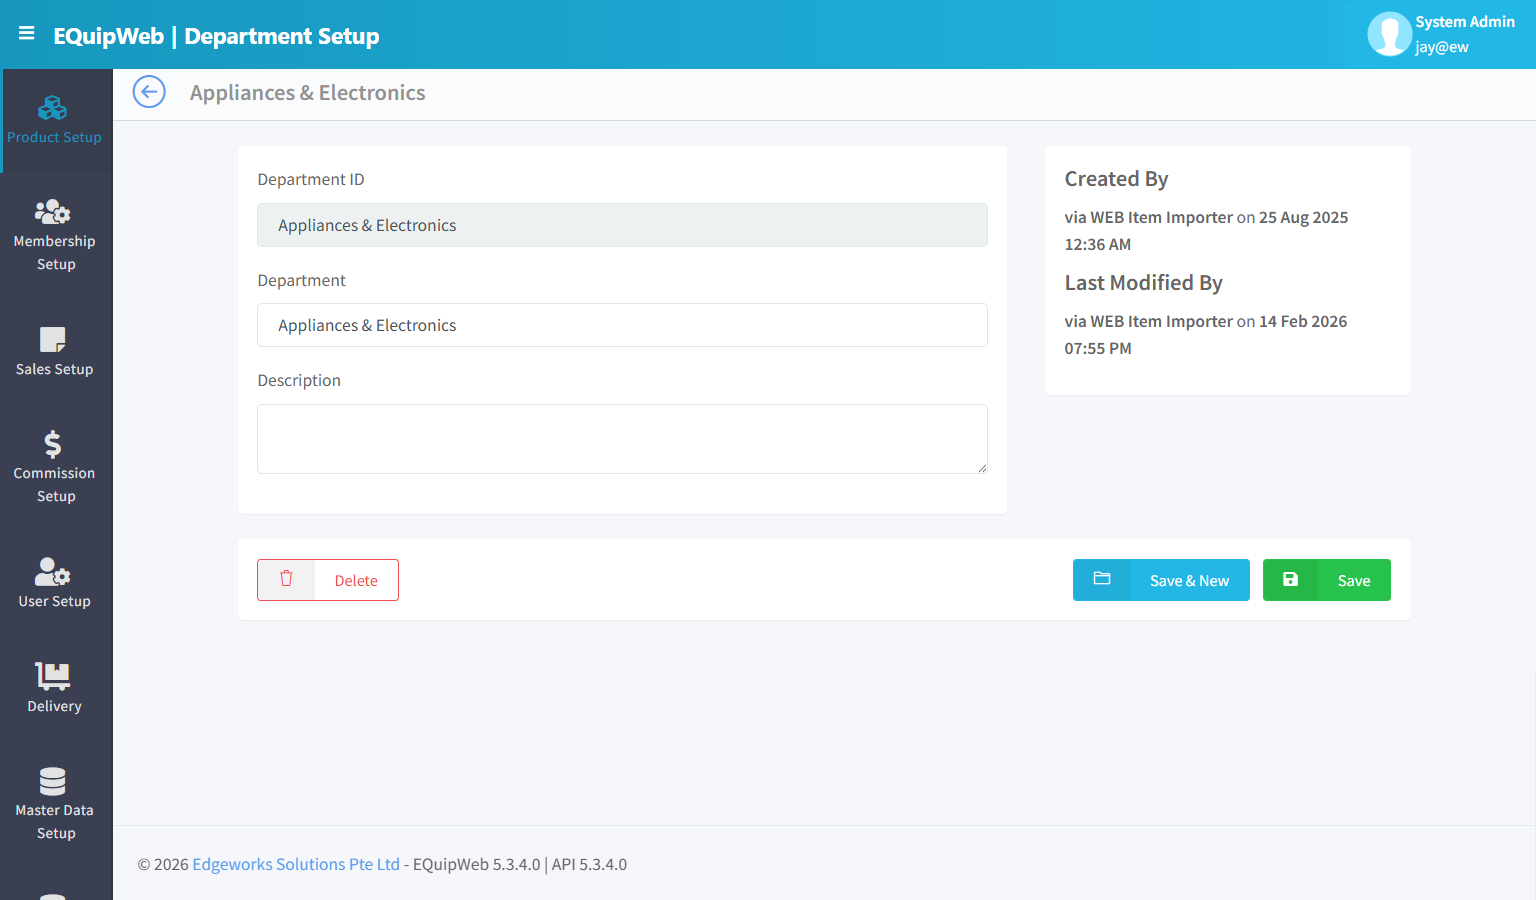
- Change the fields you need to update.
- Click Save to apply your changes.
✅ Expected Result: The department is saved and available for product grouping.
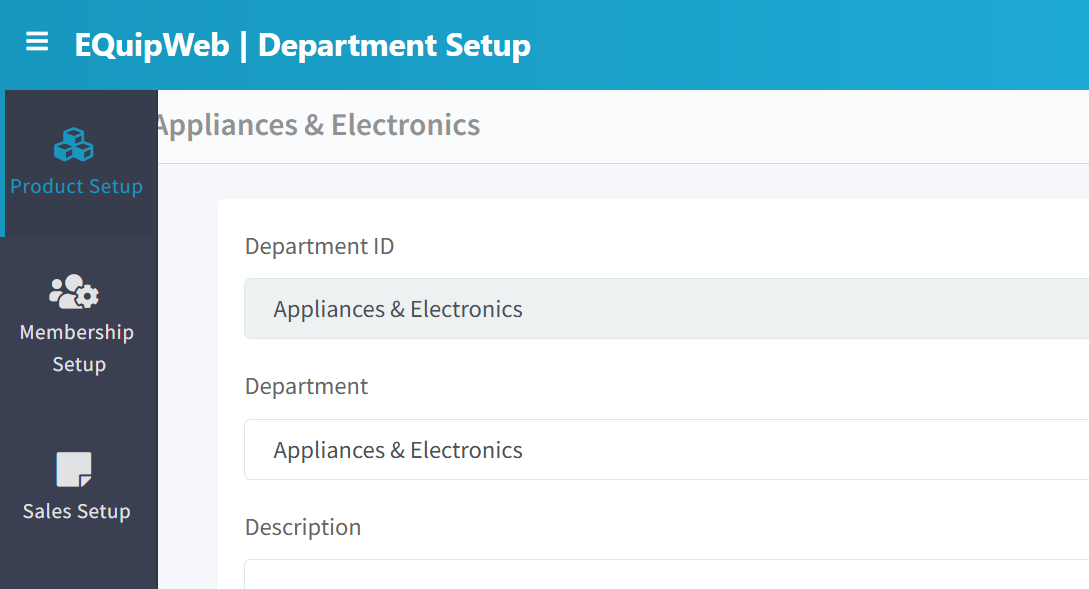
[!TIP] To make changes, just click the name of any department in the list — the same form opens with everything already filled in. Change what you need and click Save.
2.4.3 Department vs. Category
| Level | Purpose | Example |
|---|---|---|
| Department | Broad business division | "Food & Beverage", "Electronics", "Fashion" |
| Category | Specific product grouping within a department | "Hot Drinks", "Laptops", "Men's Shirts" |
💡 Example
Scenario: A department store organizes its products.
| Department | Categories | Products |
|---|---|---|
| Electronics | Phones, Laptops, Accessories | iPhone 15, MacBook Air, USB-C Cable |
| Fashion | Men's, Women's, Kids | T-Shirt, Dress, Sneakers |
| Grocery | Fresh, Frozen, Snacks | Apples, Ice Cream, Chips |
Reporting Benefits
Departments are used in sales reports for high-level analysis:
- "What is total revenue by Department this month?"
- "Which Department has the highest margin?"
[!NOTE] Departments are optional but recommended for businesses with diverse product lines. Single-category stores (e.g., a coffee shop) may not need departments — categories alone are sufficient.
Access & Permissions
| Role | View | Create | Edit | Delete |
|---|---|---|---|---|
| Admin | Yes | Yes | Yes | Yes |
| Supervisor | Yes | Yes | Yes | No |
| Cashier | No backend access | — | — | — |
[!NOTE] Exact permissions depend on the Privileges Setup configured for each role. Contact your administrator if you cannot access this page.
How to Delete a Department
- Navigate to Department Setup from the sidebar menu.
2. Click the name or code link (blue text) of the record you want to delete.
3. In the edit form, scroll down to the bottom.
4. Click the Delete button (red button).
5. A confirmation dialog appears — click Yes to confirm deletion.
Expected Result: The record is soft-deleted — it is hidden from the active list and POS terminals but can be restored later using the "Show Deleted" filter.
[!WARNING] Records linked to active transactions or other modules cannot be deleted. The system will display an error if deletion is not allowed.
How to Add a New Department
- Navigate to Department Setup from the sidebar menu.
-
Click the + Add New button (green button).
-
Fill in the required fields in the form.
-
Fill in any optional fields as needed.
-
Click Save to create the new department.
✅ Expected Result: The new department appears in the list and is available for use across the system.
FAQ
Q: Why is my product not showing on the POS? A: The POS needs to sync first. Check Terminal Status to see the last sync time. Also verify the product is not deleted and is assigned to the correct outlet.
Q: Can I delete a product that has sales history? A: You can soft-delete it (it will be hidden from active lists and POS), but it cannot be permanently removed because it is linked to transaction records.
Q: How do I update prices for multiple products at once? A: Use the Data Importer > Product Importer to bulk update. Export the current list, modify prices in the spreadsheet, then re-import.
Troubleshooting
| Issue | Possible Cause | Solution |
|---|---|---|
| Cannot save the record | Required fields are empty or invalid | Check all fields marked with * and fill in valid data |
| Record not appearing in POS | POS terminal has not synced yet | Wait for the next sync cycle or manually trigger sync from Terminal Status |
| Cannot delete the record | Record is being used by other modules | Check if the record is linked to active transactions, products, or other settings |
| Changes not taking effect | Browser cache showing old data | Refresh the page (Ctrl+F5) or clear browser cache |
| "Duplicate" error on save | A record with the same name/code already exists | Search the list (including deleted records) for duplicates |
| Page not loading | Session expired or network issue | Log out and log back in. Check your internet connection |
Related Menus
- Category Setup — product categorization
- Department Setup — reporting hierarchy
- Sales Setup > GST Setup — tax rates for products
- Data Importer > Product Importer — bulk product upload
- Sales Setup > Payment Mode — payment methods at POS
Open Questions / Confirmation Needed
[!NOTE] The following items may vary depending on your system version and configuration:
- Exact permission settings depend on your Privileges Setup configuration
- Sync timing to POS terminals depends on network conditions and sync schedule
- Some features may require additional licensing or module activation
- Field behavior may differ between EQuip versions
If you encounter behavior not described in this manual, contact your system administrator or EQuip support team.
Related Articles
Category Setup
? Backend — EQuipWebRetail ModeProduct Setup Chapter 2: Product Setup — 2.3 Category Setup Use Category Setup to organize your products into groups — like "Beverages", "Snacks", or "Electronics". When your products are neatly categorized, your staff ...Product Setup
? Backend — EQuipWebRetail ModeProduct Setup Chapter 2: Product Setup — 2.1 Product List The Product List is where you see all your products in one place. From here, you can search, filter, edit, or delete any product. Think of it as your master ...Hotkey Setup
? Backend — EQuipWebRetail ModeSales Setup Sales Setup — 4.6 Hotkey Setup Use Hotkey Setup to customize the touchscreen buttons on your POS. Arrange your most popular items as big, colorful buttons so cashiers can tap them quickly instead of ...Collection Setup
? Backend — EQuipWebRetail ModeProduct Setup Chapter 2: Product Setup — 2.7 Collection Setup Use Collection Setup to group products into reusable sets. Unlike categories (which are for organizing), collections are for linking products together — for ...Bundle Setup
? Backend — EQuipWebRetail ModeProduct Setup Chapter 2: Product Setup — 2.5 Bundle Setup Use Bundle Setup to create combo deals and set meals — like a "Lunch Set" with a main dish + drink + dessert at a special price. Customers love bundles, and ...