Hotkey Setup
Sales Setup — 4.6 Hotkey Setup
Use Hotkey Setup to customize the touchscreen buttons on your POS. Arrange your most popular items as big, colorful buttons so cashiers can tap them quickly instead of searching — perfect for fast-paced environments like cafes and food courts. Hotkeys provide quick-access buttons for products, categories, departments, and collections on the POS screen. The layout is organized into button groups (folders) with child buttons, each customizable with colors, images, and linked references.
When to use this: When you want to customize the touchscreen buttons on your POS terminal.
Prerequisites
- Products or Categories must exist for hotkey assignment
Hotkey List
📝 General Description
The Hotkey list shows all configured hotkey layouts. Each layout is assigned to a specific POS terminal and defines the button grid that cashiers use during sales transactions.
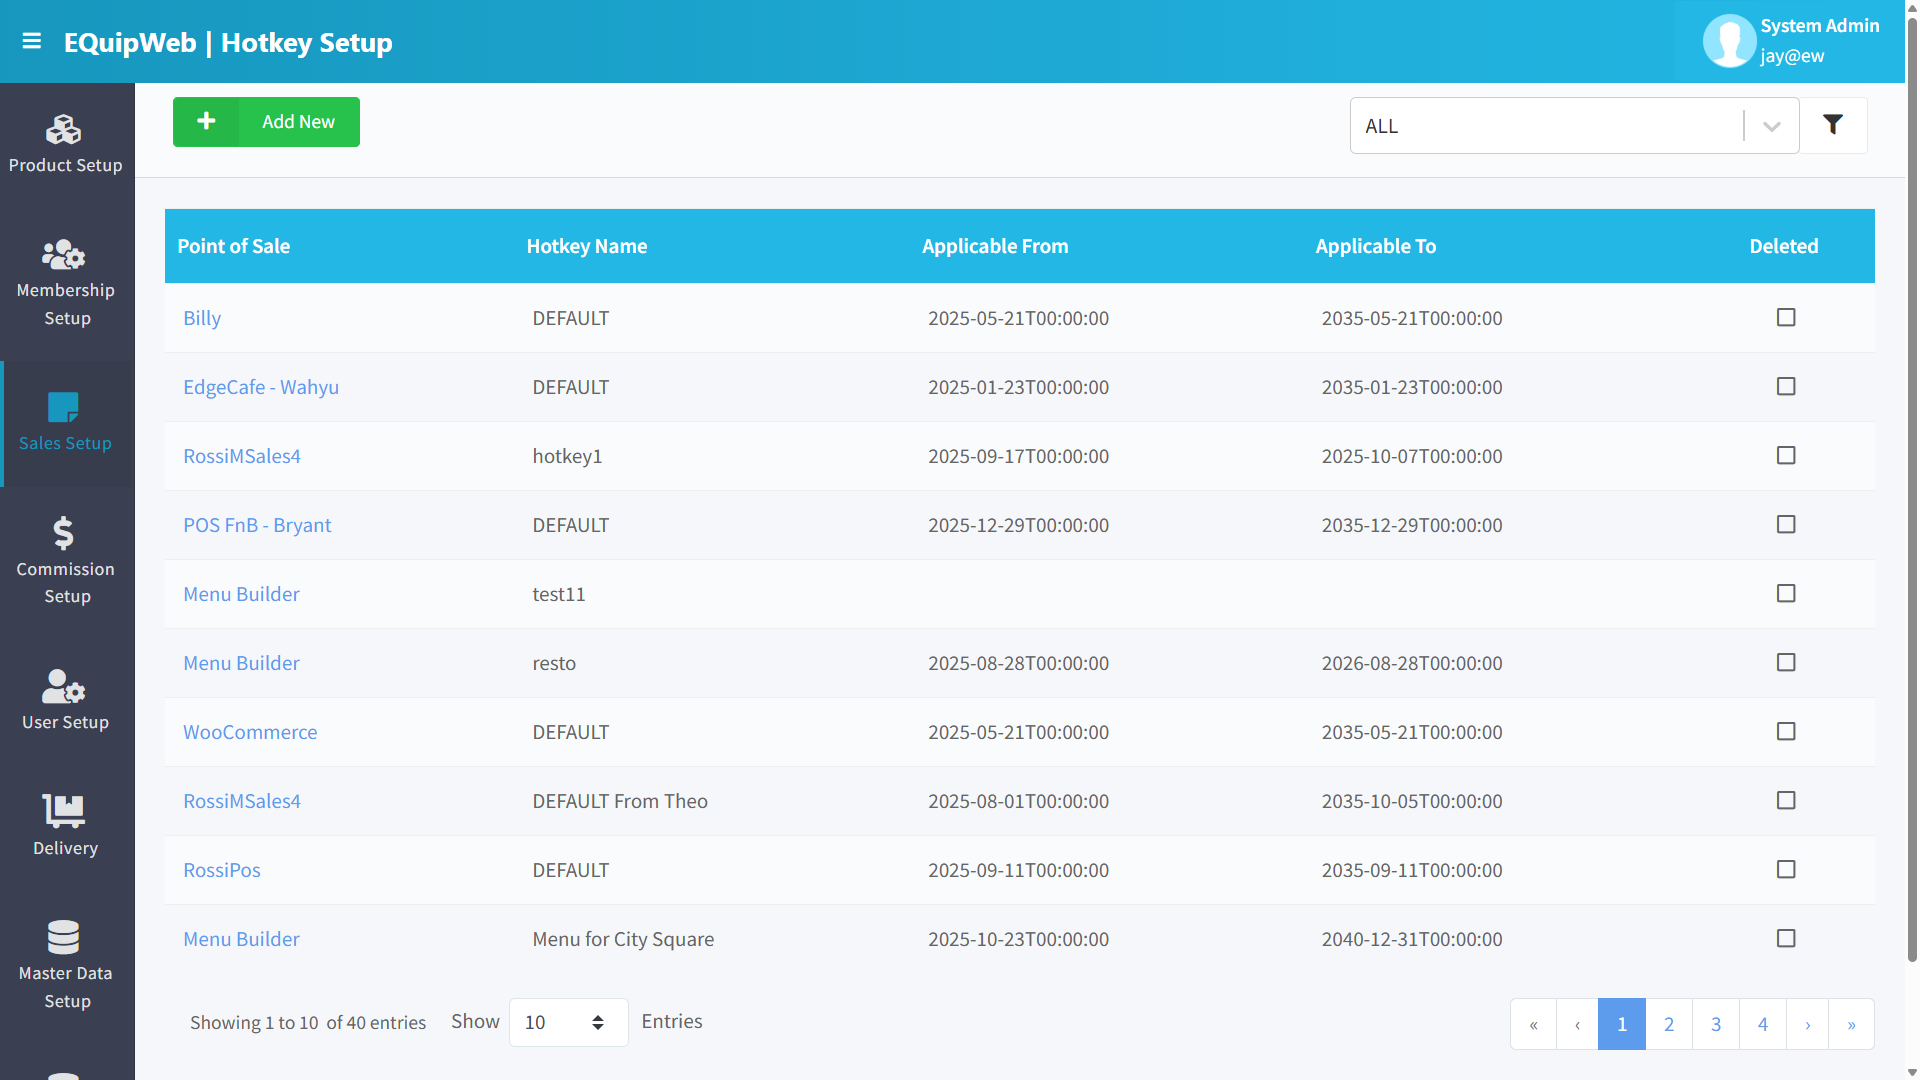
⚙️ Configuration Guide & UI Elements
- 🔴 1. Add New
- Element Type: Button (Green)
- Function: Opens the Hotkey Layout Builder to create a new layout.
- 🔴 2. Point of Sale Filter
- Element Type: Dropdown
- Function: Filter hotkey layouts by the assigned POS terminal.
- 🔴 3. Filter Icon (🔽)
- Element Type: Funnel button
- Function: Opens the advanced filter panel.
📊 Column Descriptions
| Column | Description | Example |
|---|---|---|
| Point of Sale | The POS terminal this layout is assigned to (clickable) | POS-001, Main Counter |
| Hotkey Name | Name of the layout | Default Layout, F&B Menu |
| Applicable From | Start date for when this layout is active | 27 Nov 2015 02:07 PM |
| Applicable To | End date for when this layout expires | 03 Nov 2115 02:07 PM |
| Deleted | Hidden/deleted status | ☐ / ☑ |
Hotkey Layout Builder
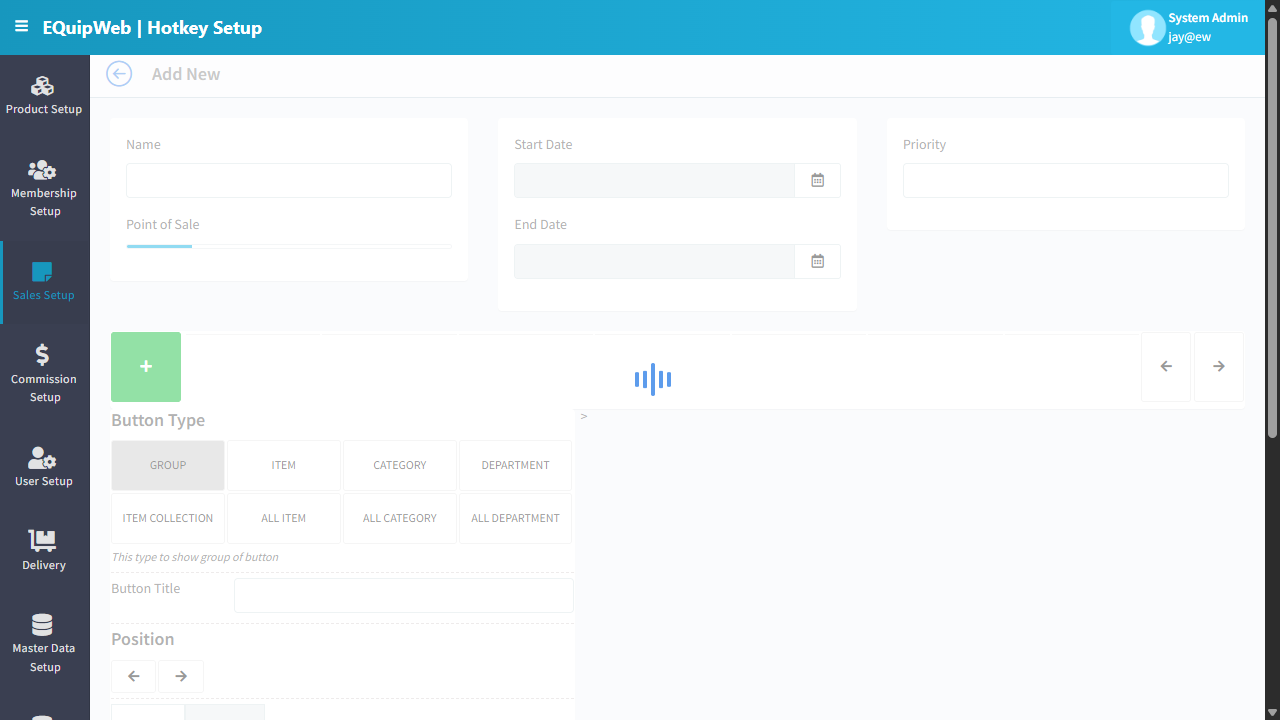
Click + Add New or click a Point of Sale link to open the visual layout editor:
Layout Configuration
| Field | Type | Required | Description |
|---|---|---|---|
| POS | Dropdown | Yes | Assign this layout to a specific POS terminal. |
| Hotkey Name | Text | Yes | Name of the hotkey layout (e.g., "Main Counter Layout"). |
Button Grid (6×4 Layout)
The hotkey editor displays an interactive 6 rows × 4 columns button grid per page.
- Click an empty cell (+) to create a new button at that position.
- Click an existing button to edit its properties.
- Pagination: Buttons are organized into pages within groups. Use arrows to navigate pages ("Page X of Y").
- Add Page: Adds a new blank page (only when the last page isn't empty).
Button Types
| Type | Description |
|---|---|
| ITEM | Links to a specific product. Tapping it adds the product to the cart. |
| CATEGORY | Links to a product category. Tapping it shows all items in that category. |
| DEPARTMENT | Links to a department. Tapping it shows all items in that department. |
| COLLECTION | Links to a product collection. |
| FOLDER | Creates a sub-group. Tapping it opens a nested page of buttons. |
| ALLITEM | Shows all products. |
| ALLCATEGORY | Shows all categories. |
| ALLDEPARTMENT | Shows all departments. |
| ITEMGROUP | Links to an item group. |
Button Properties
| Property | Type | Description |
|---|---|---|
| Button Type | Dropdown | Select from the types listed above. |
| Reference No | Lookup | The linked item/category/department/collection (via a search modal). |
| Display Text | Text | The text label shown on the button. |
| Width | Number (1–4) | How many columns the button spans. Default: 1. |
| Height | Number (1–6) | How many rows the button spans. Default: 1. |
| Page No | Number | Which page this button appears on. |
| X / Y Position | Number | Grid position (column/row). |
| Priority | Number | Display order priority. |
Button Appearance
Color Tab
| Field | Description |
|---|---|
| Background Color | Button background color. Choose from a color picker or named presets (BLUE, BROWN, GOLD, etc.). |
| Font Color | Button text color. Auto-calculated for readability based on background brightness. |
Image Tab
| Field | Description |
|---|---|
| Button Image | Upload a custom image (JPEG, PNG, JPG) for the button face. |
How to Edit a hotkey layout.Groups[1].Value.ToUpper()otkey layout
If you need to change any details of an existing hotkey layout, follow these steps:
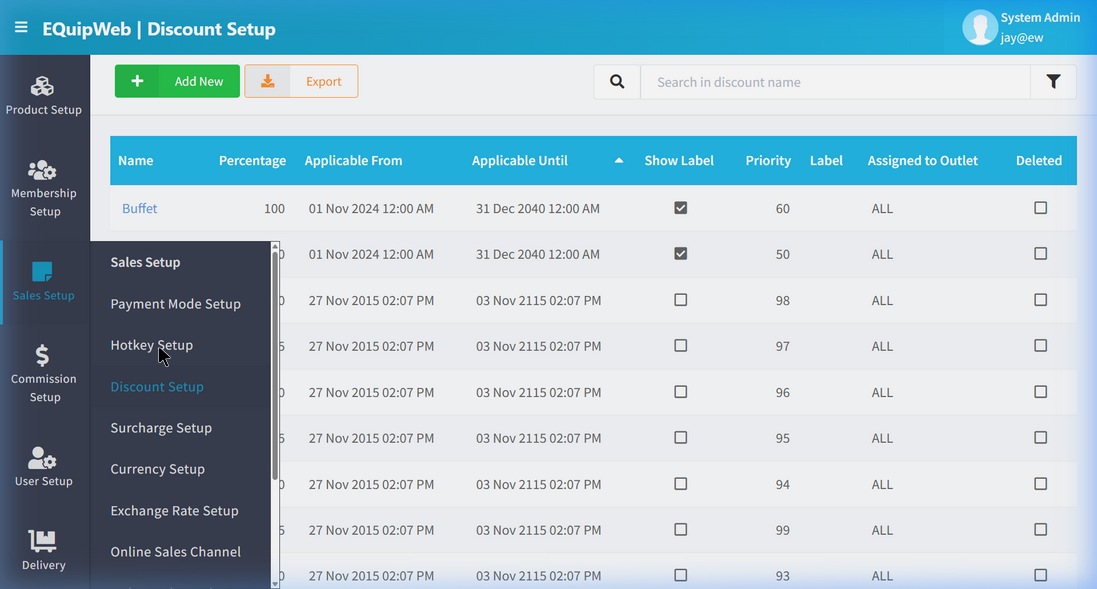
- Go to Hotkey Setup and find the hotkey layout you want to change.
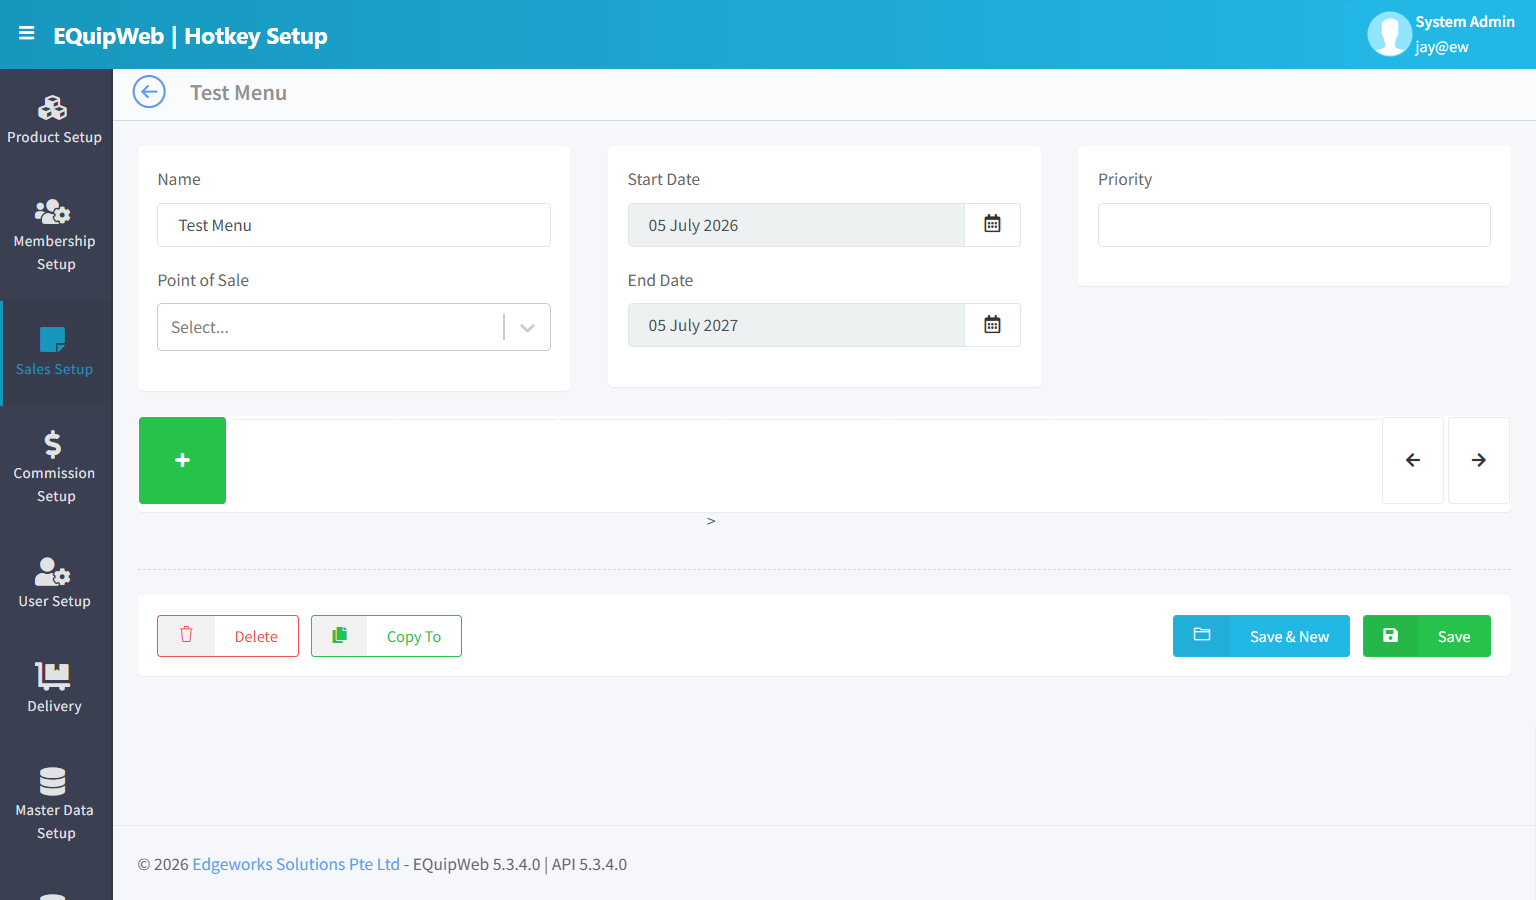
- Click the layout name link to open the edit form. The form looks the same as the "Add New" form, but the fields are already filled in with the current values.
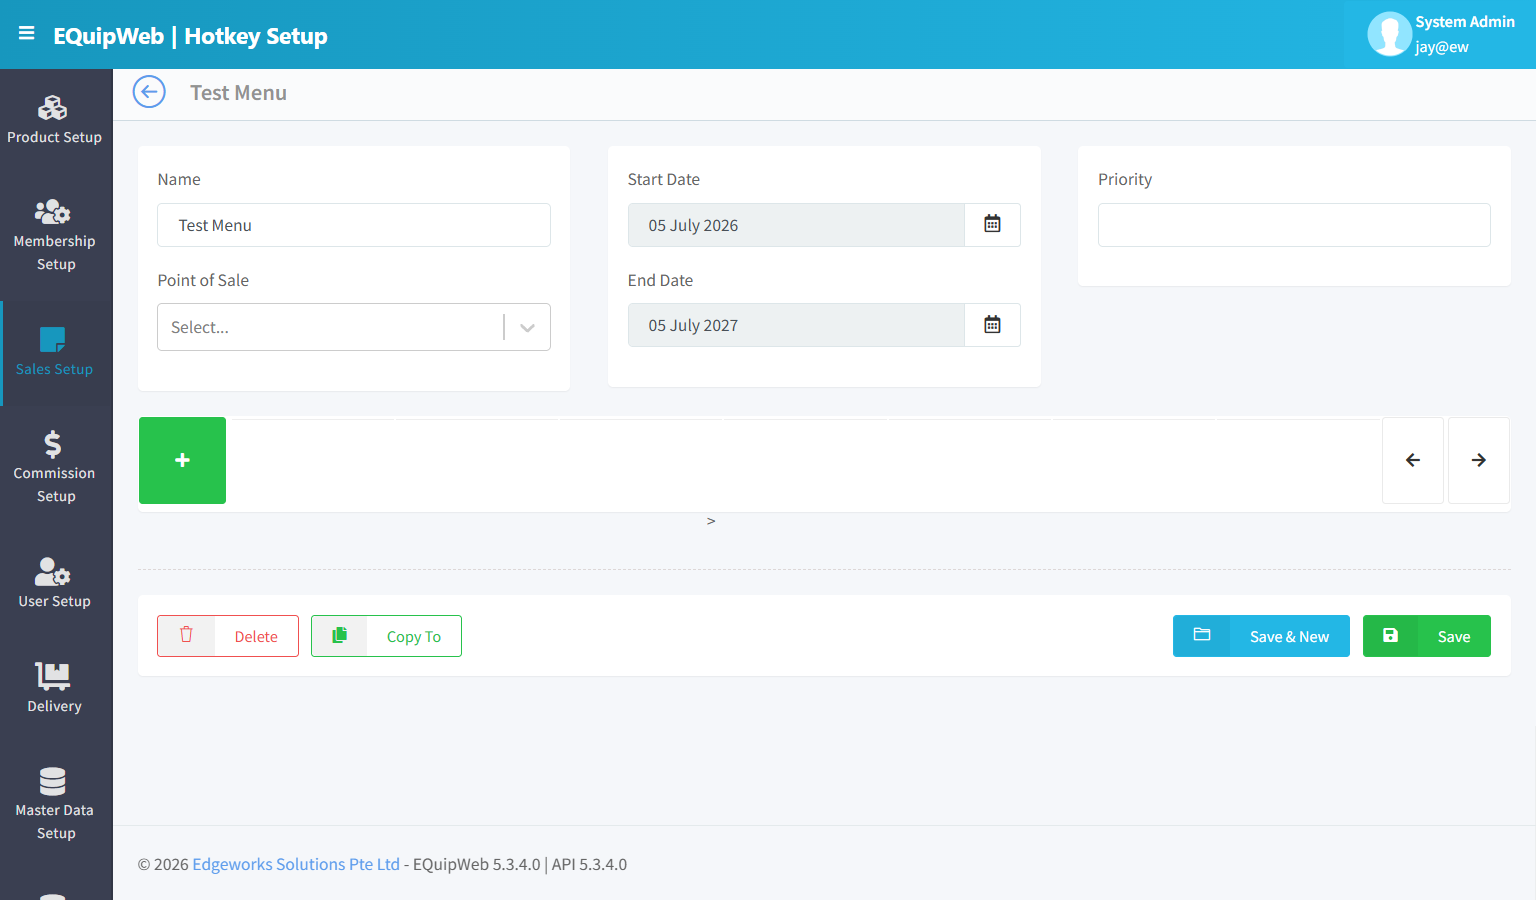
-
Make your changes to any of the fields you need to update.
-
Click Save to apply your changes.
✅ Expected Result: The hotkey is saved and appears on POS after sync.
[!TIP] The edit form is identical to the "Add New" form. The only difference is that all fields are pre-filled with the existing data. Change what you need and click Save.
[!NOTE] Color and Image are mutually exclusive. Saving with the Color tab active clears any uploaded image. Saving with the Image tab active clears the color.
Group Navigation (Folders)
Hotkeys support hierarchical grouping via FOLDER-type buttons:
- Open Group: Select a FOLDER button → click "OPEN GROUP" to drill into its child buttons.
- Close Group: Click the caret-up (↑) button to navigate back to the parent level.
- Breadcrumb Trail: Shown above the grid as
> Group1 > SubGroup1.
Actions
| Action | Description |
|---|---|
| Add New | Creates a new hotkey layout |
| Copy | Duplicates an existing hotkey layout to a new POS |
| Add Button | Click empty cell (+) to create a button |
| Save Button | Saves the selected button's properties |
| Delete Button | Removes the selected button (with confirmation) |
| Remove Image | Clears the button image |
| Add Page | Adds a new page to the current group |
| Save Layout | Saves the master record (name, POS assignment, dates) |
Access & Permissions
| Role | View | Create | Edit | Delete |
|---|---|---|---|---|
| Admin | Yes | Yes | Yes | Yes |
| Supervisor | Yes | Yes | Yes | No |
| Cashier | No backend access | — | — | — |
[!NOTE] Exact permissions depend on the Privileges Setup configured for each role. Contact your administrator if you cannot access this page.
How to Delete a Hotkey
- Navigate to Hotkey Setup from the sidebar menu.
2. Click the name or code link (blue text) of the record you want to delete.
3. In the edit form, scroll down to the bottom.
4. Click the Delete button (red button).
5. A confirmation dialog appears — click Yes to confirm deletion.
Expected Result: The record is soft-deleted — it is hidden from the active list and POS terminals but can be restored later using the "Show Deleted" filter.
[!WARNING] Records linked to active transactions or other modules cannot be deleted. The system will display an error if deletion is not allowed.
How to Add a New Hotkey
- Navigate to Hotkey Setup from the sidebar menu.
-
Click the + Add New button (green button).
-
Fill in the required fields in the form.
-
Fill in any optional fields as needed.
-
Click Save to create the new hotkey.
✅ Expected Result: The new hotkey appears in the list and is available for use across the system.
FAQ
Q: Why is this payment mode not appearing on the POS? A: Check that the payment mode is marked as Active and assigned to the correct outlet. The POS also needs to sync.
Q: Can I edit a completed sales transaction? A: No. Completed transactions cannot be edited. You can void the transaction and create a new one if correction is needed.
Q: How do I set up a new tax rate without affecting past transactions? A: Create a new GST rate with a future Commence Date. The system will automatically apply the old rate to past transactions and the new rate from the effective date.
Troubleshooting
| Issue | Possible Cause | Solution |
|---|---|---|
| Cannot save the record | Required fields are empty or invalid | Check all fields marked with * and fill in valid data |
| Record not appearing in POS | POS terminal has not synced yet | Wait for the next sync cycle or manually trigger sync from Terminal Status |
| Cannot delete the record | Record is being used by other modules | Check if the record is linked to active transactions, products, or other settings |
| Changes not taking effect | Browser cache showing old data | Refresh the page (Ctrl+F5) or clear browser cache |
| "Duplicate" error on save | A record with the same name/code already exists | Search the list (including deleted records) for duplicates |
| Page not loading | Session expired or network issue | Log out and log back in. Check your internet connection |
Related Menus
- Product Setup > Product List — products linked to pricing
- Master Data > Outlet Setup — outlet-specific payment modes
- Master Data > POS Setup — POS terminal configuration
- Setting > Feature Setup — enable/disable sales features
Open Questions / Confirmation Needed
[!NOTE] The following items may vary depending on your system version and configuration:
- Exact permission settings depend on your Privileges Setup configuration
- Sync timing to POS terminals depends on network conditions and sync schedule
- Some features may require additional licensing or module activation
- Field behavior may differ between EQuip versions
If you encounter behavior not described in this manual, contact your system administrator or EQuip support team.
Related Articles
Category Setup
? Backend — EQuipWebRetail ModeProduct Setup Chapter 2: Product Setup — 2.3 Category Setup Use Category Setup to organize your products into groups — like "Beverages", "Snacks", or "Electronics". When your products are neatly categorized, your staff ...Setup Module Overview
? Backend — EQuipWebRetail ModeChapter 1: Getting Started Backend Setup — Module Overview and Getting Started Guide The Setup Overview provides a quick-reference guide for initial system configuration. This page summarizes the recommended setup ...Privileges Setup
? Backend — EQuipWebRetail ModeUser Setup Chapter 6: User Setup — 6.4 Privileges Setup Use Setup to manage and configure this feature in your EQuipWeb system. Privileges Setup is the master list of all permissions available in the system. Each ...Company Setup
? Backend — EQuipWebRetail ModeMaster Data Setup Chapter 8: Master Data Setup — 8.9 Company Setup Use Company Setup (under Master Data) to enter your company's official business details — company name, registration number, address, and contact ...Role Setup
? Backend — EQuipWebRetail ModeUser Setup Chapter 6: User Setup — 6.2 Role Setup Use Role Setup to create job roles for your team — like "Cashier", "Supervisor", "Manager", or "Admin". Each role determines what a user can see and do in the system. ...