Role Setup
Chapter 6: User Setup — 6.2 Role Setup
Use Role Setup to create job roles for your team — like "Cashier", "Supervisor", "Manager", or "Admin". Each role determines what a user can see and do in the system. Once a role is created, you assign it to staff members in the User List.
When to use this: When you need to create or manage user roles (e.g., Admin, Supervisor, Cashier).
Prerequisites
- No prerequisites — roles are foundational setup
Role List
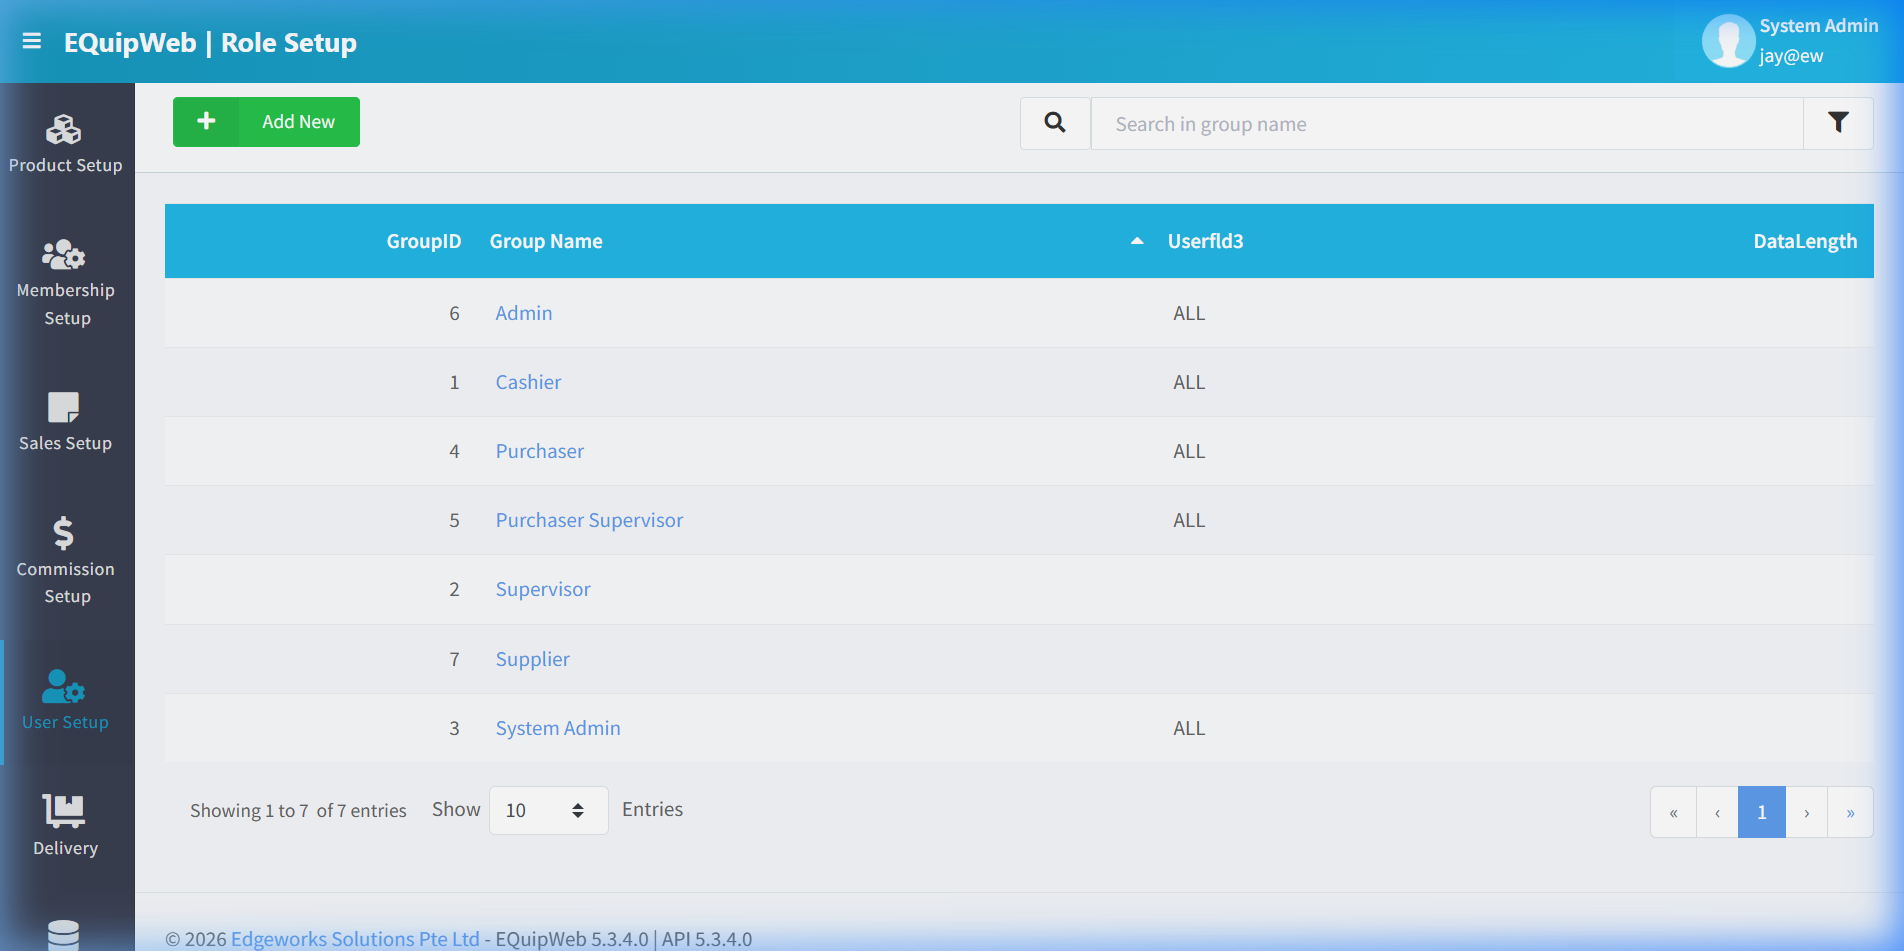
📝 General Description
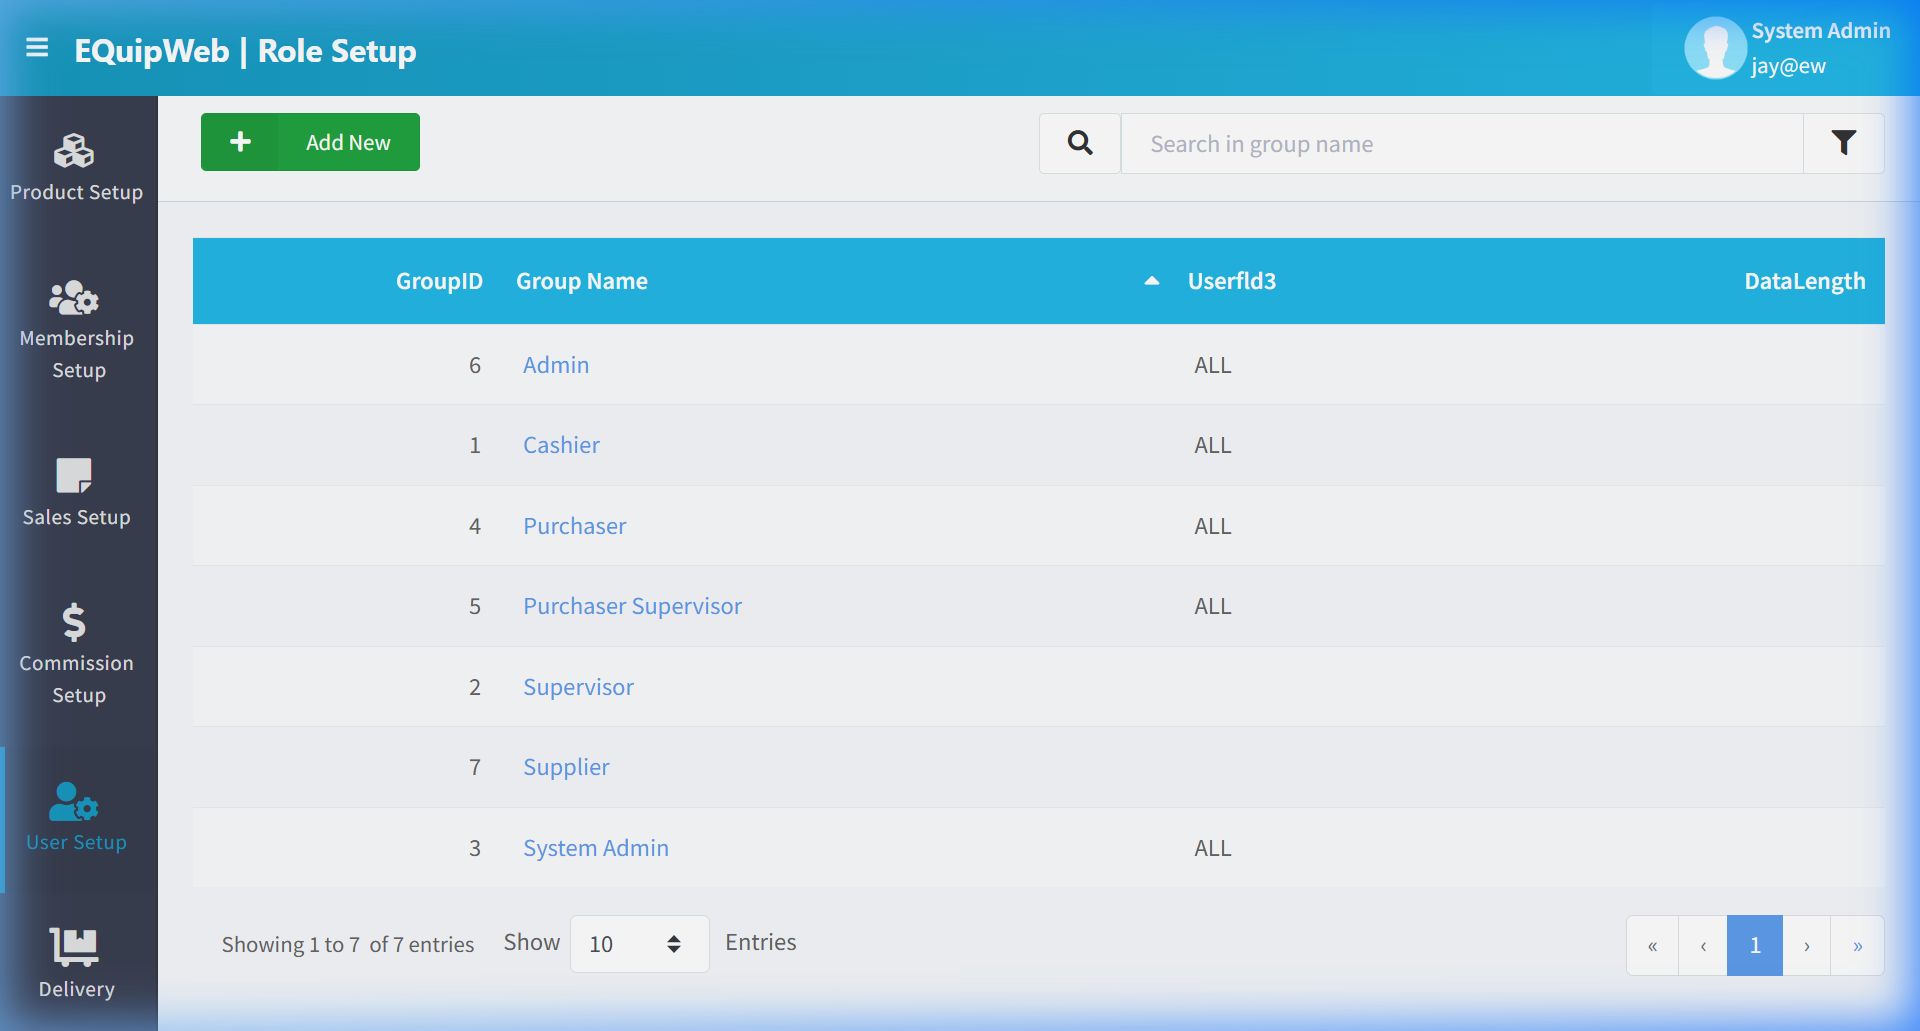
The Role Setup list page displays all configured user roles in a data grid. Each role represents a named group that users can be assigned to. The actual permissions for each role are configured separately in Role Privileges (Section 6.3). Roles are essentially labels that group users together — they don't grant permissions on their own.
⚙️ UI Elements
| Element | Type | Function |
|---|---|---|
| + Add New | Green Button | Create a new role definition |
| Export | Orange Button | Export the role list to Excel |
| Search Bar | Text Input | Filter roles by name |
| 🔽 Filter | Funnel Icon | Toggle advanced filter options (show/hide deleted) |
6.2.1 Data Grid Columns
| Column | Description |
|---|---|
| Group Name | The role name (clickable → opens edit form). Examples: "Admin", "Cashier", "Supervisor", "System Admin" |
| Description | Brief description of the role's intended purpose |
| Deleted | Hidden/deleted status — indicates if the role has been deactivated |
6.2.2 Add / Edit Role
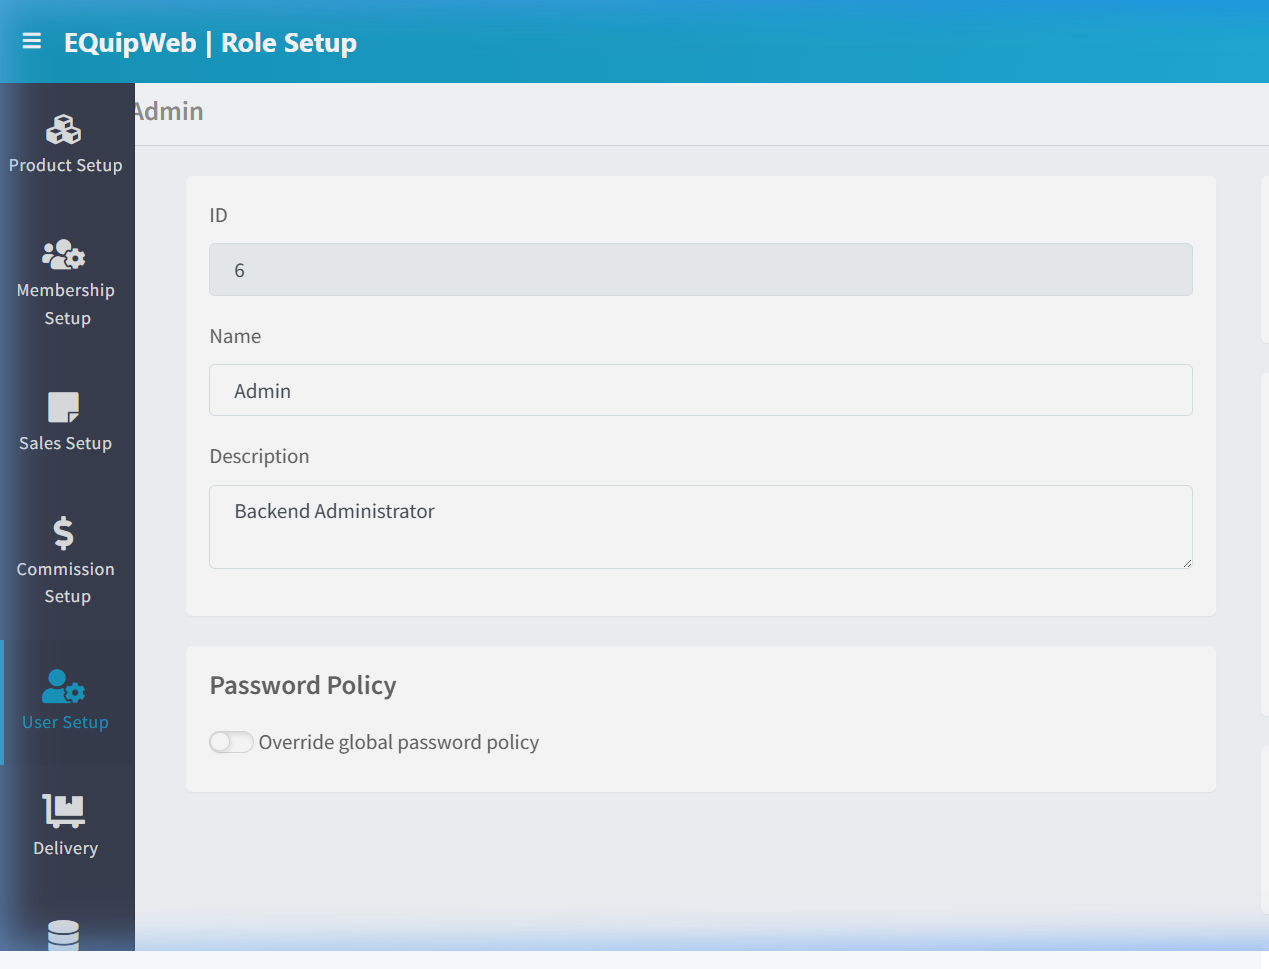
Form Fields
| Field | Type | Required | Description |
|---|---|---|---|
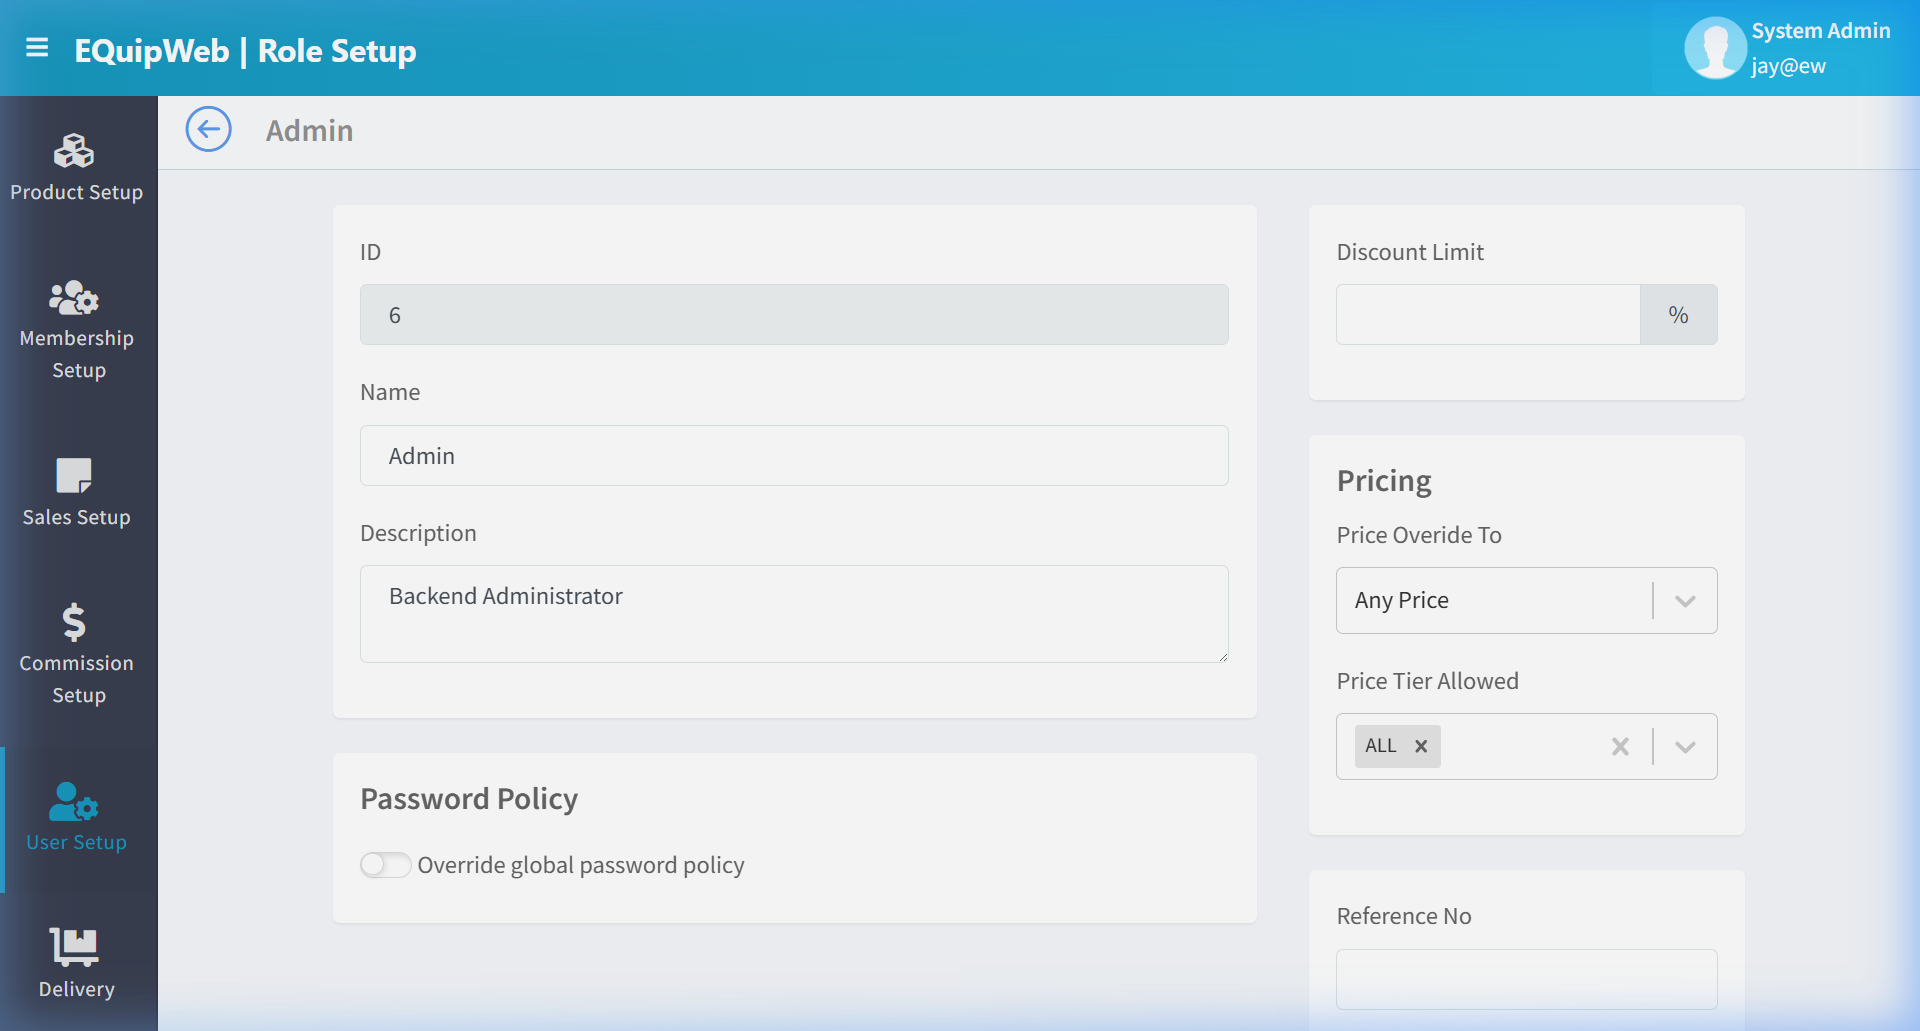
| Group Name | Text | ✅ Yes | Unique role identifier (e.g., "Store Manager", "Warehouse Staff", "Cashier Lead"). This name appears in user profiles and access logs. |
| Description | Textarea | No | Free-text description explaining the role's intended scope and responsibilities |
Actions
| Button | Function |
|---|---|
| Save | Saves the role and returns to the list |
| Save & New | Saves the role and opens a blank form for a new entry |
| Delete | Removes the role (hidden from dropdowns but existing users keep their assignment) |
| Restore | Restores a previously deleted role |
6.2.3 Default System Roles
The system comes pre-configured with these standard roles:
| Role | Typical Use |
|---|---|
| System Admin | Full access to all modules — reserved for IT administrators |
| Admin | Back-office management — product setup, membership, reporting |
| Supervisor | Store-level oversight — approvals, voids, discounts beyond limits |
| Cashier | POS operations only — sales, payments, basic member lookup |
[!NOTE] Default roles cannot be deleted, but their permissions can be fully customized via Role Privileges (Section 6.3). You can also create unlimited custom roles (e.g., "Warehouse Staff", "Marketing", "Finance").
6.2.4 Role-User Relationship
Each user account in User List (Section 6.1) is assigned exactly one role via the Group Name dropdown. Changing a user's role immediately changes their access level.
Role Setup → defines role names
    ↓
Role Privileges → assigns permissions to each role
    ↓
User List → assigns a role to each user
    ↓
User logs in → permissions enforced
💡 Example
Scenario: A retail chain introduces a new "Area Manager" role for regional supervisors who need access to reports across multiple outlets but shouldn't modify product or pricing data.
Setup:
- Navigate to Role Setup → Click + Add New.
- Enter Group Name:
Area Manager.
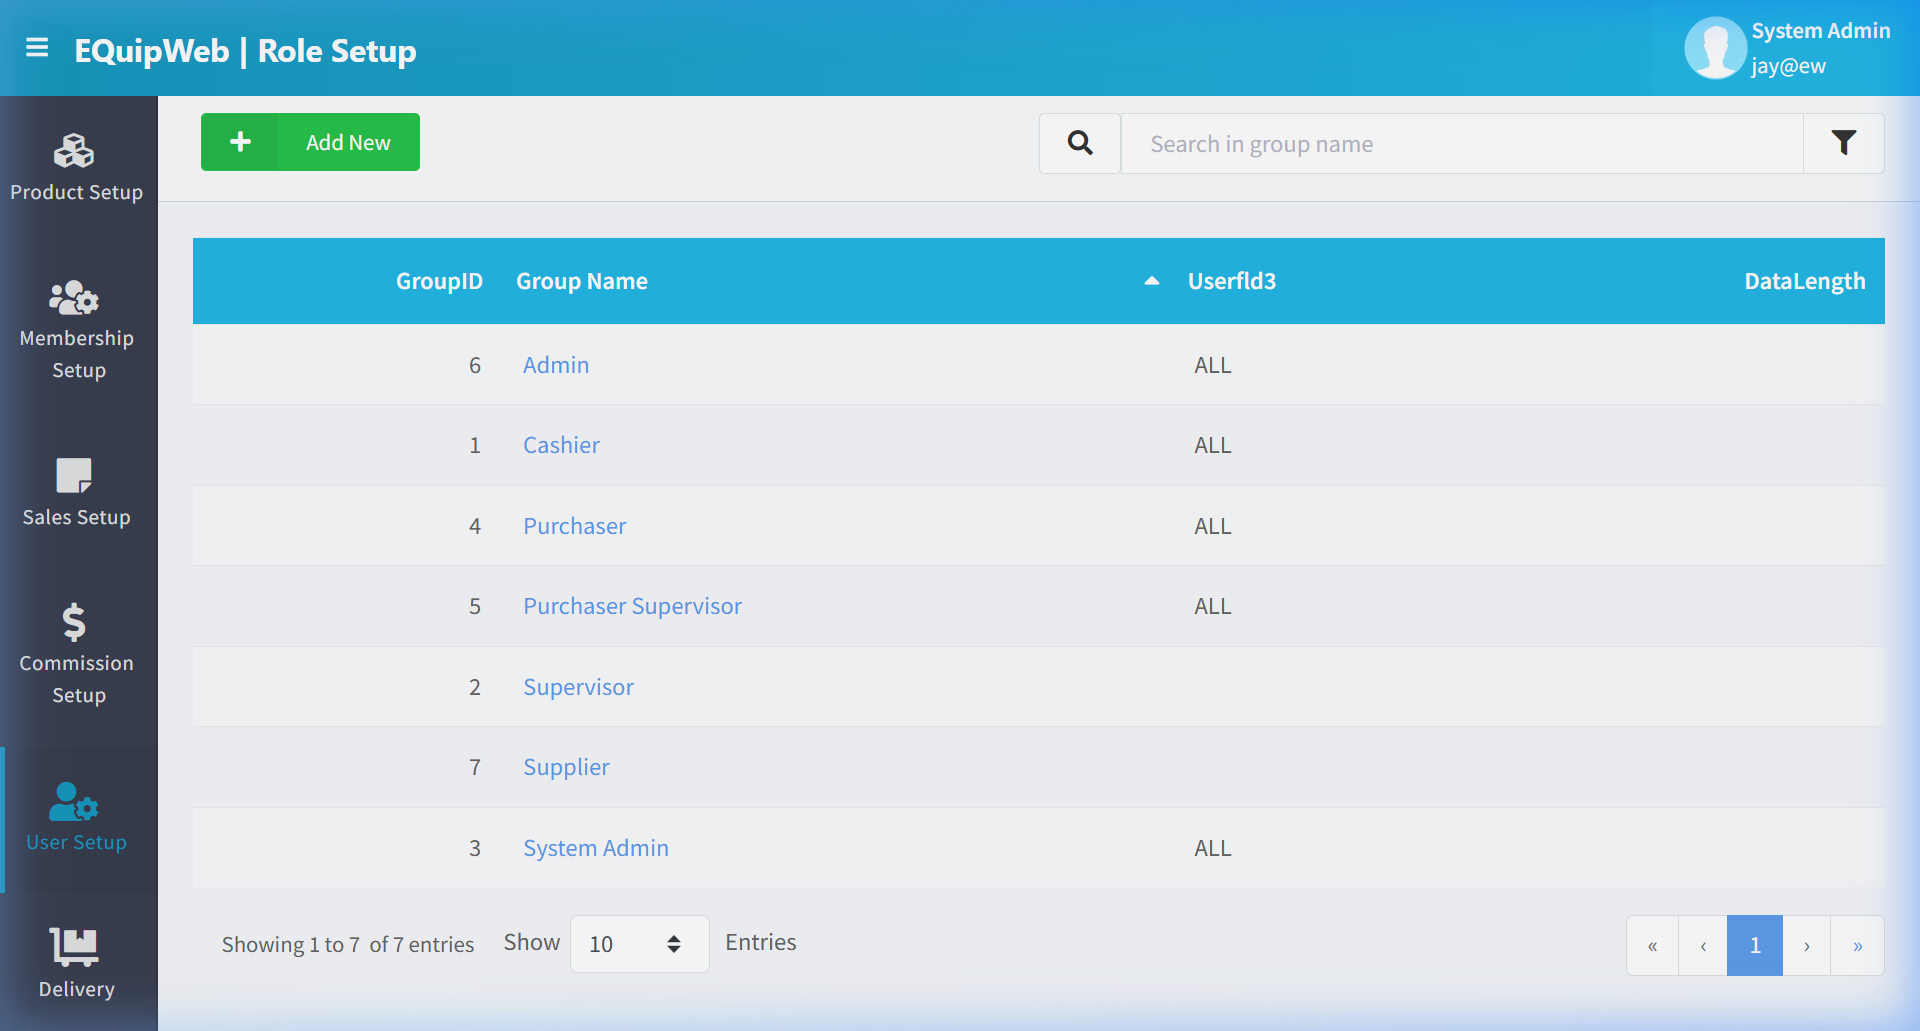 3. Enter Description:
 Regional supervisors — multi-outlet reporting, no edit access.
- Click Save.
Expected Result: The role is saved and can be assigned to users.
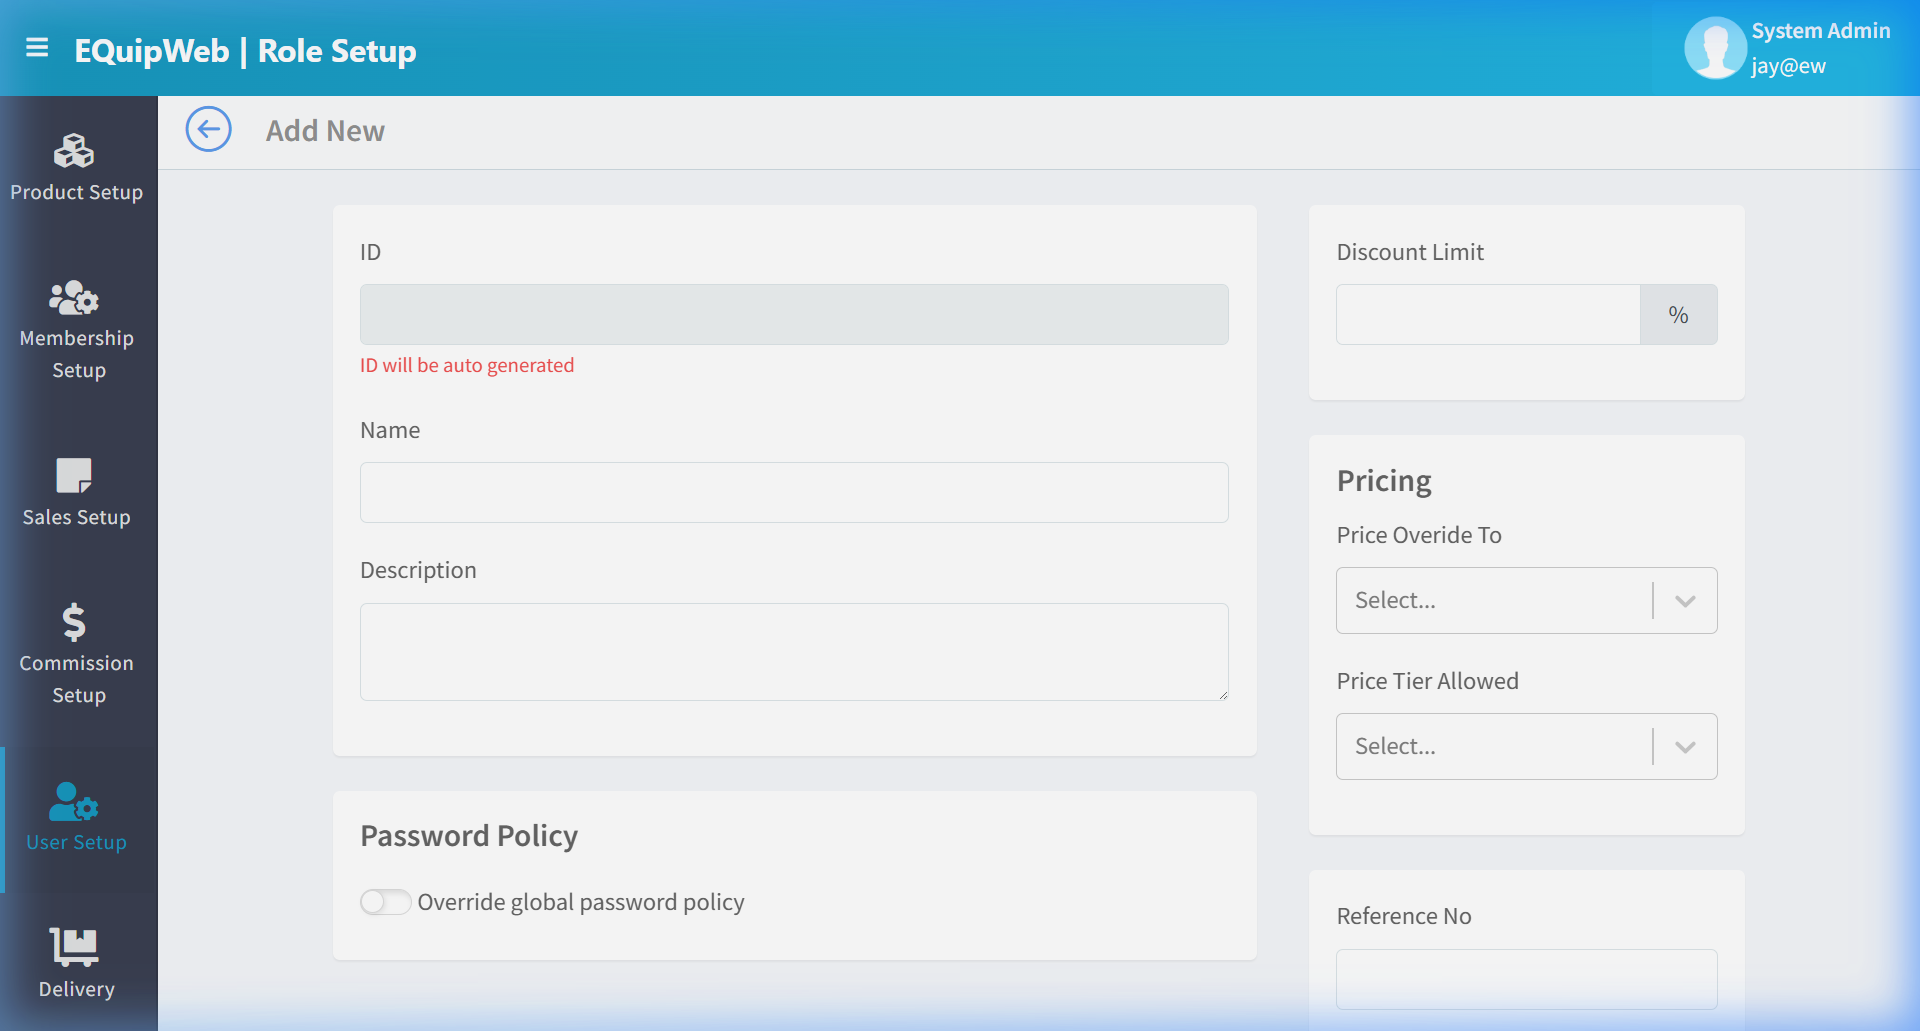 5. Go to Role Privileges (Section 6.3) → Select "Area Manager" from the dropdown.
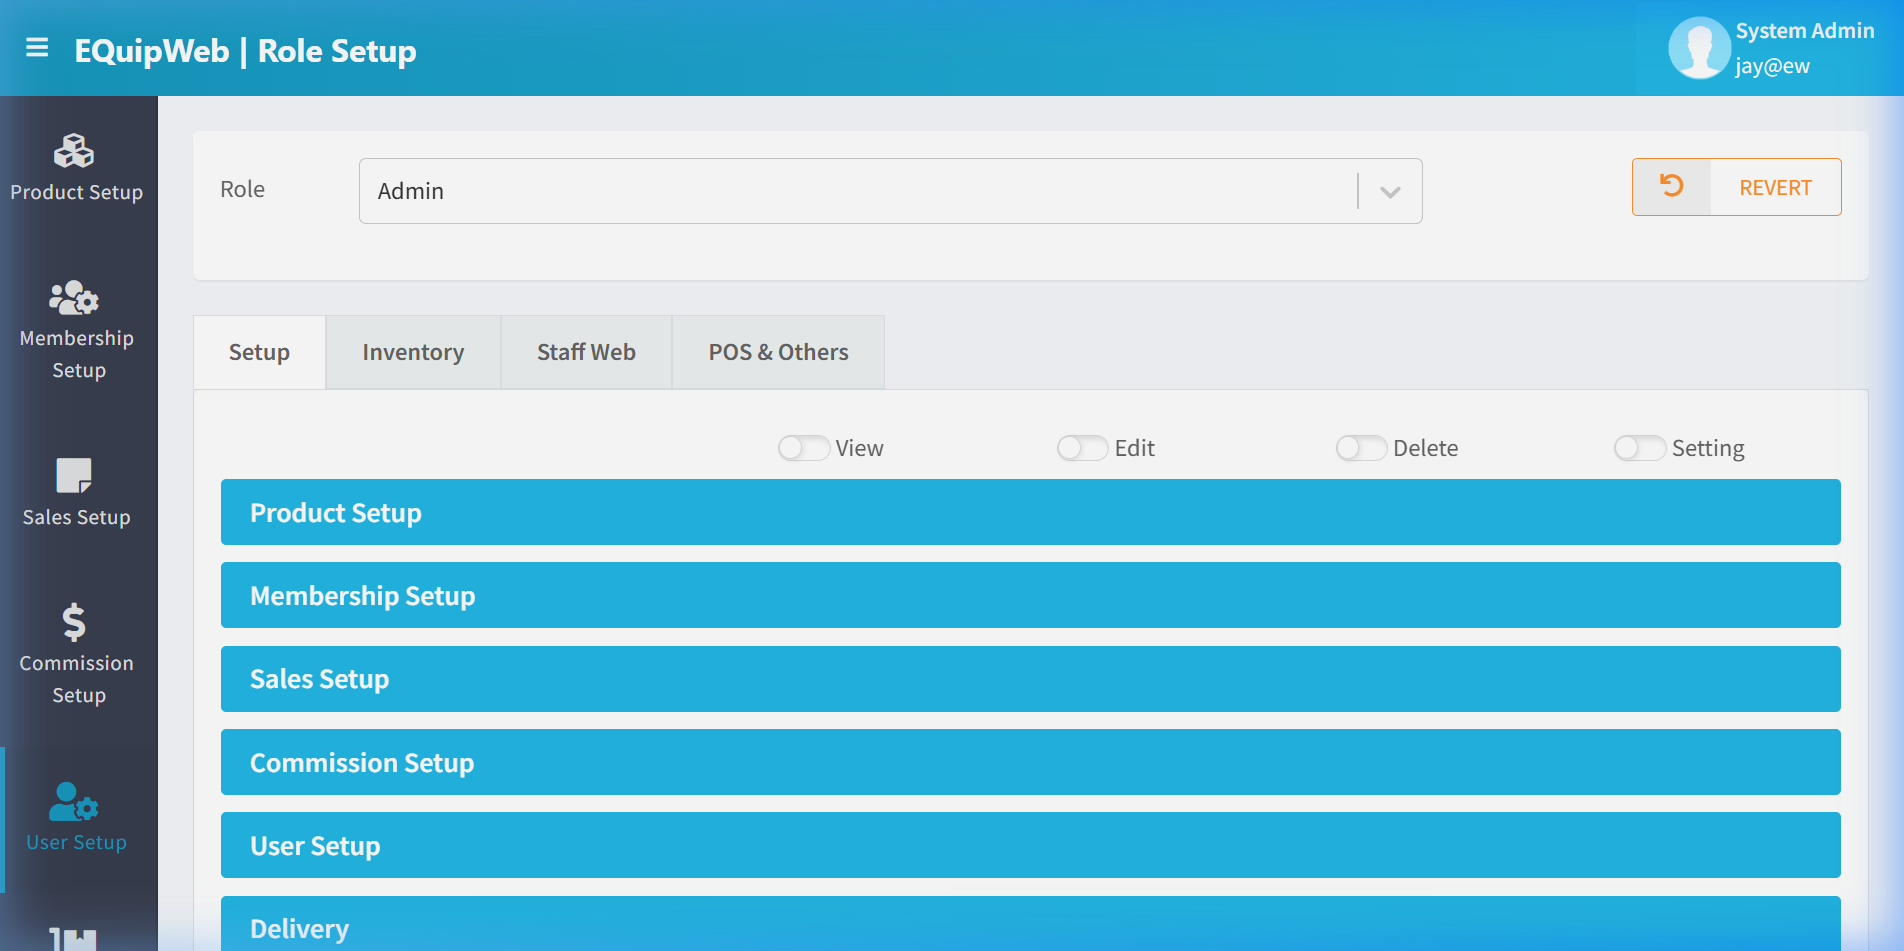
- Grant View access to all Report modules.
- Grant View access to Sales Setup and Inventory modules.
- Leave Edit and Delete toggles off for all Setup modules.
 9. Go to User List → Edit each area manager's account → Set Group Name to "Area Manager".
[!TIP] Keep role names descriptive and consistent across your organization. When support teams troubleshoot access issues, clear role names make it immediately obvious what permissions a user should have.
[!WARNING] Deleting a role does not remove the role from existing users. Users previously assigned to a deleted role will retain their last-known permissions until they are reassigned to an active role.
Access & Permissions
| Role | View | Create | Edit | Delete |
|---|---|---|---|---|
| Admin | Yes | Yes | Yes | Yes |
| Supervisor | Yes | Yes | Yes | No |
| Cashier | No backend access | — | — | — |
[!NOTE] Exact permissions depend on the Privileges Setup configured for each role. Contact your administrator if you cannot access this page.
How to Add a New Role
- Navigate to Role Setup from the sidebar menu.
-
Click the + Add New button (green button).
-
Fill in the required fields in the form.
-
Fill in any optional fields as needed.
-
Click Save to create the new role.
✅ Expected Result: The new role appears in the list and is available for use across the system.
How to Edit a Role
- Navigate to Role Setup from the sidebar menu.
-
Click on the name or code link (blue text) of the record you want to edit.
-
The edit form opens with all current values pre-filled. Modify the fields as needed.
- Click Save to apply your changes.
✅ Expected Result: The role is updated and changes take effect immediately.
How to Delete a Role
- Navigate to Role Setup from the sidebar menu.
-
Click on the name or code link (blue text) of the record you want to delete.
-
In the edit form, scroll down to the bottom.
- Click the Delete button (red button).
- A confirmation dialog appears — click Yes to confirm.
✅ Expected Result: The role is soft-deleted — hidden from active lists and POS but can be restored later.
[!WARNING] Records linked to active transactions or other modules cannot be deleted. The system will display an error if deletion is not allowed.
FAQ
Q: A user is locked out — how do I unlock them? A: Go to User Setup > Locked User to view and unlock locked accounts. Accounts may lock after multiple failed login attempts.
Q: Can a user have multiple roles? A: Each user is assigned one role. To combine permissions, create a custom role with the needed privileges in Role Setup and Privileges Setup.
Q: Why can't a user see certain menus? A: Their role may not have the required privileges. Check Privileges Setup for the user's assigned role.
Troubleshooting
| Issue | Possible Cause | Solution |
|---|---|---|
| Cannot save the record | Required fields are empty or invalid | Check all fields marked with * and fill in valid data |
| Record not appearing in POS | POS terminal has not synced yet | Wait for the next sync cycle or manually trigger sync from Terminal Status |
| Cannot delete the record | Record is being used by other modules | Check if the record is linked to active transactions, products, or other settings |
| Changes not taking effect | Browser cache showing old data | Refresh the page (Ctrl+F5) or clear browser cache |
| "Duplicate" error on save | A record with the same name/code already exists | Search the list (including deleted records) for duplicates |
| Page not loading | Session expired or network issue | Log out and log back in. Check your internet connection |
Related Menus
- Setting > Feature Setup — system feature toggles
- Master Data > Outlet Setup — outlet access assignment
- User Setup > Role Setup — role definitions
- User Setup > Privileges Setup — permission configuration
Open Questions / Confirmation Needed
[!NOTE] The following items may vary depending on your system version and configuration:
- Exact permission settings depend on your Privileges Setup configuration
- Sync timing to POS terminals depends on network conditions and sync schedule
- Some features may require additional licensing or module activation
- Field behavior may differ between EQuip versions
If you encounter behavior not described in this manual, contact your system administrator or EQuip support team.
Related Articles
Role Privileges Setup
? Backend — EQuipWebRetail ModeUser Setup Chapter 6: User Setup — 6.3 Role Privileges Use Role Privileges to decide exactly what each role can see and do. For example, you might let Cashiers process sales but block them from viewing reports or ...Privileges Setup
? Backend — EQuipWebRetail ModeUser Setup Chapter 6: User Setup — 6.4 Privileges Setup Use Setup to manage and configure this feature in your EQuipWeb system. Privileges Setup is the master list of all permissions available in the system. Each ...Company Setup
? Backend — EQuipWebRetail ModeMaster Data Setup Chapter 8: Master Data Setup — 8.9 Company Setup Use Company Setup (under Master Data) to enter your company's official business details — company name, registration number, address, and contact ...Feature Setup
? Backend — EQuipWebRetail ModeSetting Setting — 12.5 Feature Setup: Toggle product features, pricing display, and system options Use Feature Setup to turn features on or off across your system. Each feature has a simple toggle switch — flip it ON ...Currency Setup
? Backend — EQuipWebRetail ModeSales Setup Chapter 4: Sales Setup — 4.8 Currency Setup Use Currency Setup to add the currencies your business accepts. If you only accept one currency (e.g., SGD), it's already set up for you. Multi-currency ...