How to Check the Transaction Report
This guide shows you how to open, filter, and export the Transaction Report in the EQuip Report Portal. Use it to review sales, voided, and refunded transactions and to export the data as CSV, Excel, PDF, or Flat File.
1. Open the Transaction Report
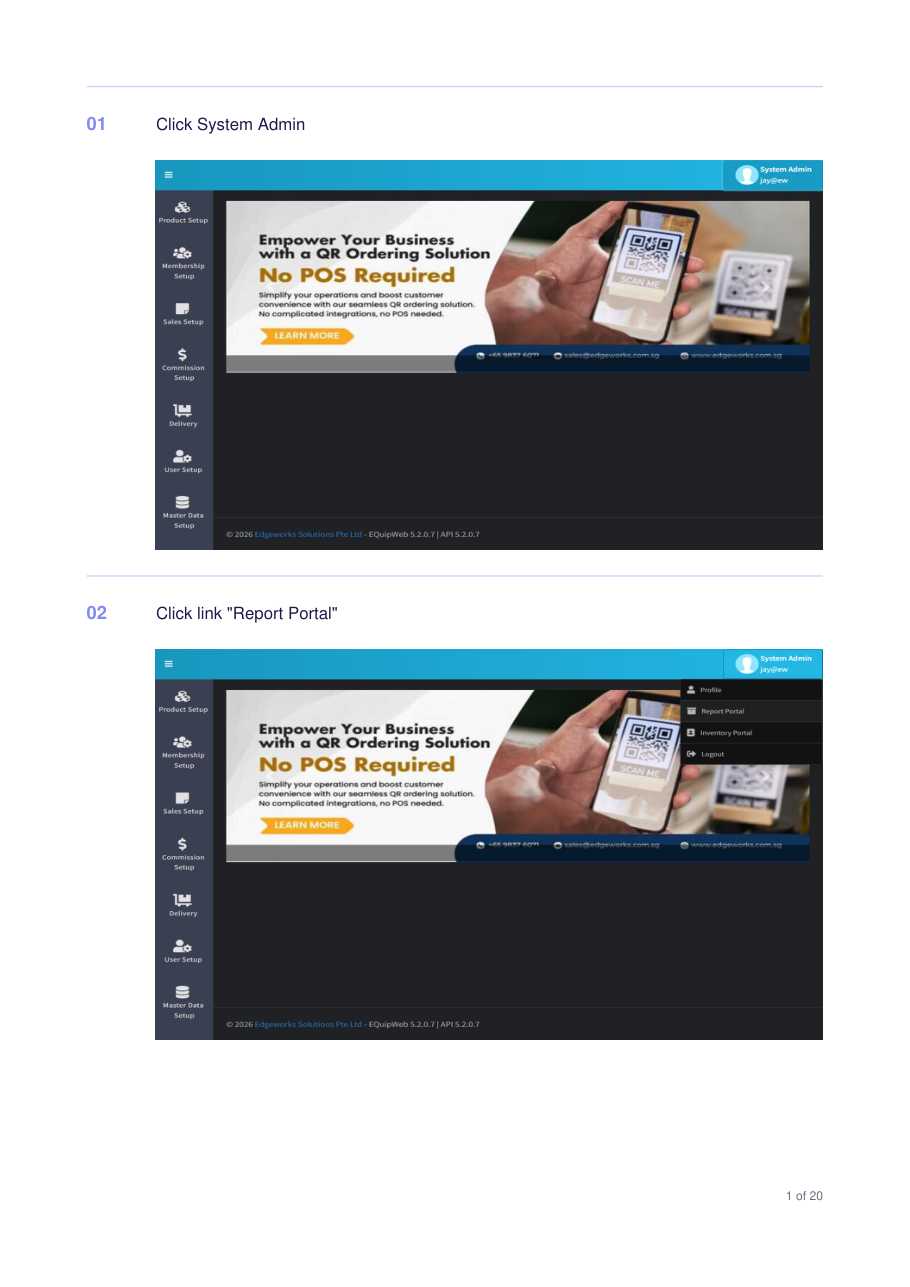
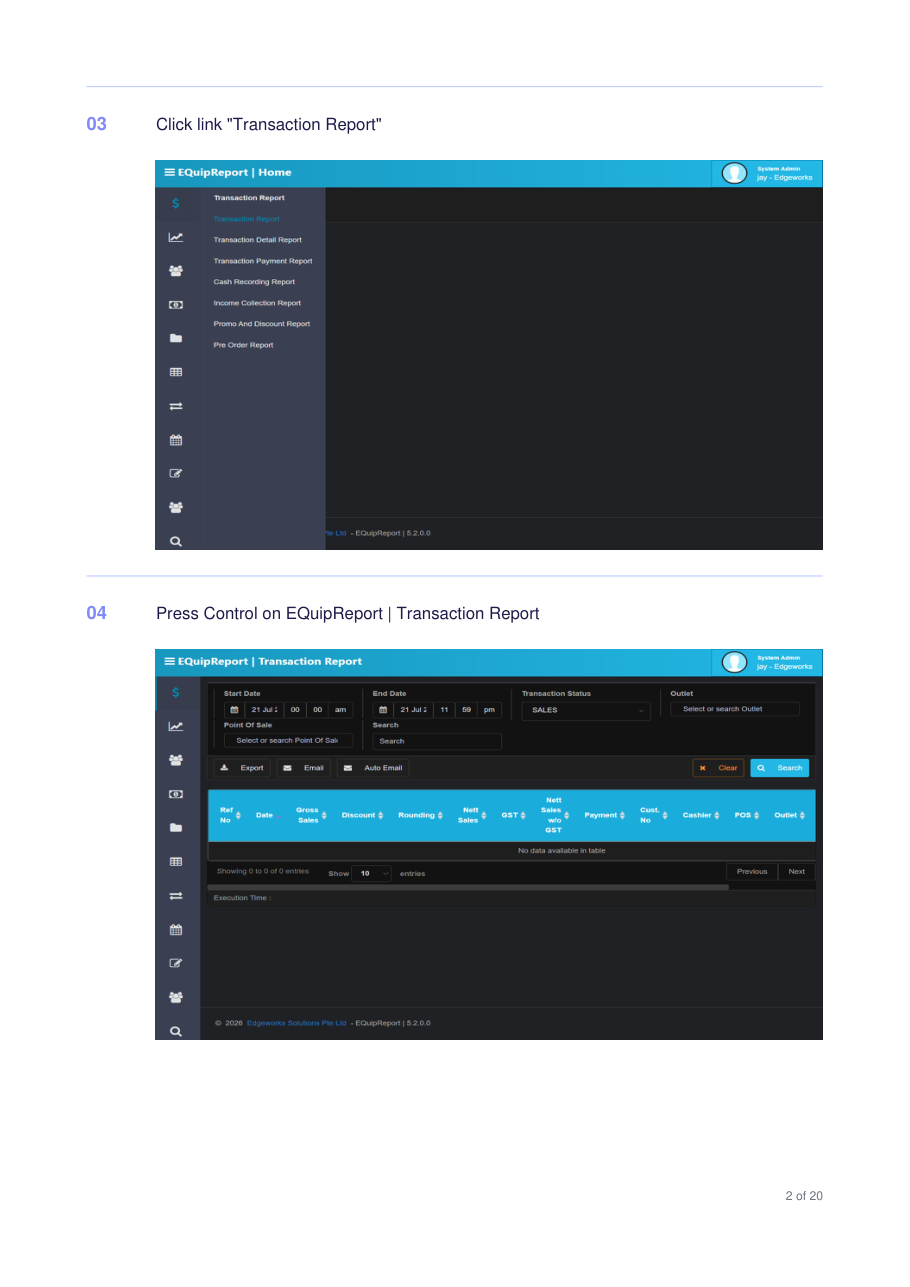
- From the EQuipWeb dashboard, click your profile menu (System Admin, top-right) and choose Report Portal.
- In the Report Portal, open the Transaction Report menu on the left and click Transaction Report.
2. Set your filters and search
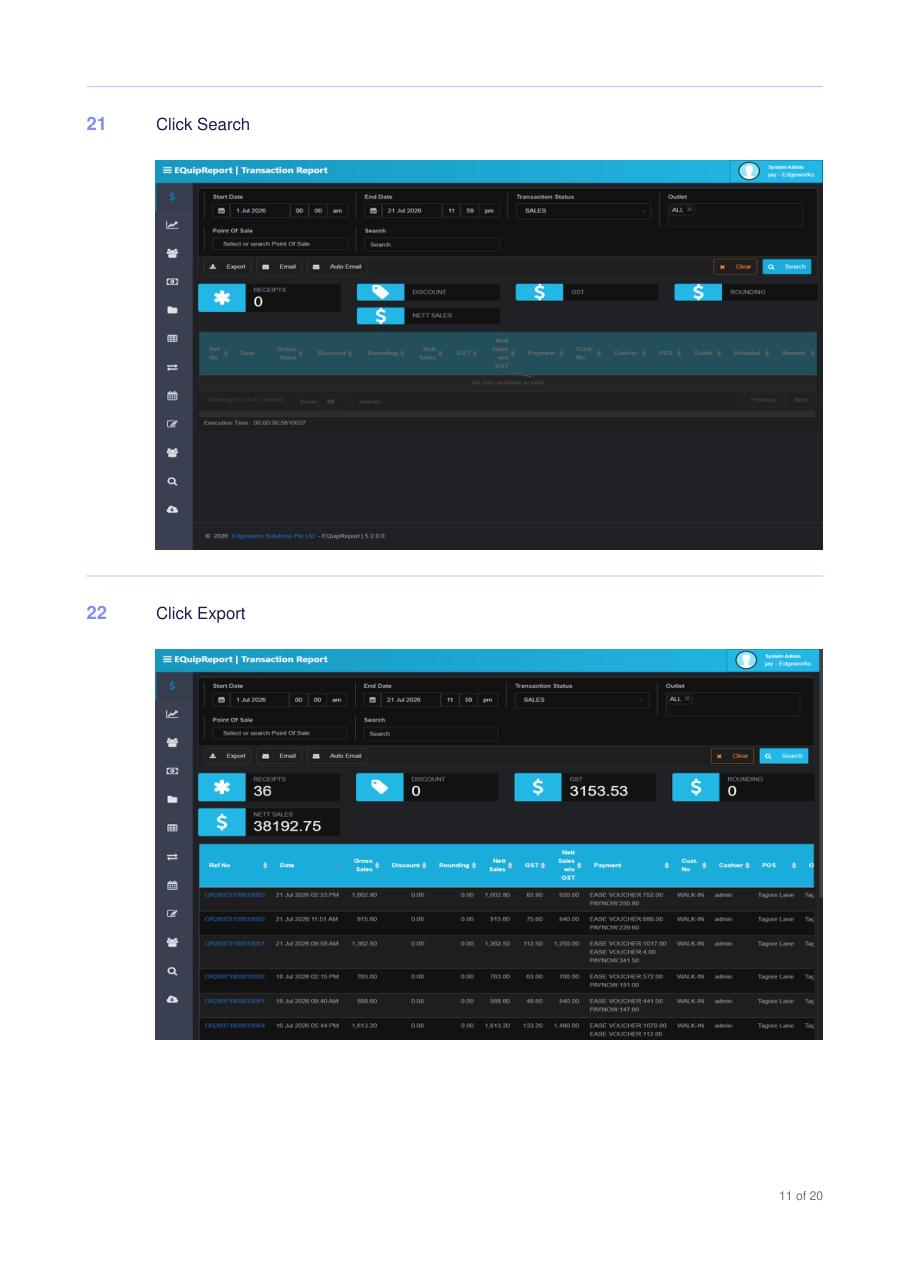
At the top of the Transaction Report page, set the filters you need, then click Search:
- Start Date / End Date — the reporting period.
- Transaction Status — choose SALES, VOIDED, REFUNDED, or ALL.
- Outlet and Point Of Sale — optional; leave blank for all outlets/POS.
- Search field — optional keyword filter (e.g. a reference number).
After searching, the summary cards show Receipts, Discount, GST, Rounding, and Nett Sales, and the table lists each transaction. Use Clear to reset the filters.
3. Export the report
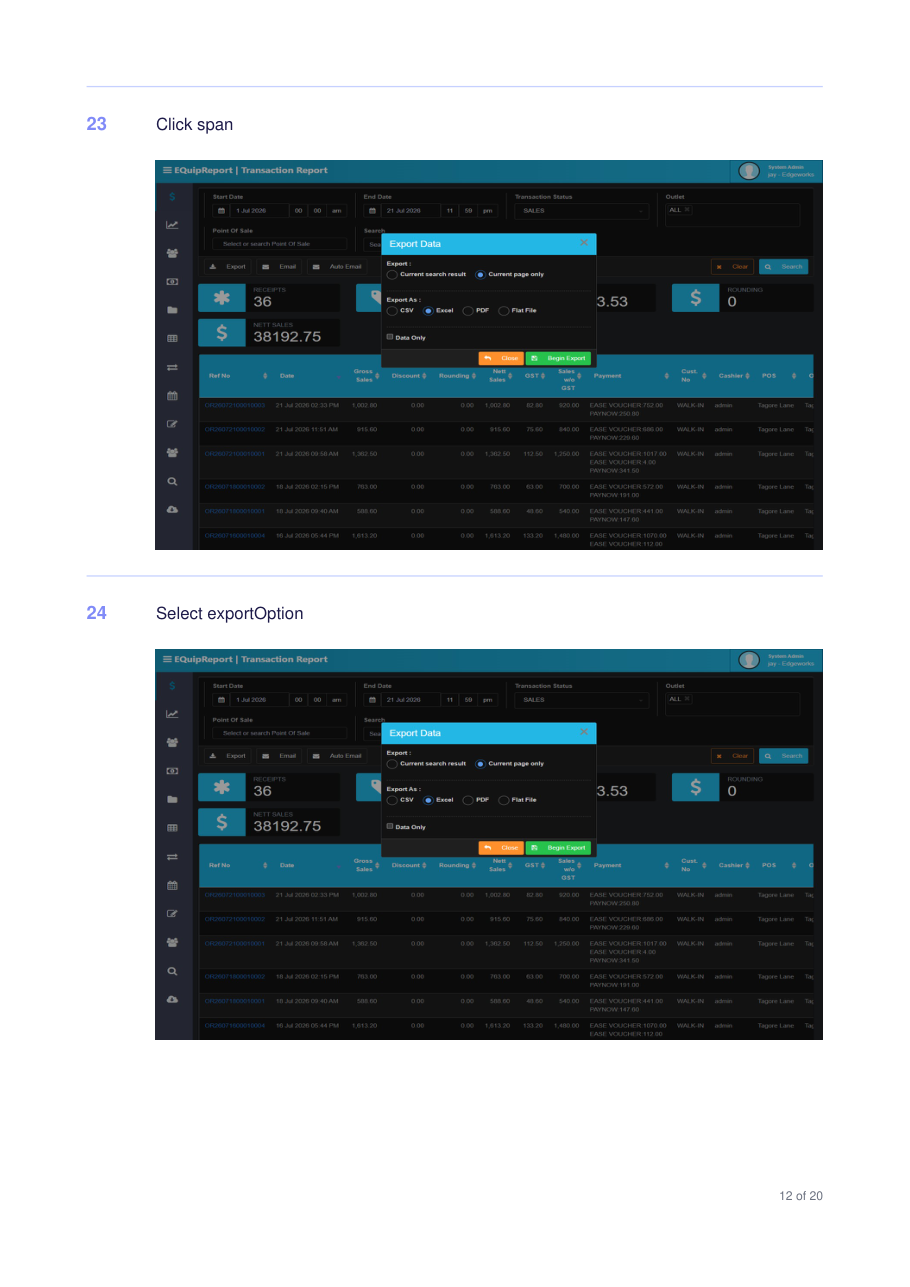
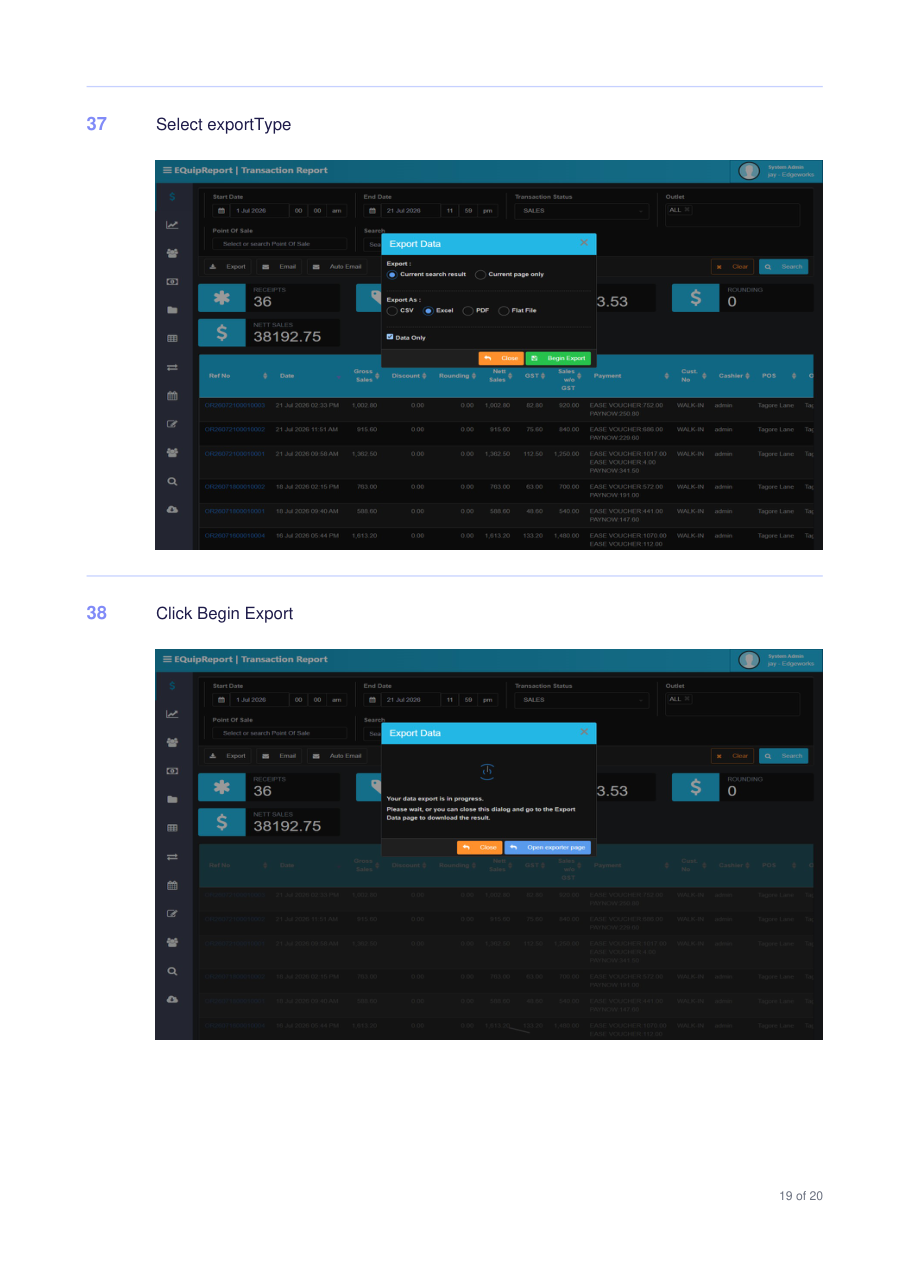
- Click Export to open the Export Data dialog.
- Under Export, choose the scope: Current search result (all matching rows) or Current page only.
- Under Export As, choose the format: CSV, Excel, PDF, or Flat File.
- Optionally tick Data Only to export the raw data without the summary/header layout.
- Click Begin Export.
The export runs in the background. You can wait, or close the dialog and continue working — the file will be ready in your notifications.
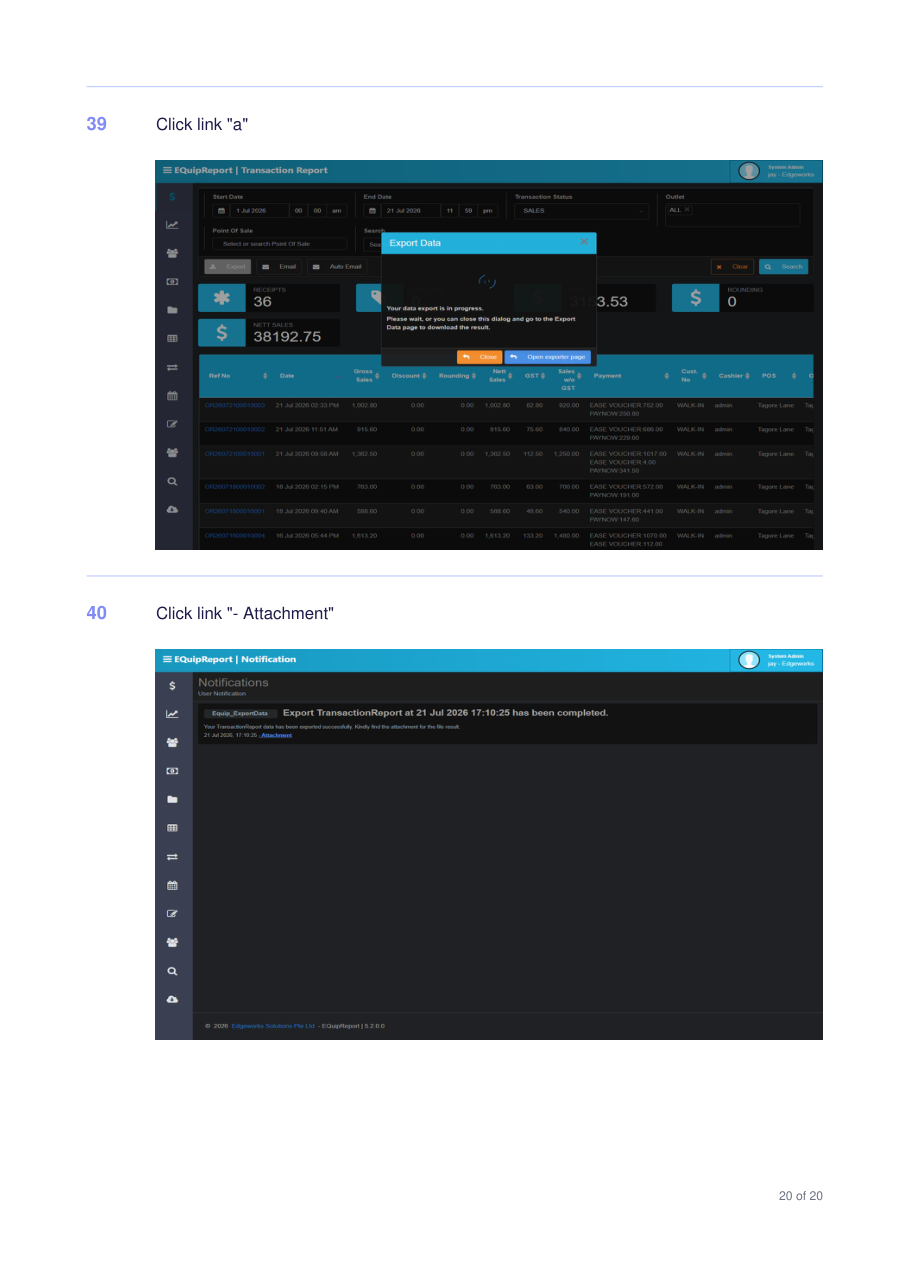
4. Download the exported file
When the export finishes, open the Notifications page. You'll see a message such as “Export TransactionReport … has been completed.” Click the Attachment link to download your file.
Tip: For a full breakdown per line item, use the Transaction Detail Report; for payment-method totals, use the Transaction Payment Report — both are in the same Report Portal menu.
Related Articles
Report Portal Overview
? Report Portal Report Portal — Module Overview and Navigation GuideMain Portal
? Backend — EQuipWebRetail ModeChapter 1: Getting Started Backend Login — Main Portal Dashboard The Main Portal is the first page you see after logging into EQuipWeb. It provides a high-level overview of your business with key metrics, quick-access ...Profile & Account
? Backend — EQuipWebRetail ModeChapter 1: Getting Started Chapter 1: Getting Started — 1.3 Profile & Account Use Account to manage and configure this feature in your EQuipWeb system. The Profile section is accessed from the top-right corner of any ...Data Exporter
? Backend — EQuipWebRetail ModeData Importer & Exporter Chapter 10: Data Importer — 10.8 Data Exporter Use Exporter to manage and configure this feature in your EQuipWeb system. Use the Data Exporter to download your data as spreadsheet files. ...Department Setup
? Backend — EQuipWebRetail ModeProduct Setup Chapter 2: Product Setup — 2.4 Department Setup Use Department Setup to create broad groupings for your products — like "Food & Beverage", "Retail", or "Services". Departments sit above categories, giving ...