Inventory Location Setup
Chapter 8: Master Data Setup — 8.4 Inventory Location Setup
Use Inventory Location Setup to define where your stock is stored — your main warehouse, back-of-store shelving, or outlet display areas. Each location tracks its own stock levels, so you always know exactly where your products are.
When to use this: When you need to add a new stockroom or warehouse, or update an existing inventory location.
Prerequisites
- No prerequisites — inventory locations are foundational setup
Inventory Location List
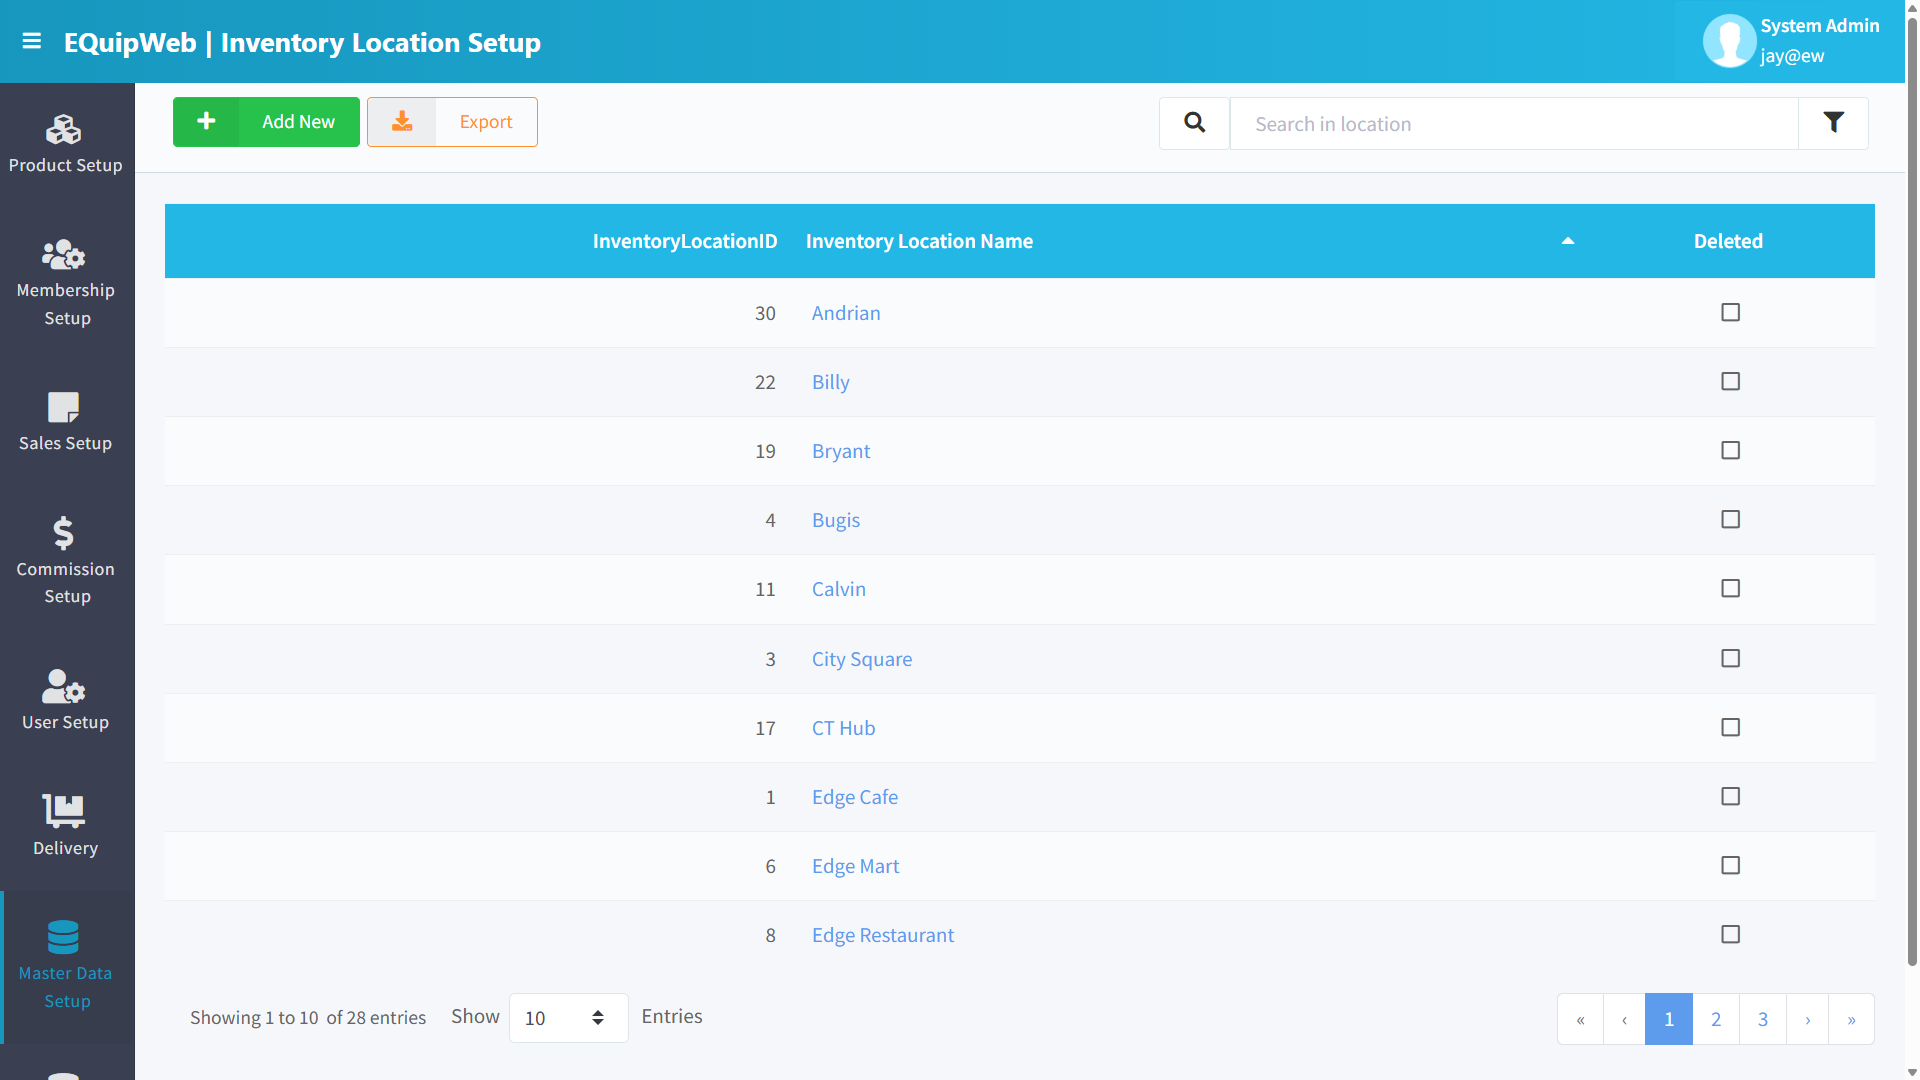
📝 General Description
This page displays a data grid of all configured inventory locations. Inventory locations are a core foundation of the inventory module — they are referenced in every stock-in, stock-out, transfer, stock take, and purchase order operation. Each outlet must be linked to at least one inventory location to manage its stock.
⚙️ UI Elements
| Element | Type | Function |
|---|---|---|
| + Add New | Green Button | Create a new inventory location |
| Export | Orange Button | Export the location list to Excel |
| Search Bar | Text Input | Filter by location name |
| 🔽 Filter | Funnel Icon | Toggle show/hide deleted locations |
8.4.1 Data Grid Columns
| Column | Description |
|---|---|
| Inventory Location Name | Display name of the location (clickable → opens edit form) |
| Inventory Location Group | Group classification if assigned |
| Deleted | Hidden/deleted status |
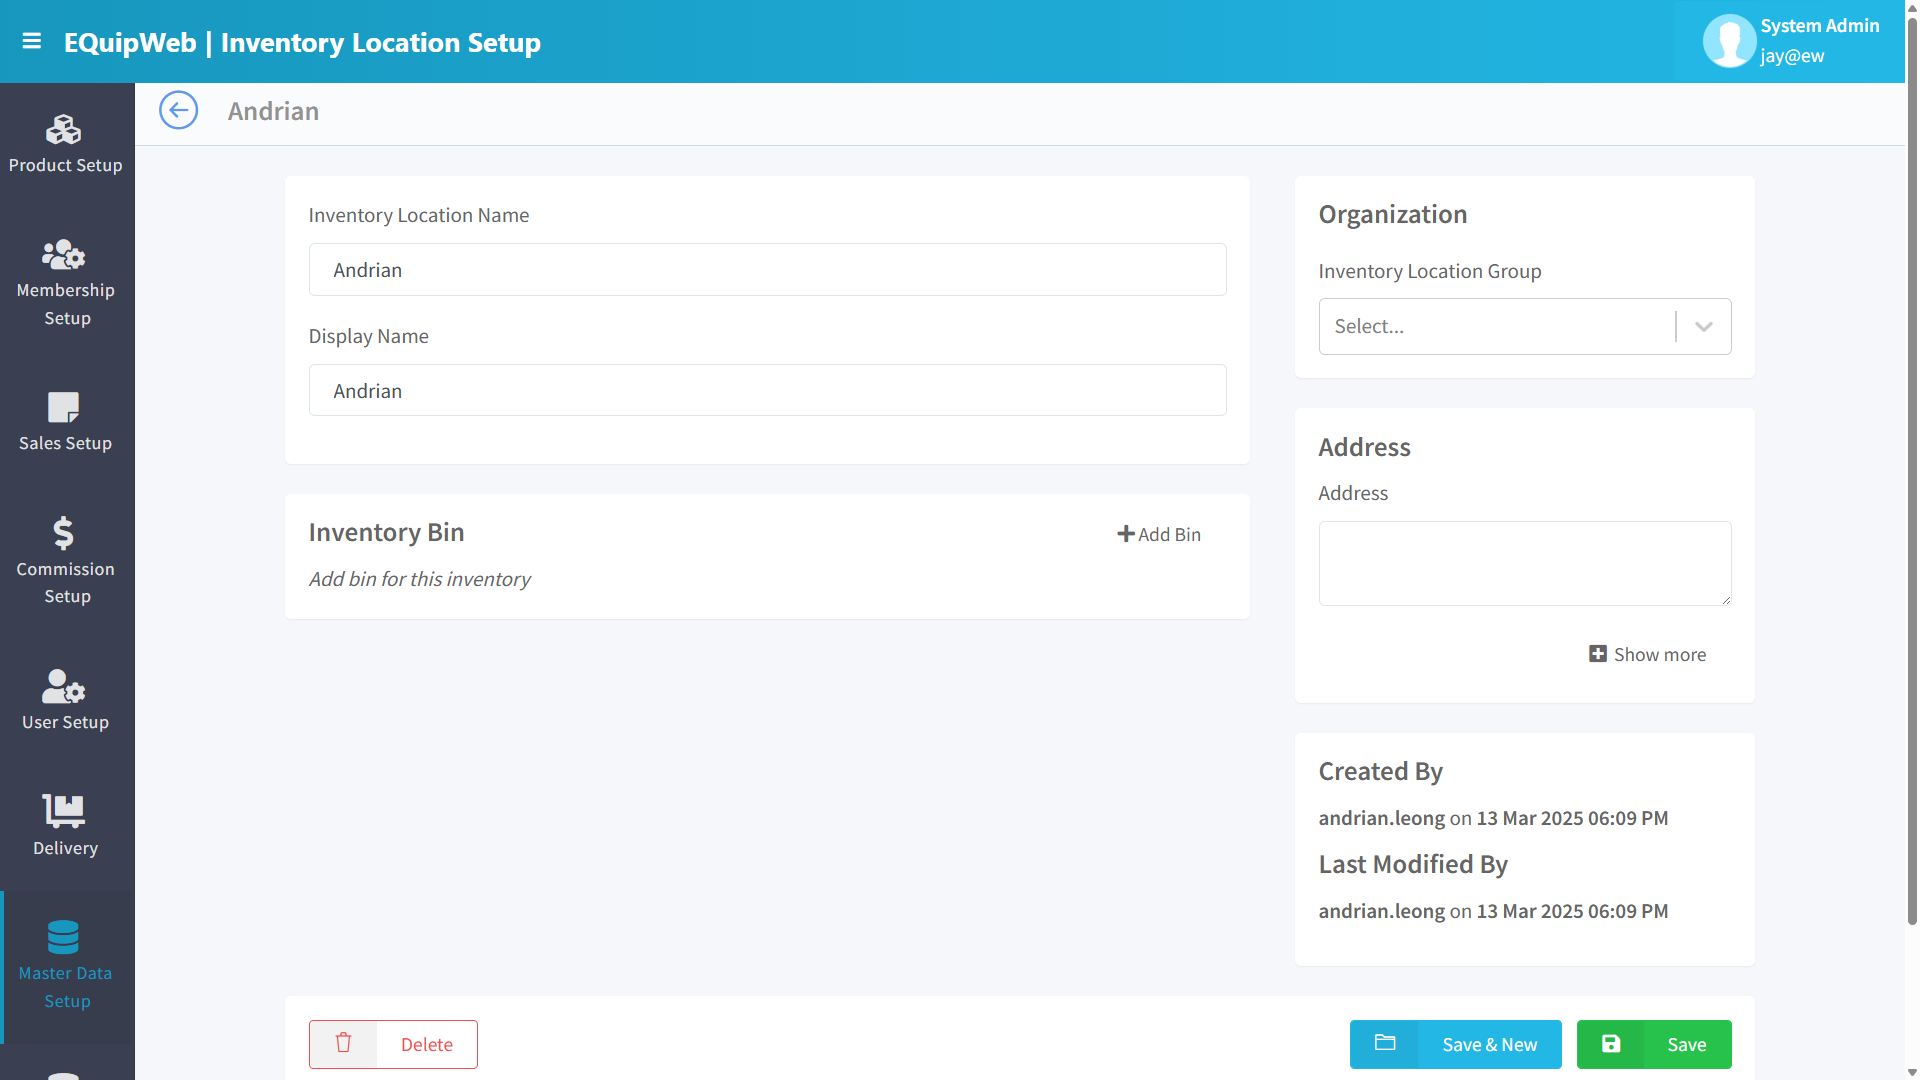
8.4.2 Add / Edit Inventory Location
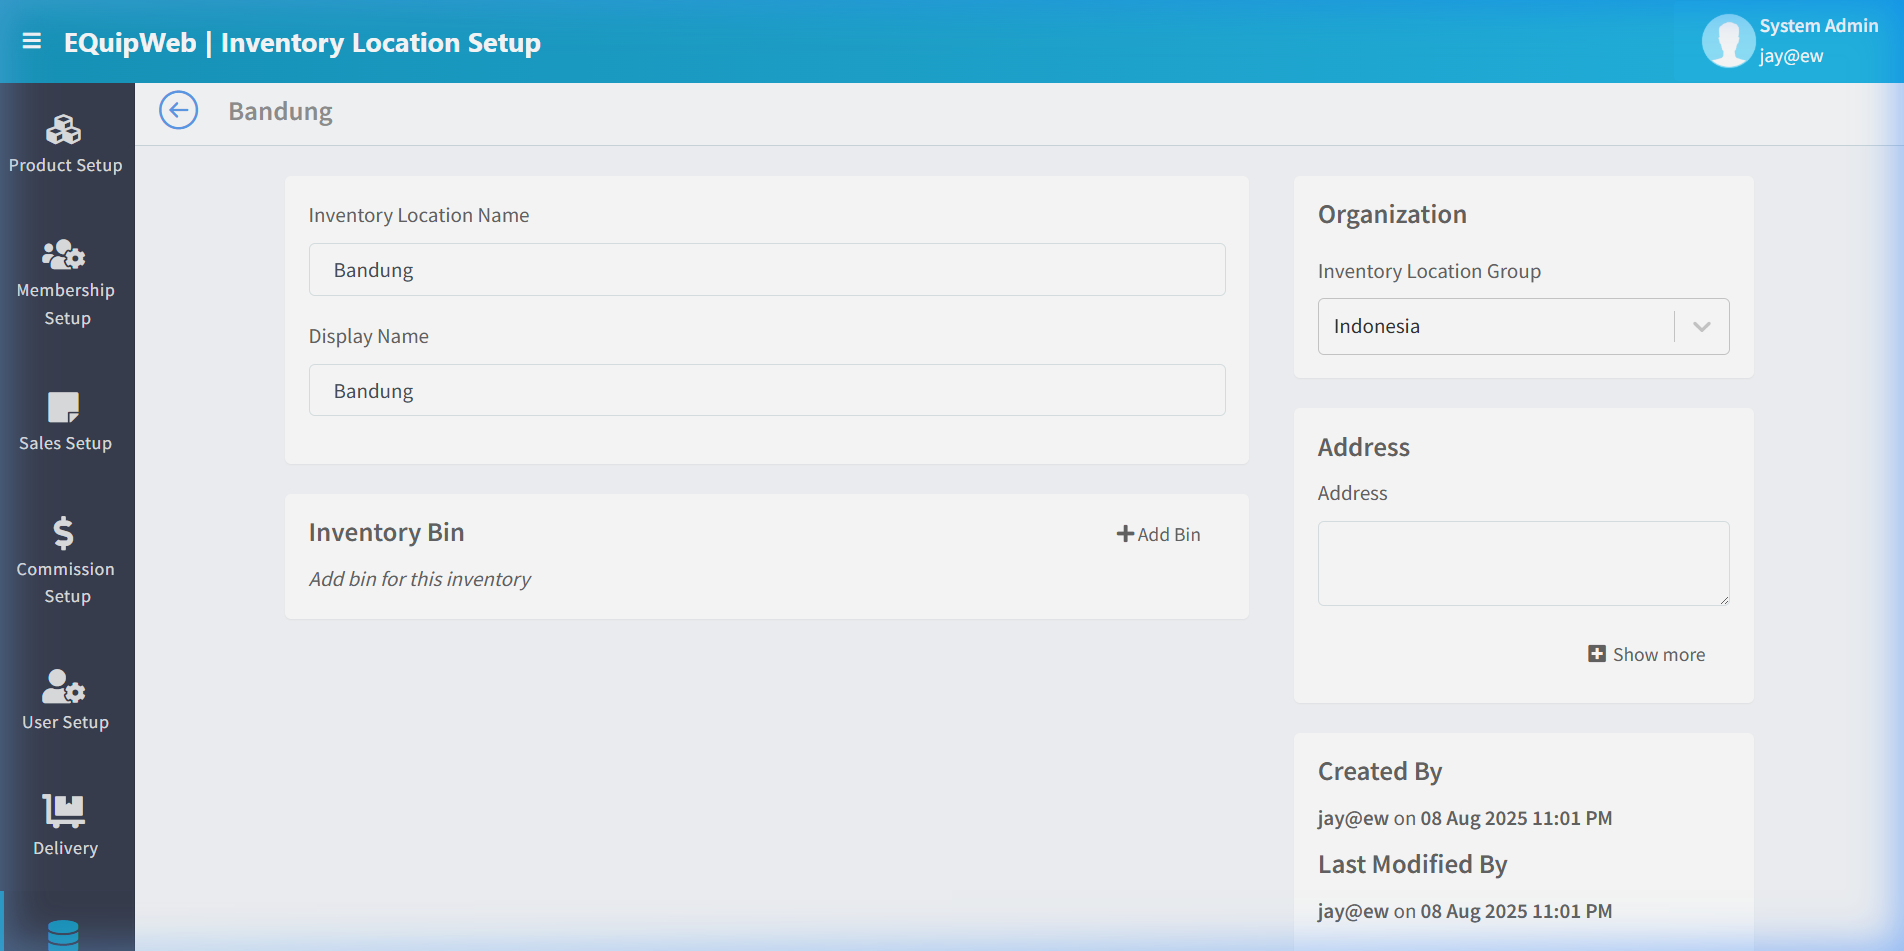
Main Section
| Field | Type | Required | Description |
|---|---|---|---|
| Inventory Location ID | Text | ✅ Yes | Unique identifier (e.g., "HQ", "WH-NORTH", "BANDUNG"). Auto-generated or manually entered. Disabled on edit. |
| Inventory Location Name | Text | ✅ Yes | Display name (e.g., "Headquarters Warehouse", "North Region Store") |
| Display Name | Text | No | Alternative display name for reports and dropdowns |
| Inventory Location Group | Dropdown | No | Assign to a location group (see Section 8.6). Includes a quick-create option to add a new group inline. |
| Sequence | Number | No | Display order in dropdown menus (lower numbers appear first) |
| Partial PO MOQ | Text | No | Minimum order quantity for partial purchase orders at this location |
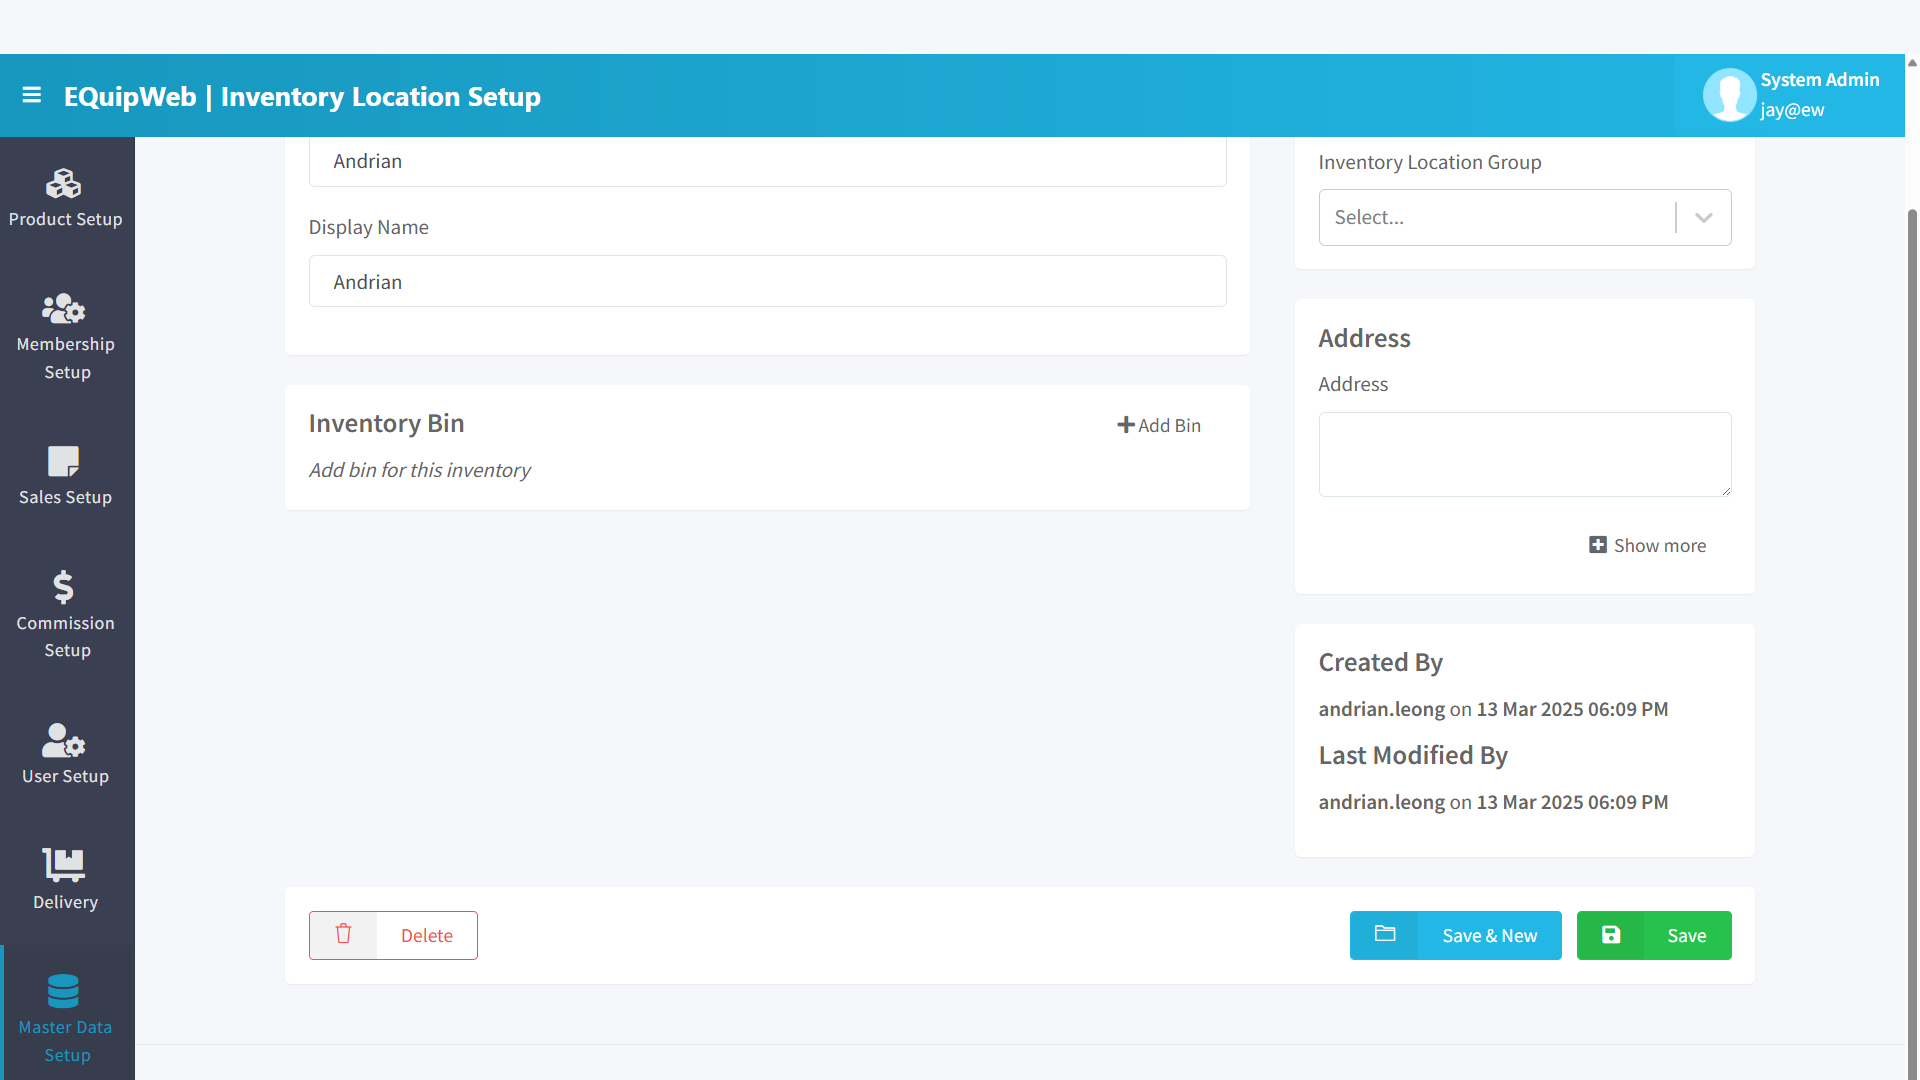
Address Section (Expandable)
| Field | Type | Description |
|---|---|---|
| Address 1 | Text | Primary street address |
| Address 2 | Text | Secondary address line |
| Address 3 | Text | Third address line |
| City | Text | City |
| Country | Text | Country |
| Postal Code | Text | Postal/ZIP code |
| Contact email for this location |
Inventory Bins Section
Inventory bins provide sub-location tracking within a location (e.g., Shelf A, Aisle 3, Cold Storage). This is optional and used for warehouses that need granular stock positioning.
| Column | Description |
|---|---|
| Bin Name | Name of the bin/sub-location (e.g., "SHELF-A1", "COLD-01") |
| Description | Description of the bin's purpose or physical location |
| Element | Function |
|---|---|
| + Add Bin | Add a new inventory bin to this location |
| Delete Bin | Remove a bin (existing stock in the bin must be moved first) |
Actions
| Button | Function |
|---|---|
| Save | Saves the location record |
| Save & New | Saves and opens a blank form |
| Delete | Removes the location (hidden from inventory operations) |
| Restore | Restores a deleted location |
8.4.3 Where Inventory Locations Are Used
| Module | Usage |
|---|---|
| Outlet Setup | Each outlet is linked to one or more inventory locations via the "Inventory Location" dropdown |
| Stock In | Select the destination inventory location when receiving goods |
| Stock Out | Select the source location when issuing stock out |
| Stock Transfer | Move stock between two inventory locations |
| Stock Take | Count and reconcile stock at a specific location |
| Purchase Order | Specify the receiving location for incoming orders |
| Stock Template | Define default source/destination locations for template-based operations |
| Warehouse Mapping | Map inventory locations to product-specific warehouses |
8.4.4 Outlet–Location Relationship
Each outlet can be linked to one or more inventory locations. The relationship is configured in Outlet Setup (Section 8.1).
Outlet "MGL Store"
  └── Linked to Inventory Location "MGL-MAIN" (primary stock)
  └── Linked to Inventory Location "MGL-BACKROOM" (overflow/secondary)

Outlet "ION Orchard"
  └── Linked to Inventory Location "ION-MAIN"
[!NOTE] The primary inventory location is used as the default for all POS stock deduction. Secondary locations require manual selection during stock operations.
💡 Example
Scenario: A retailer opens a new outlet in Bandung, Indonesia and needs to set up its warehouse.
Setup:
- Navigate to Inventory Location Setup → Click + Add New.
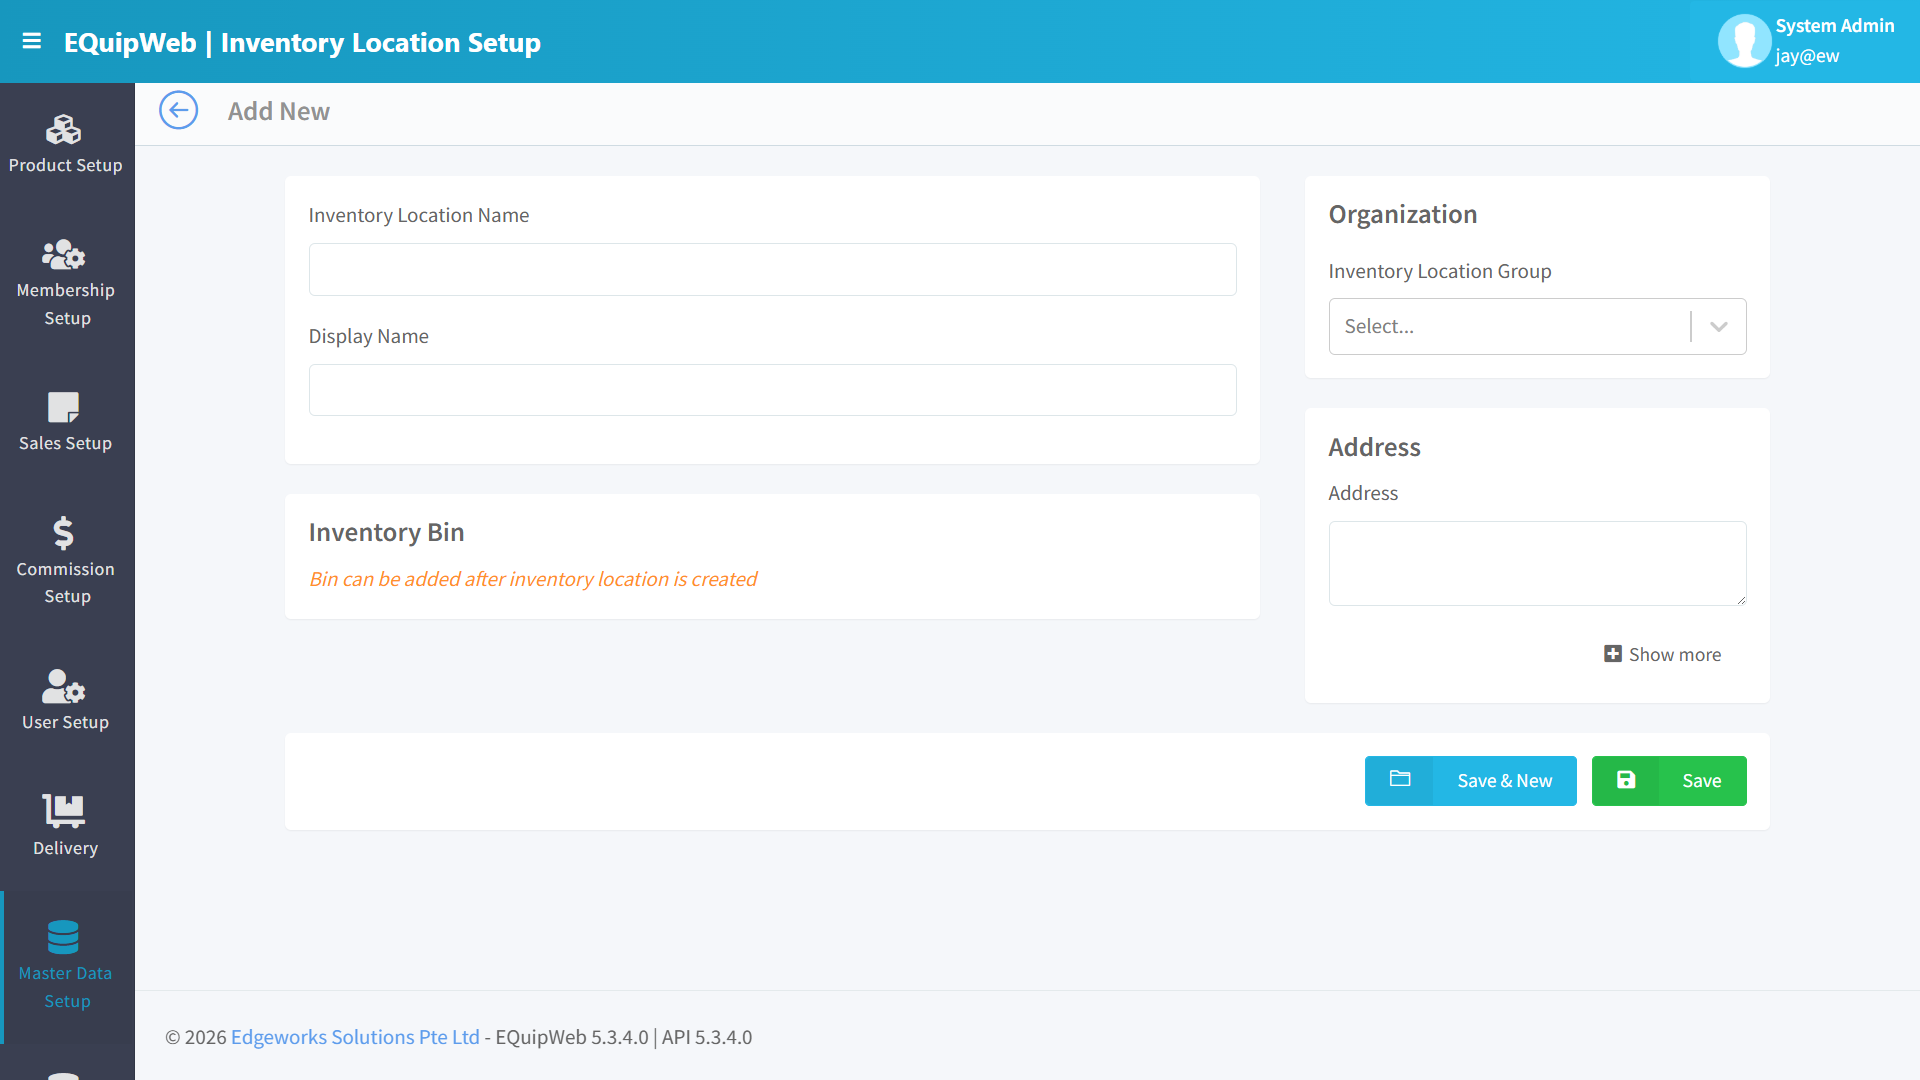 2. Fill in:
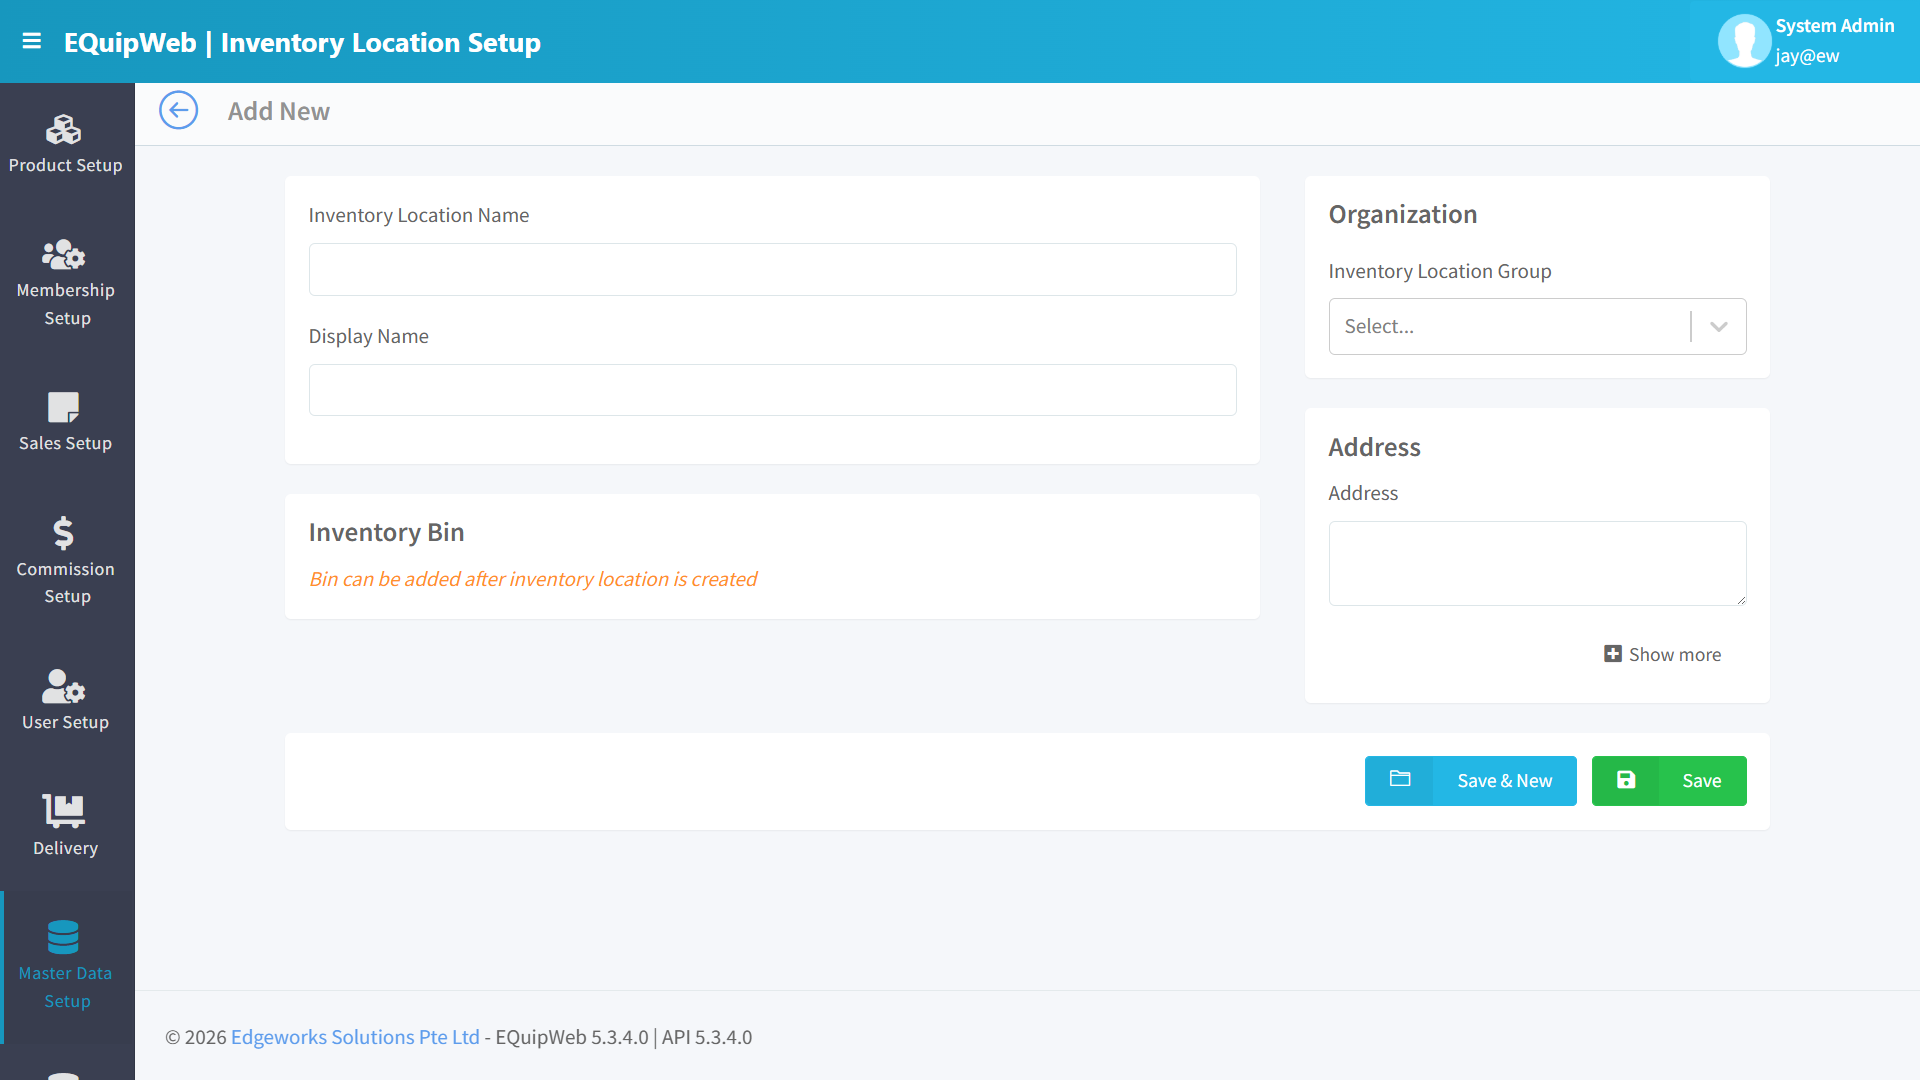
- Location ID:
BDG-WH - Location Name:
Bandung Warehouse - Location Group:
Indonesia(create group if needed) - Sequence:
10
- Expand the Address section:
- Address 1:
Jl. Braga No. 99 - City:
Bandung - Country:
Indonesia - Postal Code:
40111
- Address 1:
- Click Save.
Expected Result: The inventory location is saved and can be linked to outlets.
 5. Go to Outlet Setup (Section 8.1) → Edit the Bandung outlet → Set Inventory Location to "Bandung Warehouse".
 6. The new location is now available for all inventory operations (Stock In, Stock Out, Transfer, Stock Take).
[!TIP] Use the Inventory Bins feature if your warehouse has a structured layout (e.g., rows of shelving, cold storage vs. dry storage). Bins allow staff to quickly locate products during stock take or fulfillment. For small outlets with simple stockrooms, bins are not necessary.
[!WARNING] Deleting an inventory location that has existing stock records will soft-delete it but not move or zero out the stock. Always transfer or reconcile stock before deactivating a location.
Access & Permissions
| Role | View | Create | Edit | Delete |
|---|---|---|---|---|
| Admin | Yes | Yes | Yes | Yes |
| Supervisor | Yes | Yes | Yes | No |
| Cashier | No backend access | — | — | — |
[!NOTE] Exact permissions depend on the Privileges Setup configured for each role. Contact your administrator if you cannot access this page.
How to Add a New Inventory Location
- Navigate to Inventory Location Setup from the sidebar menu.
-
Click the + Add New button (green button).
-
Fill in the required fields in the form.
-
Fill in any optional fields as needed.
-
Click Save to create the new inventory location.
✅ Expected Result: The new inventory location appears in the list and is available for use across the system.
How to Edit a Inventory Location
- Navigate to Inventory Location Setup from the sidebar menu.
-
Click on the name or code link (blue text) of the record you want to edit.
-
The edit form opens with all current values pre-filled. Modify the fields as needed.
- Click Save to apply your changes.
✅ Expected Result: The inventory location is updated and changes take effect immediately.
How to Delete a Inventory Location
- Navigate to Inventory Location Setup from the sidebar menu.
-
Click on the name or code link (blue text) of the record you want to delete.
-
In the edit form, scroll down to the bottom.
- Click the Delete button (red button).
- A confirmation dialog appears — click Yes to confirm.
✅ Expected Result: The inventory location is soft-deleted — hidden from active lists and POS but can be restored later.
[!WARNING] Records linked to active transactions or other modules cannot be deleted. The system will display an error if deletion is not allowed.
FAQ
Q: Can I delete an outlet that has transaction history? A: You can soft-delete it, but it cannot be permanently removed if it has linked transactions or POS terminals.
Q: Why are changes not showing on the POS terminal? A: The POS needs to sync. Check Terminal Status for the last sync time and trigger a manual sync if needed.
Q: What happens if I change the company name? A: The change will appear on all new receipts after the next POS sync. Existing printed receipts are not affected.
Troubleshooting
| Issue | Possible Cause | Solution |
|---|---|---|
| Cannot save the record | Required fields are empty or invalid | Check all fields marked with * and fill in valid data |
| Record not appearing in POS | POS terminal has not synced yet | Wait for the next sync cycle or manually trigger sync from Terminal Status |
| Cannot delete the record | Record is being used by other modules | Check if the record is linked to active transactions, products, or other settings |
| Changes not taking effect | Browser cache showing old data | Refresh the page (Ctrl+F5) or clear browser cache |
| "Duplicate" error on save | A record with the same name/code already exists | Search the list (including deleted records) for duplicates |
| Page not loading | Session expired or network issue | Log out and log back in. Check your internet connection |
Related Menus
- Product Setup > Product List — products linked to outlets
- User Setup > User List — users assigned to outlets
- Sales Setup > Payment Mode — payment methods per outlet
- Setting > Company Setup — company-wide settings
Open Questions / Confirmation Needed
[!NOTE] The following items may vary depending on your system version and configuration:
- Exact permission settings depend on your Privileges Setup configuration
- Sync timing to POS terminals depends on network conditions and sync schedule
- Some features may require additional licensing or module activation
- Field behavior may differ between EQuip versions
If you encounter behavior not described in this manual, contact your system administrator or EQuip support team.
Related Articles
Inventory Location Group Setup
? Backend — EQuipWebRetail ModeMaster Data Setup Chapter 8: Master Data Setup — 8.6 Inventory Location Group Setup Use Inventory Location Group Setup to organize your storage locations into groups — like grouping all "Back of Store" locations ...Outlet Setup
? Backend — EQuipWebRetail ModeMaster Data Setup Chapter 8: Master Data Setup — 8.3 Outlet Setup Use Outlet Setup to add and manage your store locations. Each outlet has its own address, contact details, operating hours, and receipt settings. When ...Webhook Setup
? Backend — EQuipWebRetail ModeSetting Chapter 12: Setting — 12.1 Webhook Setup Use Webhook Setup to send automatic notifications to external systems when something happens in EQuip — like a new sale, a stock update, or a member registration. This ...Product Setup
? Backend — EQuipWebRetail ModeProduct Setup Chapter 2: Product Setup — 2.1 Product List The Product List is where you see all your products in one place. From here, you can search, filter, edit, or delete any product. Think of it as your master ...Setup Module Overview
? Backend — EQuipWebRetail ModeChapter 1: Getting Started Backend Setup — Module Overview and Getting Started Guide The Setup Overview provides a quick-reference guide for initial system configuration. This page summarizes the recommended setup ...