Navigation & Sidebar
Chapter 1: Getting Started — 1.4 Navigation & Sidebar
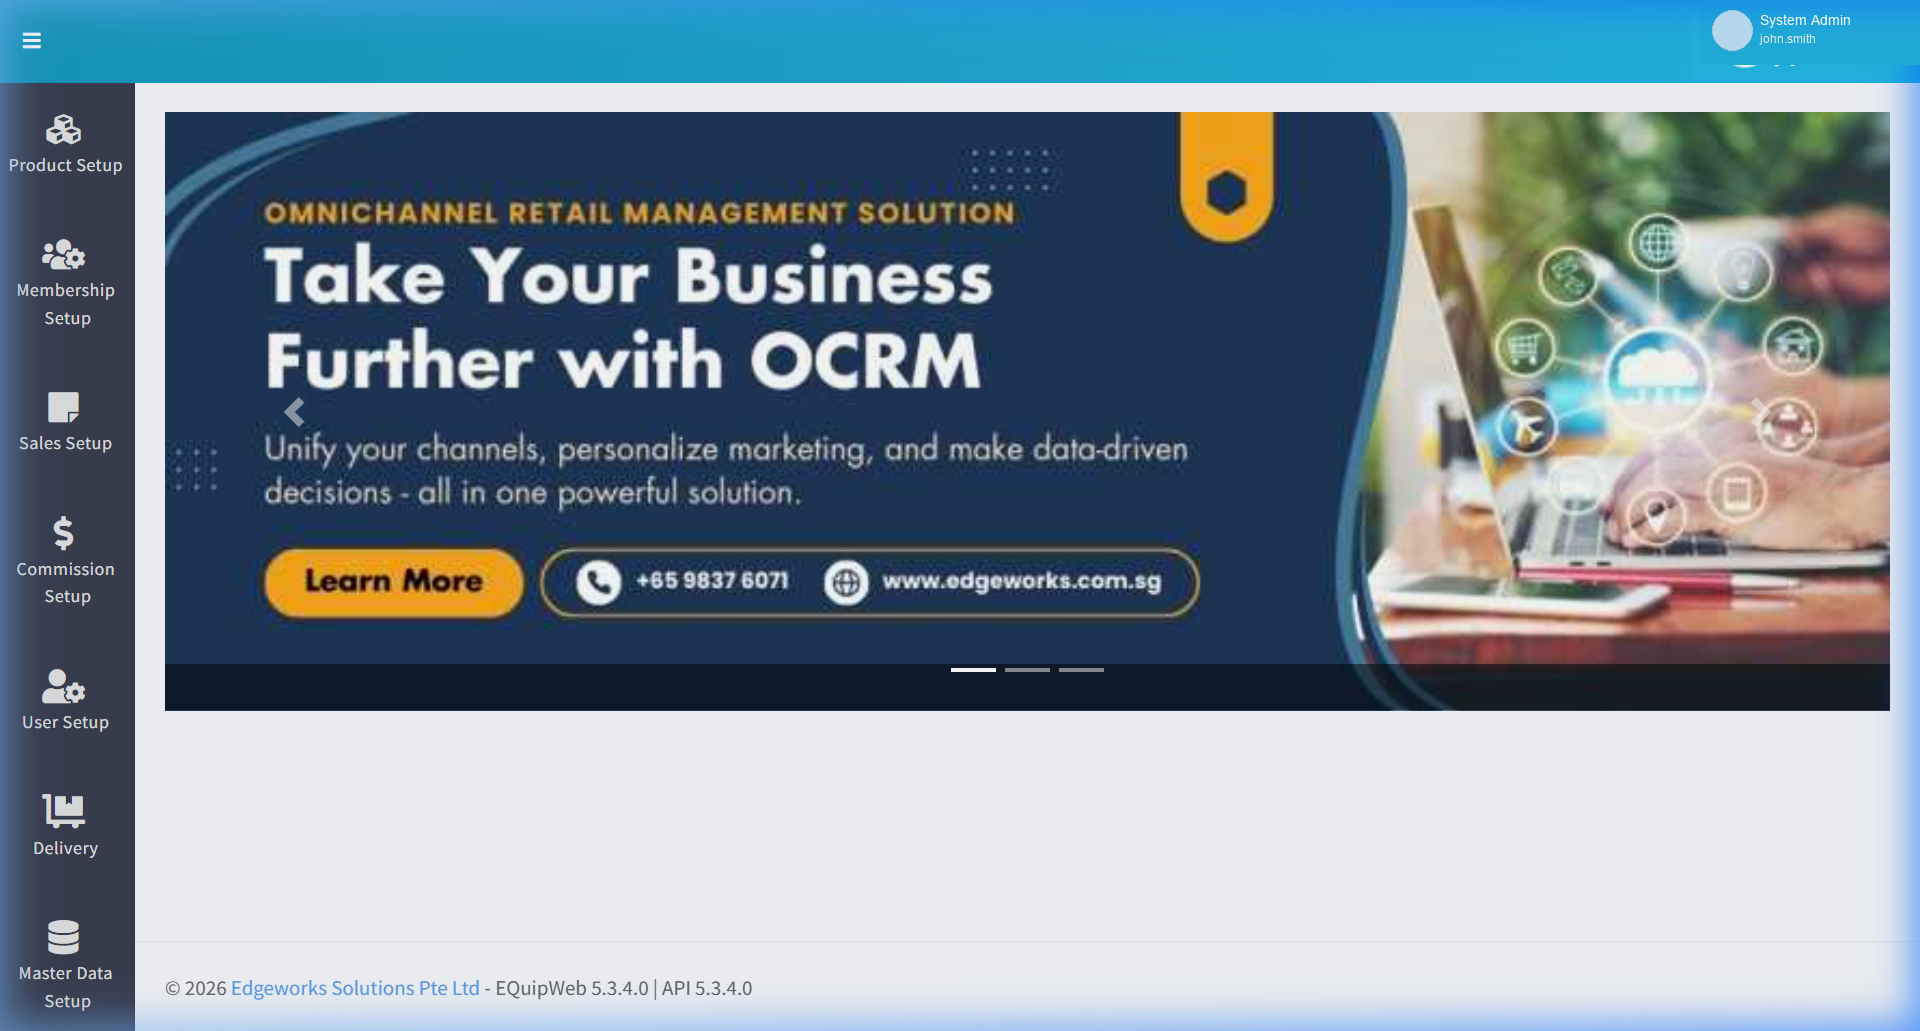
The sidebar is the primary navigation tool in EQuipWeb. It appears on the left side of every page and provides access to all 11 modules and their sub-pages.
When to use this: When you need help finding a menu or feature in EQuipWeb.
Prerequisites
- User must have appropriate role permissions (see Access & Permissions above)
Sidebar Overview
📝 General Description
The sidebar shows 11 module icons stacked vertically. Each icon has a label below it. When you hover over an icon, a flyout sub-menu appears showing all pages within that module. Clicking a sub-menu item navigates you to that page.
📋 Complete Module List (Top to Bottom)
| # | Icon | Module Name | Pages | Description |
|---|---|---|---|---|
| 1 | 🔧 | Product Setup | 16 | Products, categories, departments, promotions, bundles, attributes |
| 2 | 👥 | Membership Setup | 8 | Members, groups, benefits, campaigns, referrals, store value cards |
| 3 | 💳 | Sales Setup | 11 | Payment modes, discounts, GST, currencies, vouchers, online sales |
| 4 | 💰 | Commission Setup | 1 | Sales commission plan configuration |
| 5 | 👤 | User Setup | 5 | Users, roles, privileges, locked accounts |
| 6 | 🚚 | Delivery | 1 | Delivery order management |
| 7 | 🏢 | Master Data Setup | 15 | Outlets, POS terminals, suppliers, locations |
| 8 | 📱 | QR Online Ordering Setup | 5 | QR ordering, online menu, promotions, payment gateway |
| 9 | 🍽️ | Menu Management | 2 | Menu builder, time windows |
| 10 | 📥 | Data Importer & Exporter | 8 | Bulk import/export for products, members, promotions |
| 11 | ⚙️ | Setting | 8 | Feature flags, POS settings, webhooks, company setup |
How to Navigate
- Find the module you need in the sidebar on the left side.
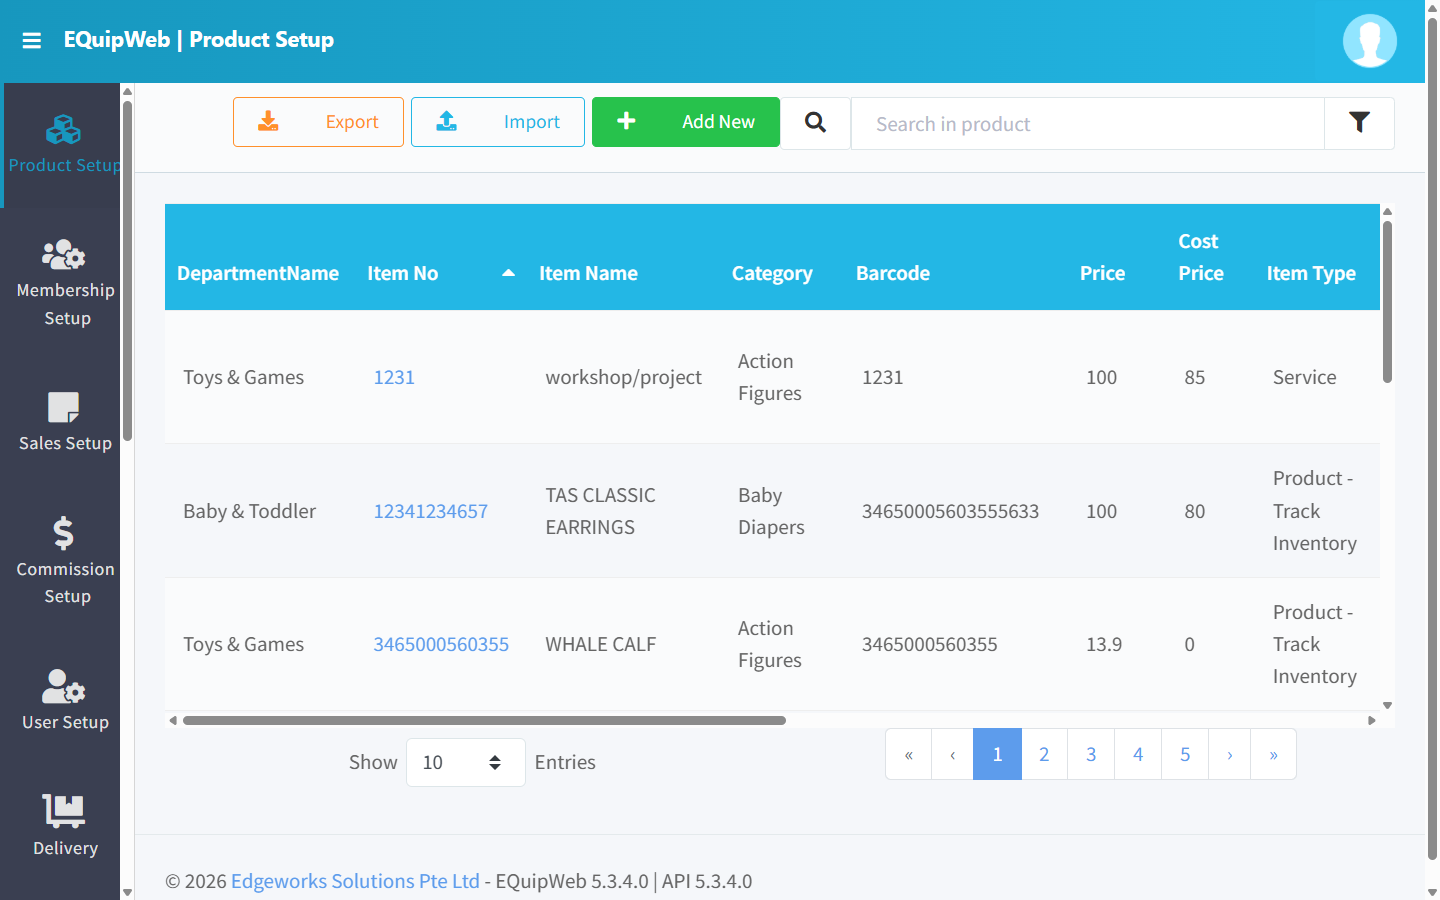
- Hover over the module icon — a flyout sub-menu appears showing all pages.
- Click the page you want to open.
Flyout Sub-Menu
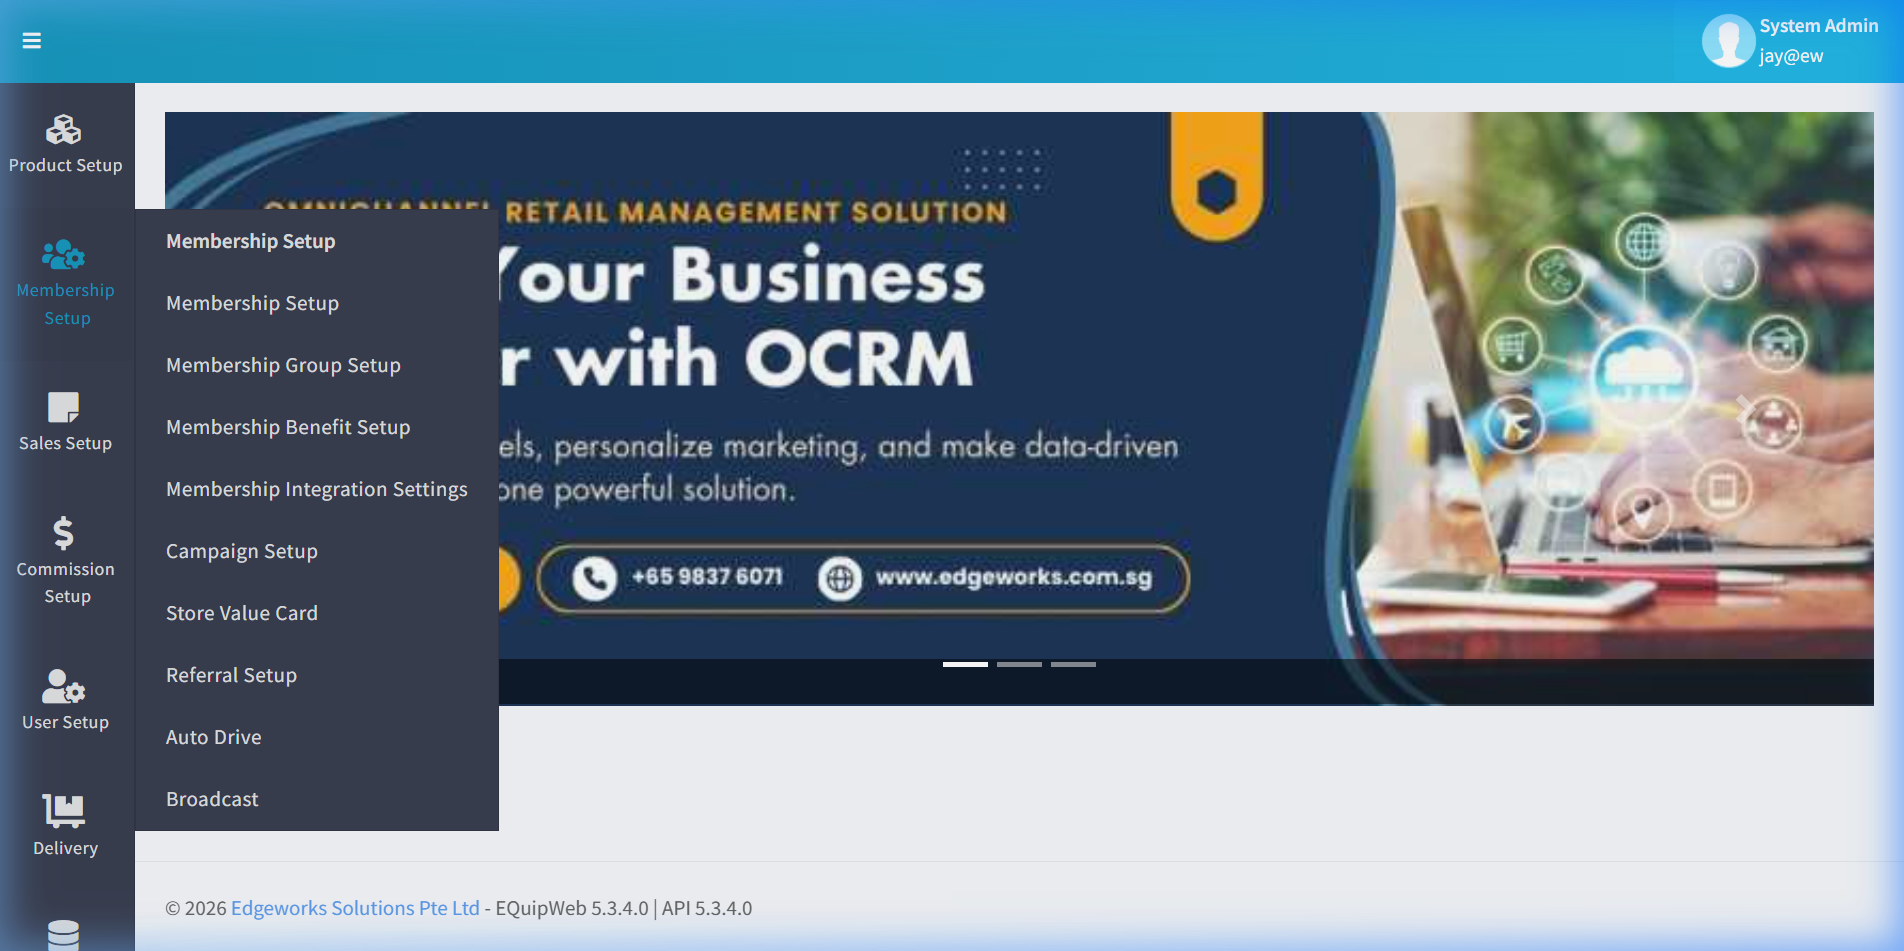
When you hover over a module icon, a flyout menu appears to the right showing all sub-pages.
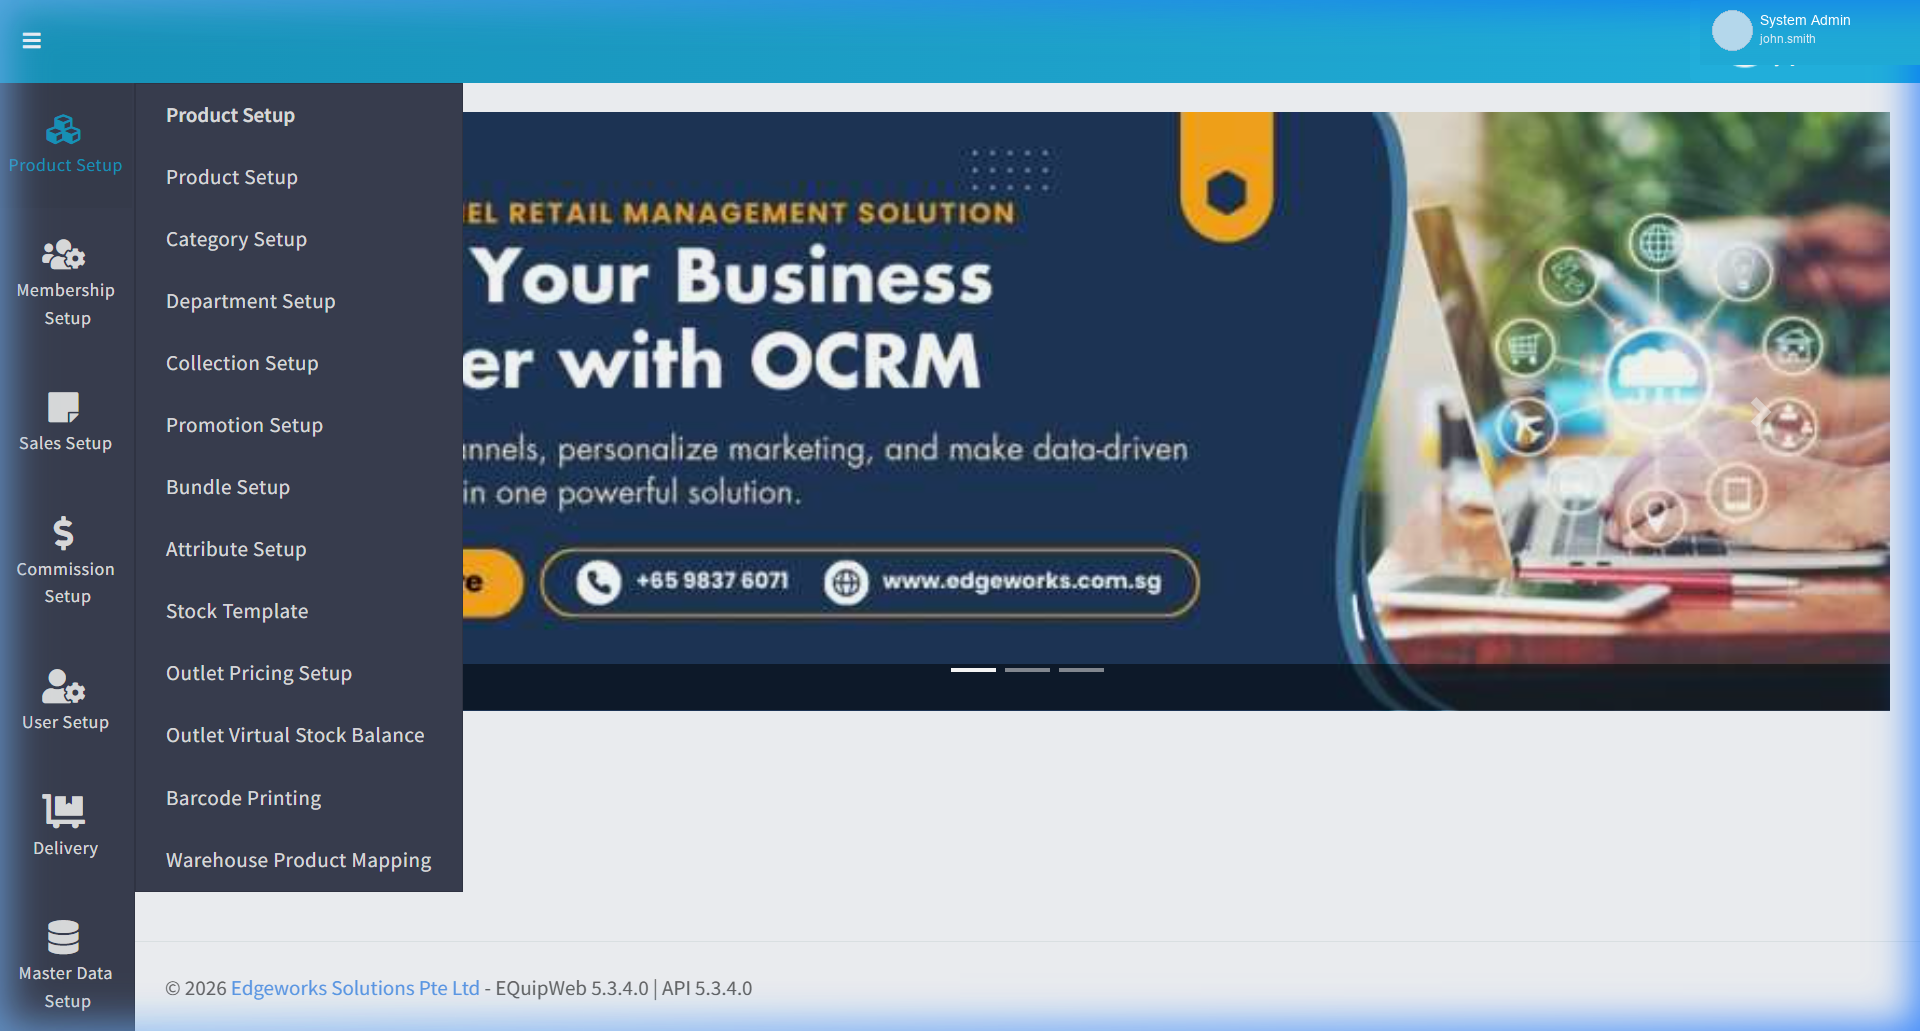
In the screenshot above, the Product Setup flyout shows:
| Sub-Page | Chapter Reference |
|---|---|
| Product Setup (list) | 2.1 Product List |
| Category Setup | 2.6 Category Setup |
| Department Setup | 2.7 Department Setup |
| Collection Setup | 2.10 Collection Setup |
| Promotion Setup | 2.15 Promotion Setup |
| Bundle Setup | 2.8 Bundle Setup |
| Attribute Setup | 2.9 Attribute Setup |
| Stock Template | 2.16 Stock Template |
| Outlet Pricing Setup | 2.17 Outlet Pricing |
| Outlet Virtual Stock Balance | 2.18 Virtual Stock |
| Barcode Printing | 2.14 Barcode Printing |
| Warehouse Product Mapping | 2.19 Warehouse Mapping |
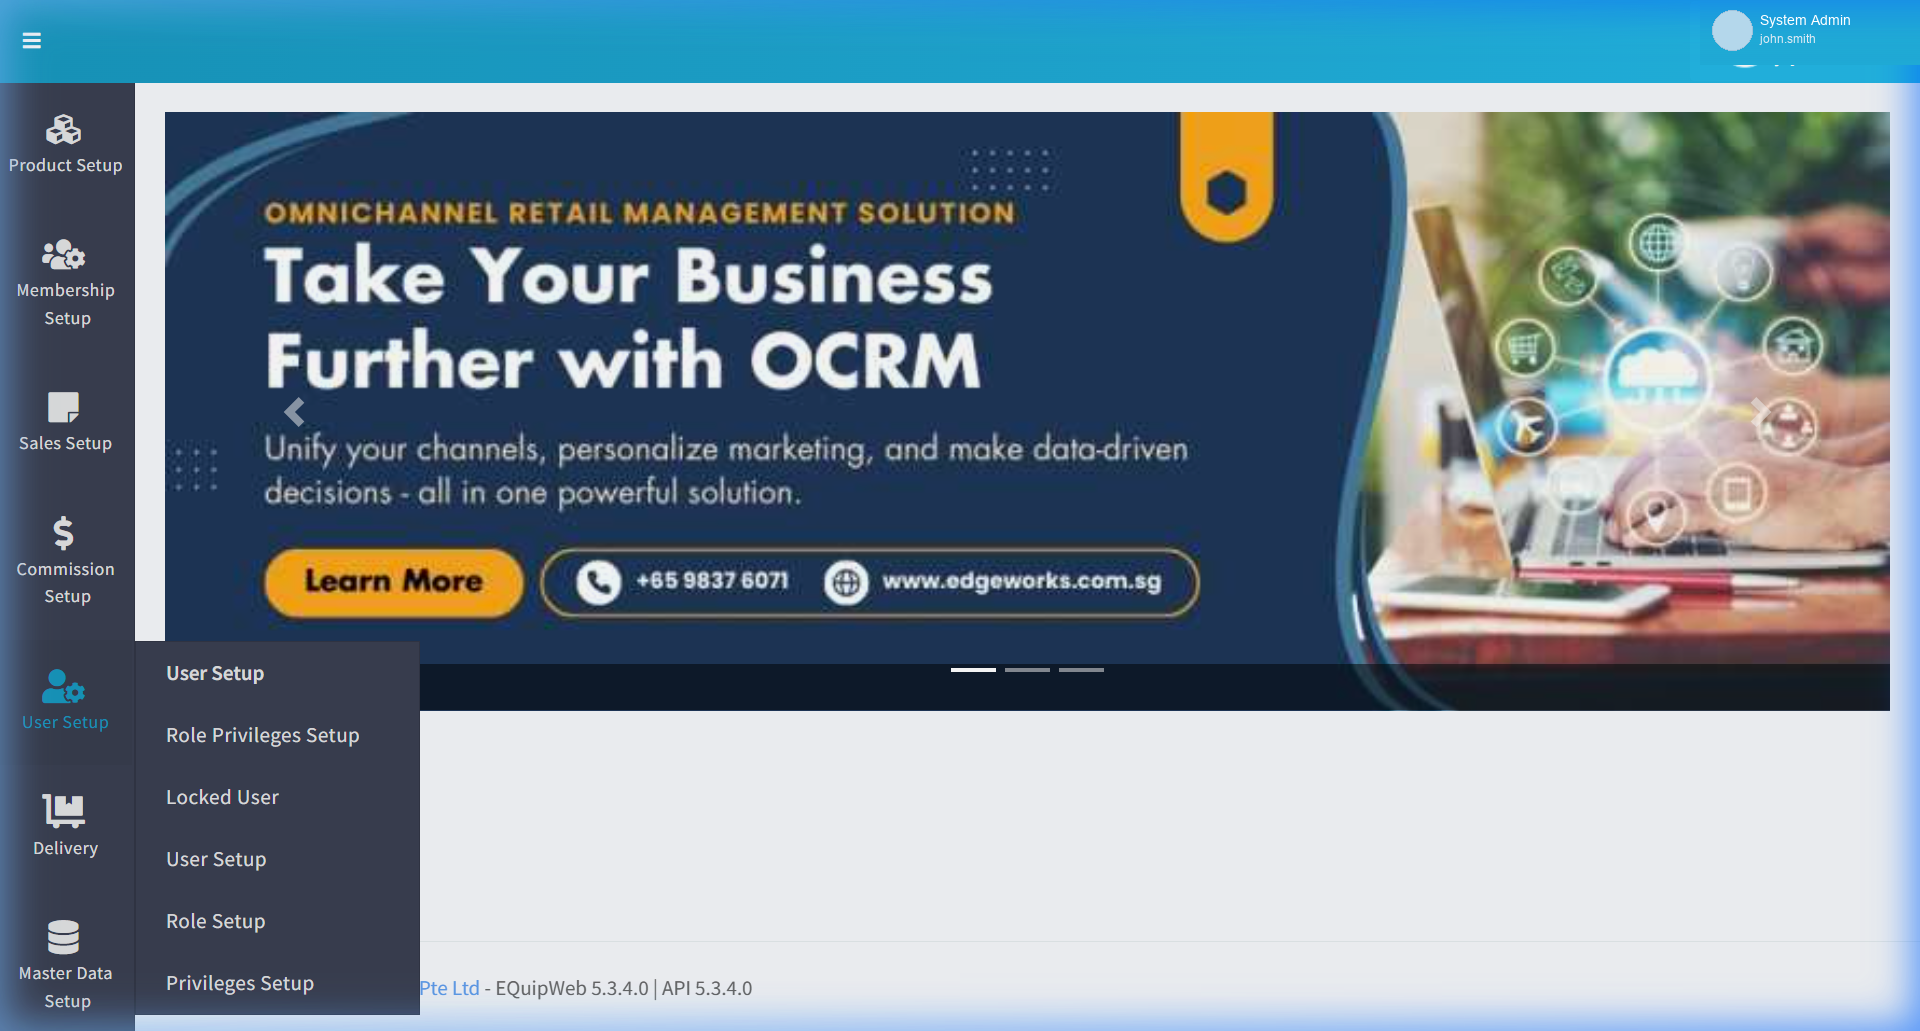
Here is the User Setup flyout as another example:
Navigation Actions
| Action | How | Result |
|---|---|---|
| Open a page | Hover icon → Click sub-menu item | Page loads in the main content area |
| Toggle sidebar | Click the hamburger menu ☰ (top-left) | Sidebar shows/hides — useful for more screen space |
| Return to Home | Click any empty area or navigate to /home | Returns to Dashboard |
| Know your location | Look at the header bar title | Shows current page name (e.g., "EQuipWeb | Product List") |
Common UI Patterns (Across All Pages)
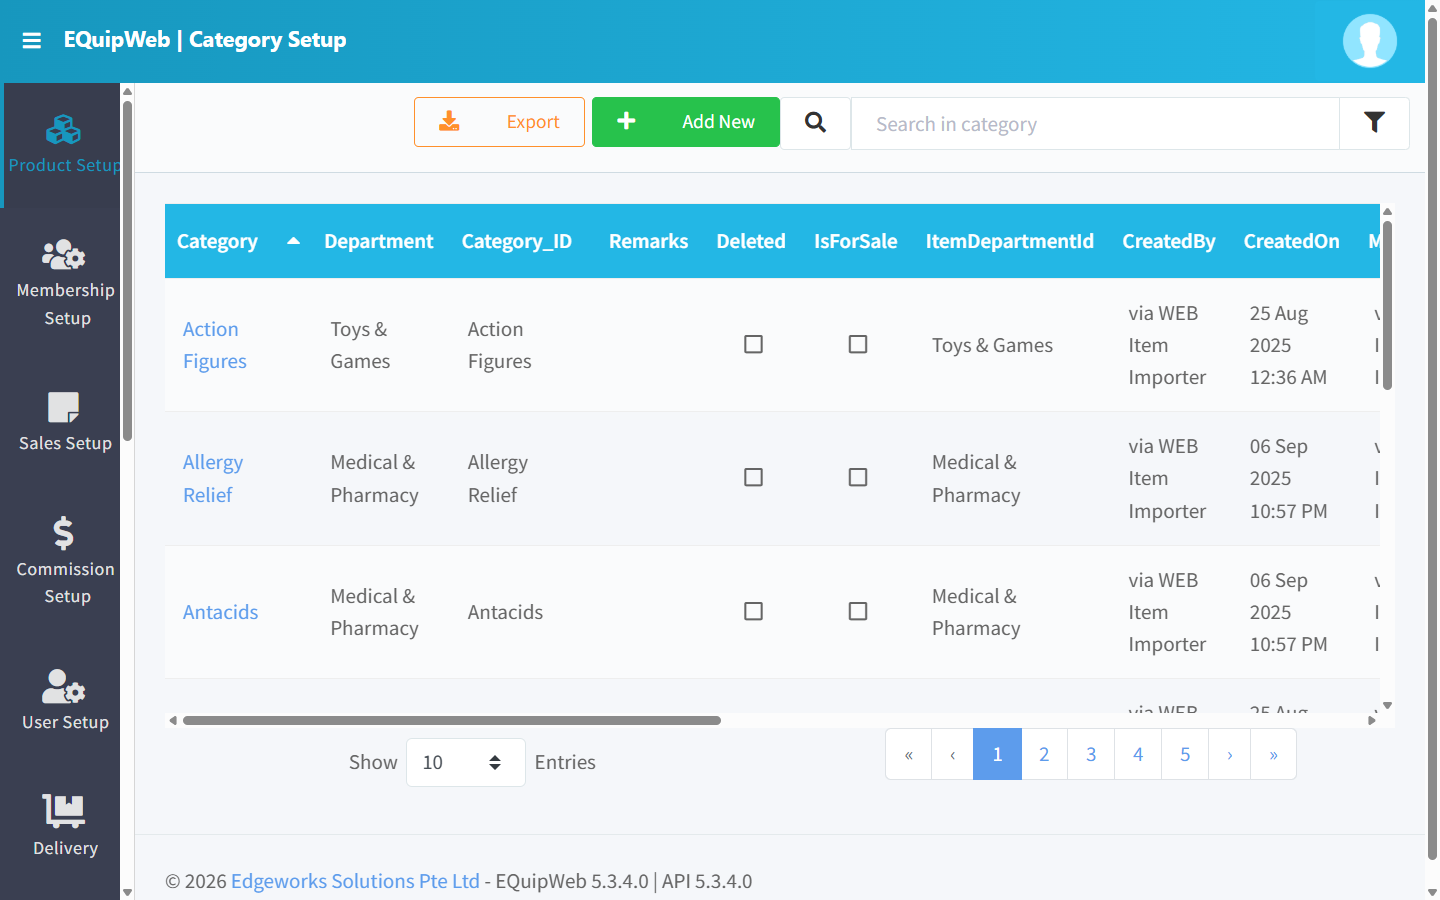
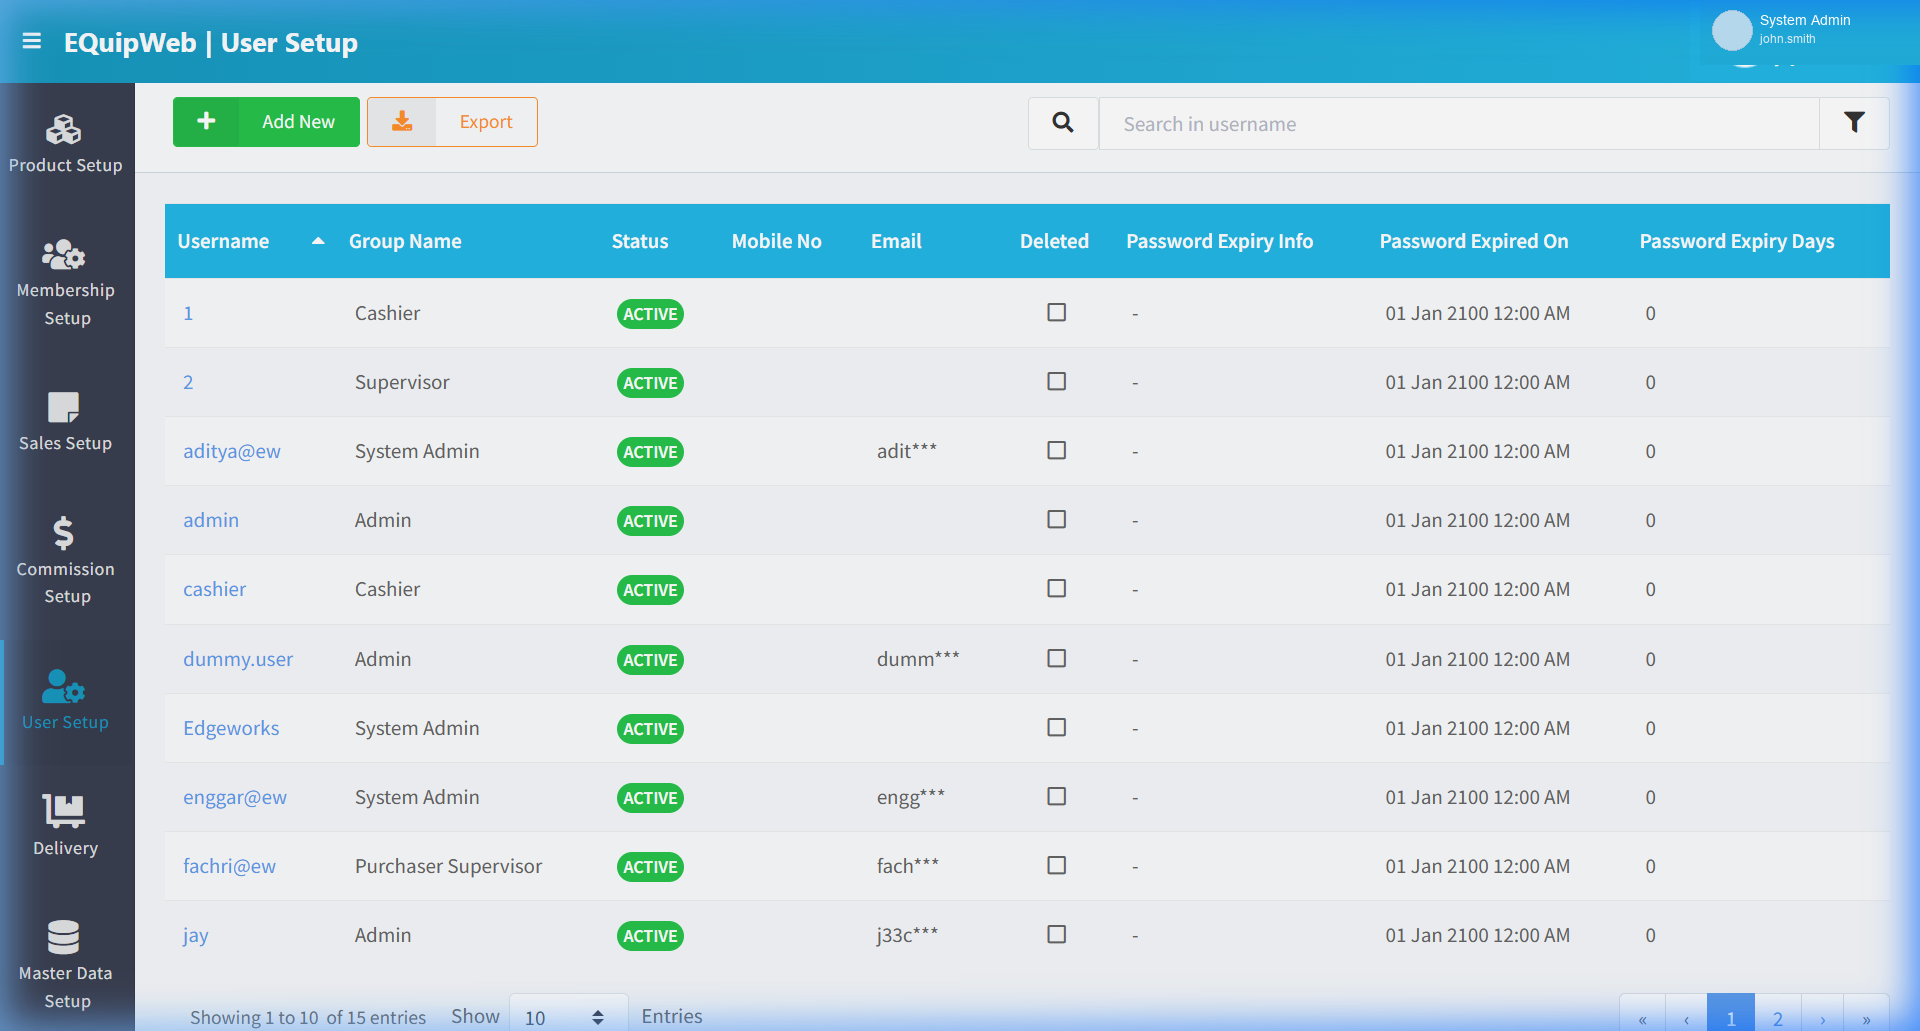
Every data page in EQuipWeb follows a consistent layout:
List Pages
| UI Element | Color/Style | Function |
|---|---|---|
| + Add New | Green button | Creates a new record |
| Export | Orange/Yellow button | Downloads data as Excel file |
| Import | Blue button | Upload CSV/Excel file |
| 🔍 Search Bar | Text input | Filters records by keyword (instant filter) |
| 🔽 Filter Icon | Funnel button | Opens advanced filters (date range, status, show deleted, etc.) |
| Data Grid | Table | Displays records. Column headers are clickable for sorting. Blue/clickable text = edit link. |
| Pagination | Bottom-right | Navigate between pages. "Show X Entries" dropdown controls page size. |
| Show X Entries | Dropdown (bottom-left) | Choose 10, 25, 50, or 100 records per page. |
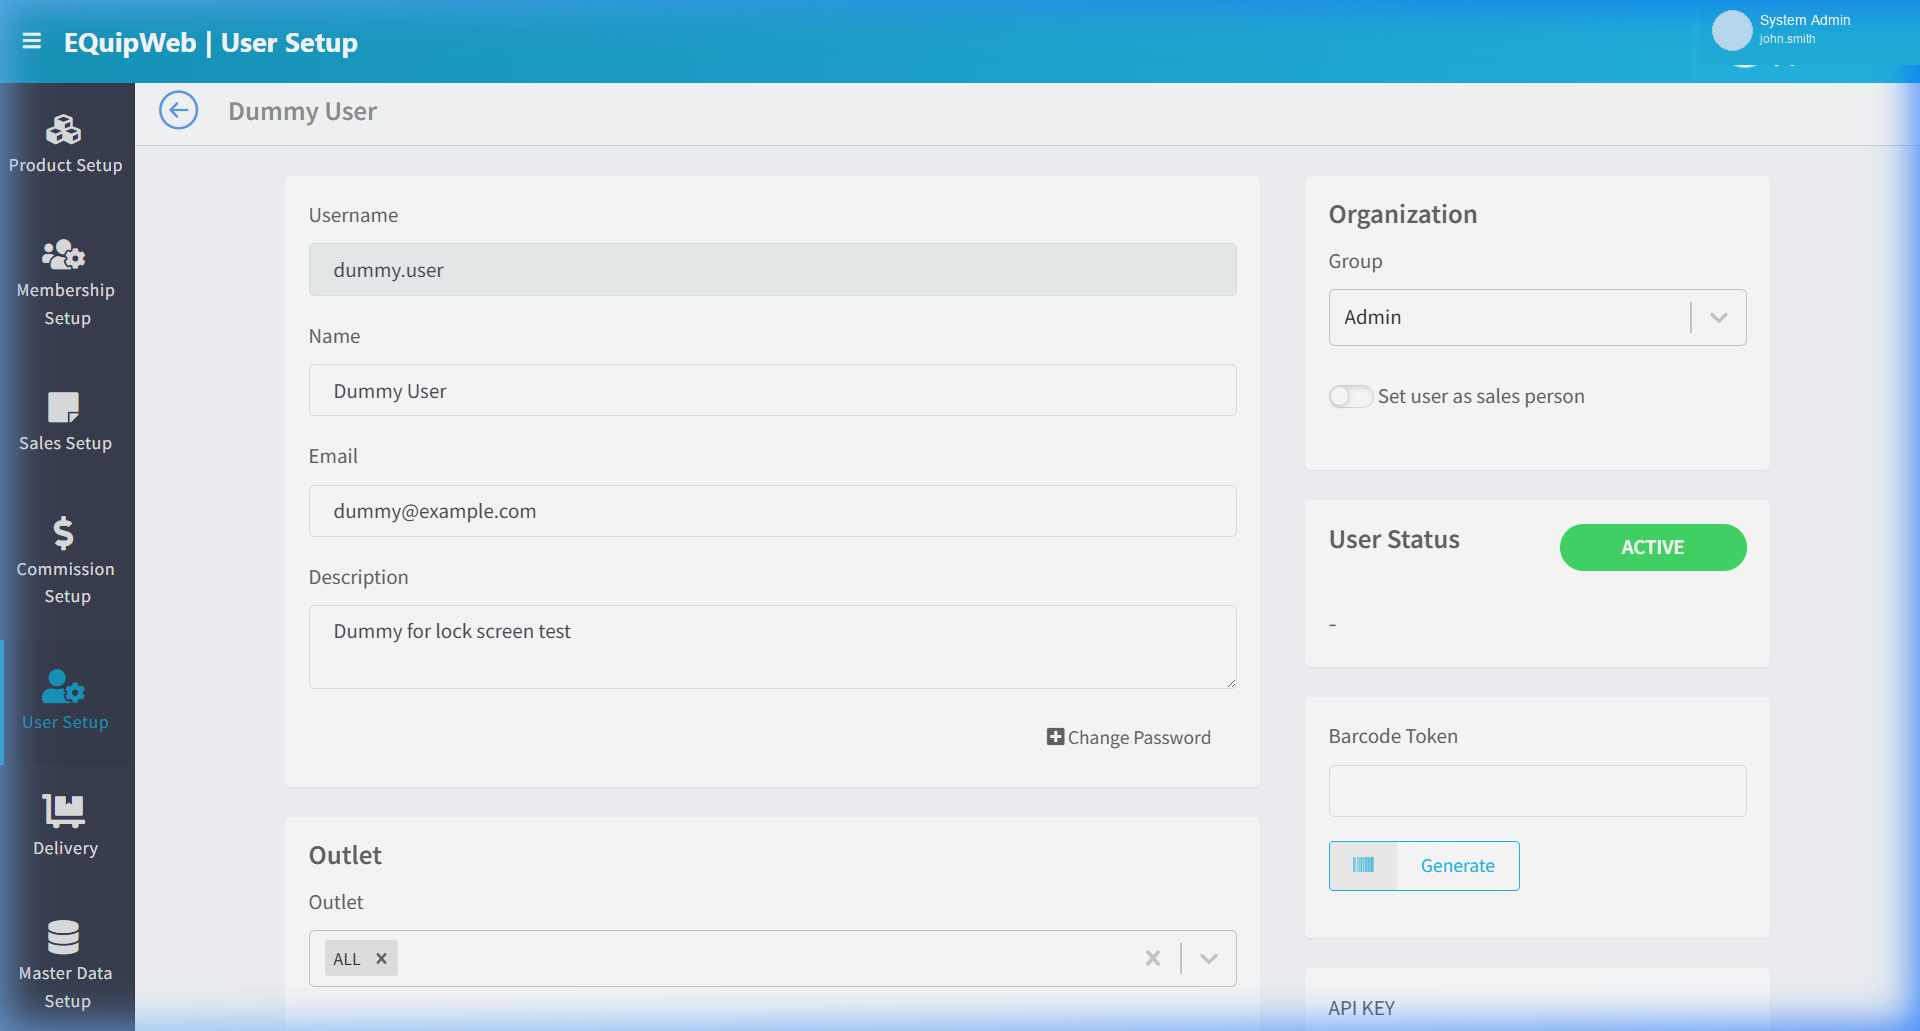
Form Pages (Add/Edit)
| UI Element | Color/Style | Function |
|---|---|---|
| Save | Green/Blue button | Saves the current record |
| Save and New | Green/Blue button | Saves then opens a blank form |
| Delete | Red button | Removes the record |
| Restore | Blue button | Restores a previously deleted record |
| Back / Cancel | Gray button or browser back | Returns to the list page without saving |
| Tabs | Horizontal tabs | Switch between sections (e.g., Setup, POS Assignment, Integration) |
| Toggle Switches | Green (ON) / Gray (OFF) | Enable/disable features. See each page's toggle behavior section. |
Filter Panel (🔽)
When you click the funnel icon, a filter panel appears to the right of the data grid:
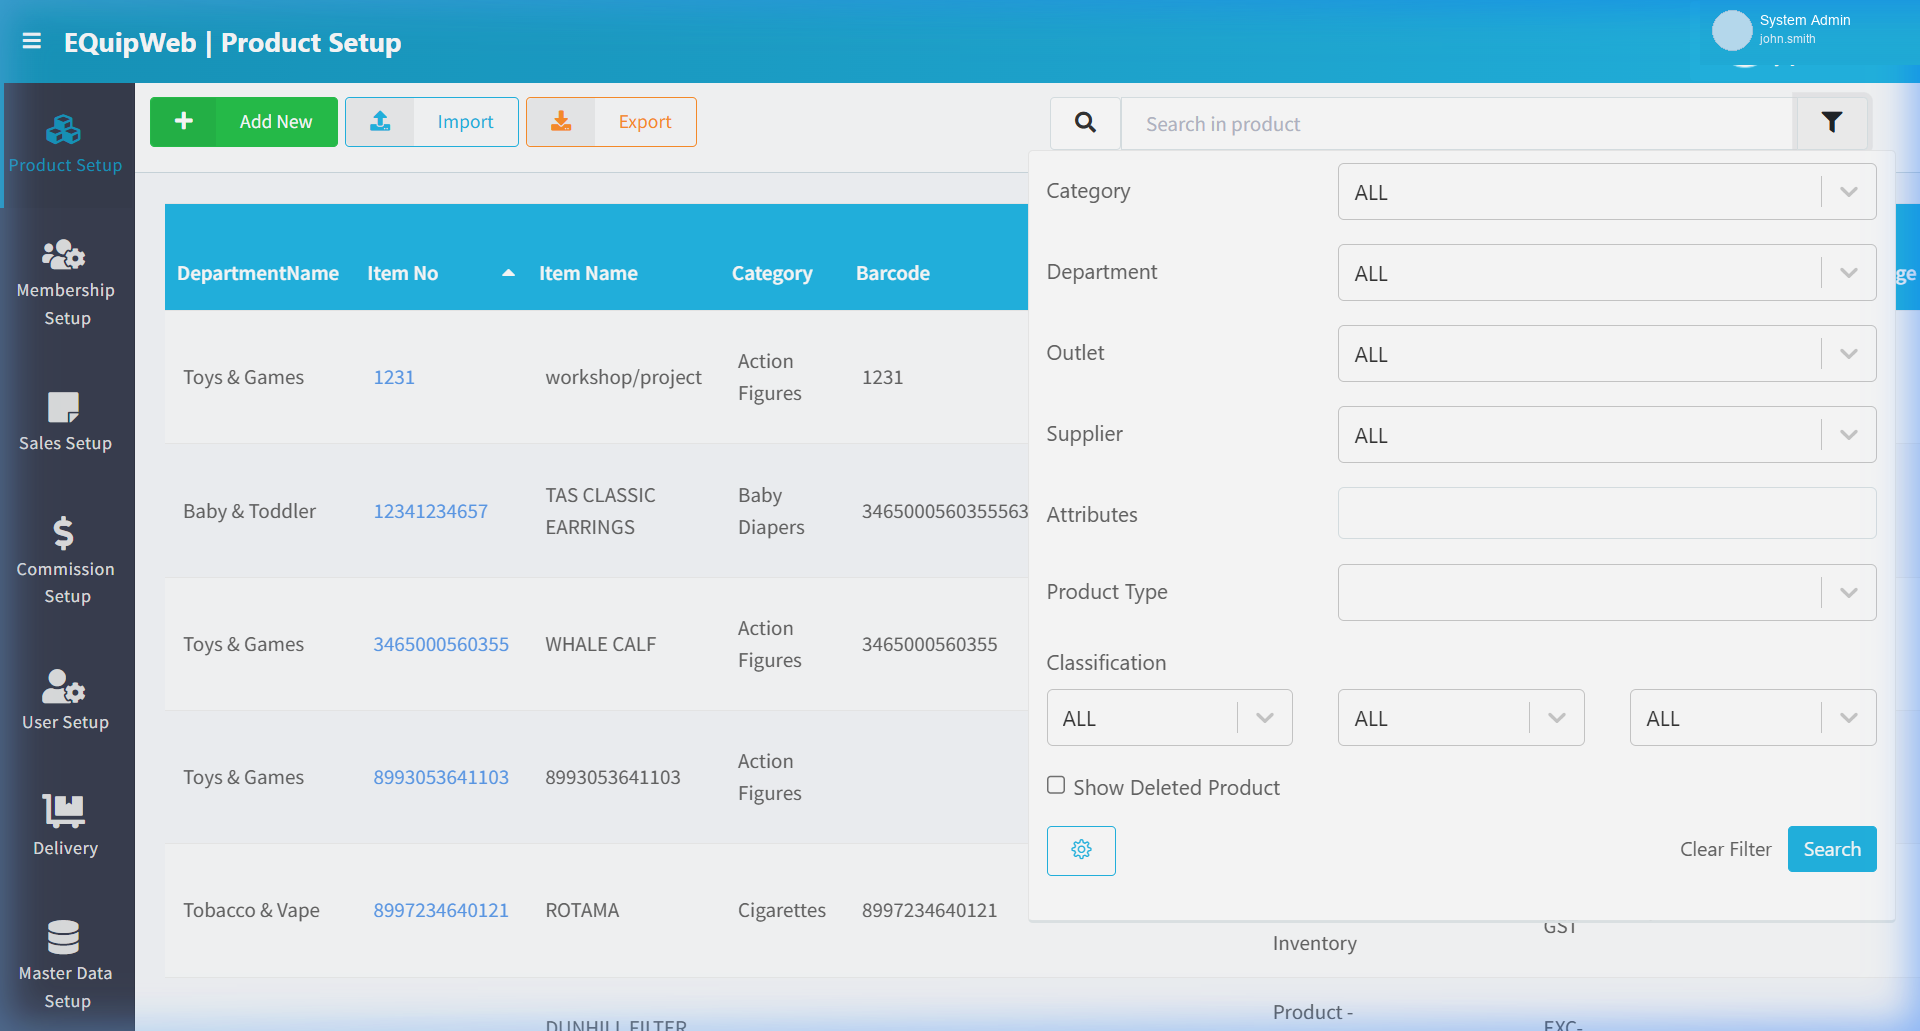
| Filter Element | Description |
|---|---|
| Show Deleted | Toggle — when ON, includes safely deleted records (shown with "Deleted" checkbox checked) |
| Date Range | Some pages have date pickers for filtering by creation/modification date |
| Status Filter | Dropdown to filter by status (Active, Expired, etc.) |
| Apply / Clear | Apply filters or reset to default view |
💡 Keyboard Shortcuts
| Shortcut | Action |
|---|---|
Enter | Submits the current form (same as clicking Save) |
Esc | Closes modals/popups |
Tab | Moves to the next input field |
[!TIP] The sidebar remembers which module was last active. When you navigate between pages within the same module, the module icon stays highlighted in the sidebar, helping you track your location.
Access & Permissions
| Role | View | Create | Edit | Delete |
|---|---|---|---|---|
| Admin | Yes | Yes | Yes | Yes |
| Supervisor | Yes | Yes | Yes | No |
| Cashier | No backend access | — | — | — |
[!NOTE] Exact permissions depend on the Privileges Setup configured for each role. Contact your administrator if you cannot access this page.
Expected Result: Changes are saved successfully and reflected across the system after the next POS sync.
[!IMPORTANT] The sidebar layout cannot be customized by users. Menu items and module order are system-defined. If a module is not visible, check your role permissions in Privileges Setup.
FAQ
Q: I forgot my password — how do I reset it? A: Contact your system administrator to reset your password from User Setup > User List.
Q: Why can't I see all menus in the sidebar? A: Your role may not have permissions for all modules. Contact your administrator to check your assigned privileges.
Troubleshooting
| Issue | Possible Cause | Solution |
|---|---|---|
| Cannot save the record | Required fields are empty or invalid | Check all fields marked with * and fill in valid data |
| Record not appearing in POS | POS terminal has not synced yet | Wait for the next sync cycle or manually trigger sync from Terminal Status |
| Cannot delete the record | Record is being used by other modules | Check if the record is linked to active transactions, products, or other settings |
| Changes not taking effect | Browser cache showing old data | Refresh the page (Ctrl+F5) or clear browser cache |
| "Duplicate" error on save | A record with the same name/code already exists | Search the list (including deleted records) for duplicates |
| Page not loading | Session expired or network issue | Log out and log back in. Check your internet connection |
Related Menus
- User Setup > User List — account management
- User Setup > Role Setup — role assignment
- Setting > Feature Setup — system feature toggles
Open Questions / Confirmation Needed
[!NOTE] The following items may vary depending on your system version and configuration:
- Exact permission settings depend on your Privileges Setup configuration
- Sync timing to POS terminals depends on network conditions and sync schedule
- Some features may require additional licensing or module activation
- Field behavior may differ between EQuip versions
If you encounter behavior not described in this manual, contact your system administrator or EQuip support team.
Field Reference
| Field | Required | Description |
|---|---|---|
| Name / Title | Yes | The display name for this record |
| Status / Active | — | Whether this record is active in the system |
| Created Date | Auto | System-generated creation timestamp |
| Modified Date | Auto | System-generated last modification timestamp |
[!NOTE] Additional fields specific to this page are documented in the sections above. The table above shows common fields present across most pages.
Related Articles
Main Portal
? Backend — EQuipWebRetail ModeChapter 1: Getting Started Backend Login — Main Portal Dashboard The Main Portal is the first page you see after logging into EQuipWeb. It provides a high-level overview of your business with key metrics, quick-access ...Setup Module Overview
? Backend — EQuipWebRetail ModeChapter 1: Getting Started Backend Setup — Module Overview and Getting Started Guide The Setup Overview provides a quick-reference guide for initial system configuration. This page summarizes the recommended setup ...Profile & Account
? Backend — EQuipWebRetail ModeChapter 1: Getting Started Chapter 1: Getting Started — 1.3 Profile & Account Use Account to manage and configure this feature in your EQuipWeb system. The Profile section is accessed from the top-right corner of any ...Menu Builder
? Backend — EQuipWebRetail ModeMenu Management Chapter 10: Menu Management — 10.1 Menu Builder Use Menu Builder to design your POS and online ordering menu. Drag and drop items to create categories, arrange your menu layout, and control what ...Category Setup
? Backend — EQuipWebRetail ModeProduct Setup Chapter 2: Product Setup — 2.3 Category Setup Use Category Setup to organize your products into groups — like "Beverages", "Snacks", or "Electronics". When your products are neatly categorized, your staff ...