POS Order Integration
Chapter 8: Master Data Setup — 8.7 POS Order Integration
Use POS Order Integration to connect your POS terminals with external ordering systems. This is where you set up how orders from third-party platforms (delivery apps, kiosks, or online channels) flow into your POS.
When to use this: When you need to configure how online orders are received and processed by your POS terminals.
Prerequisites
- POS Setup completed
- Online ordering platform configured
POS Order Integration List
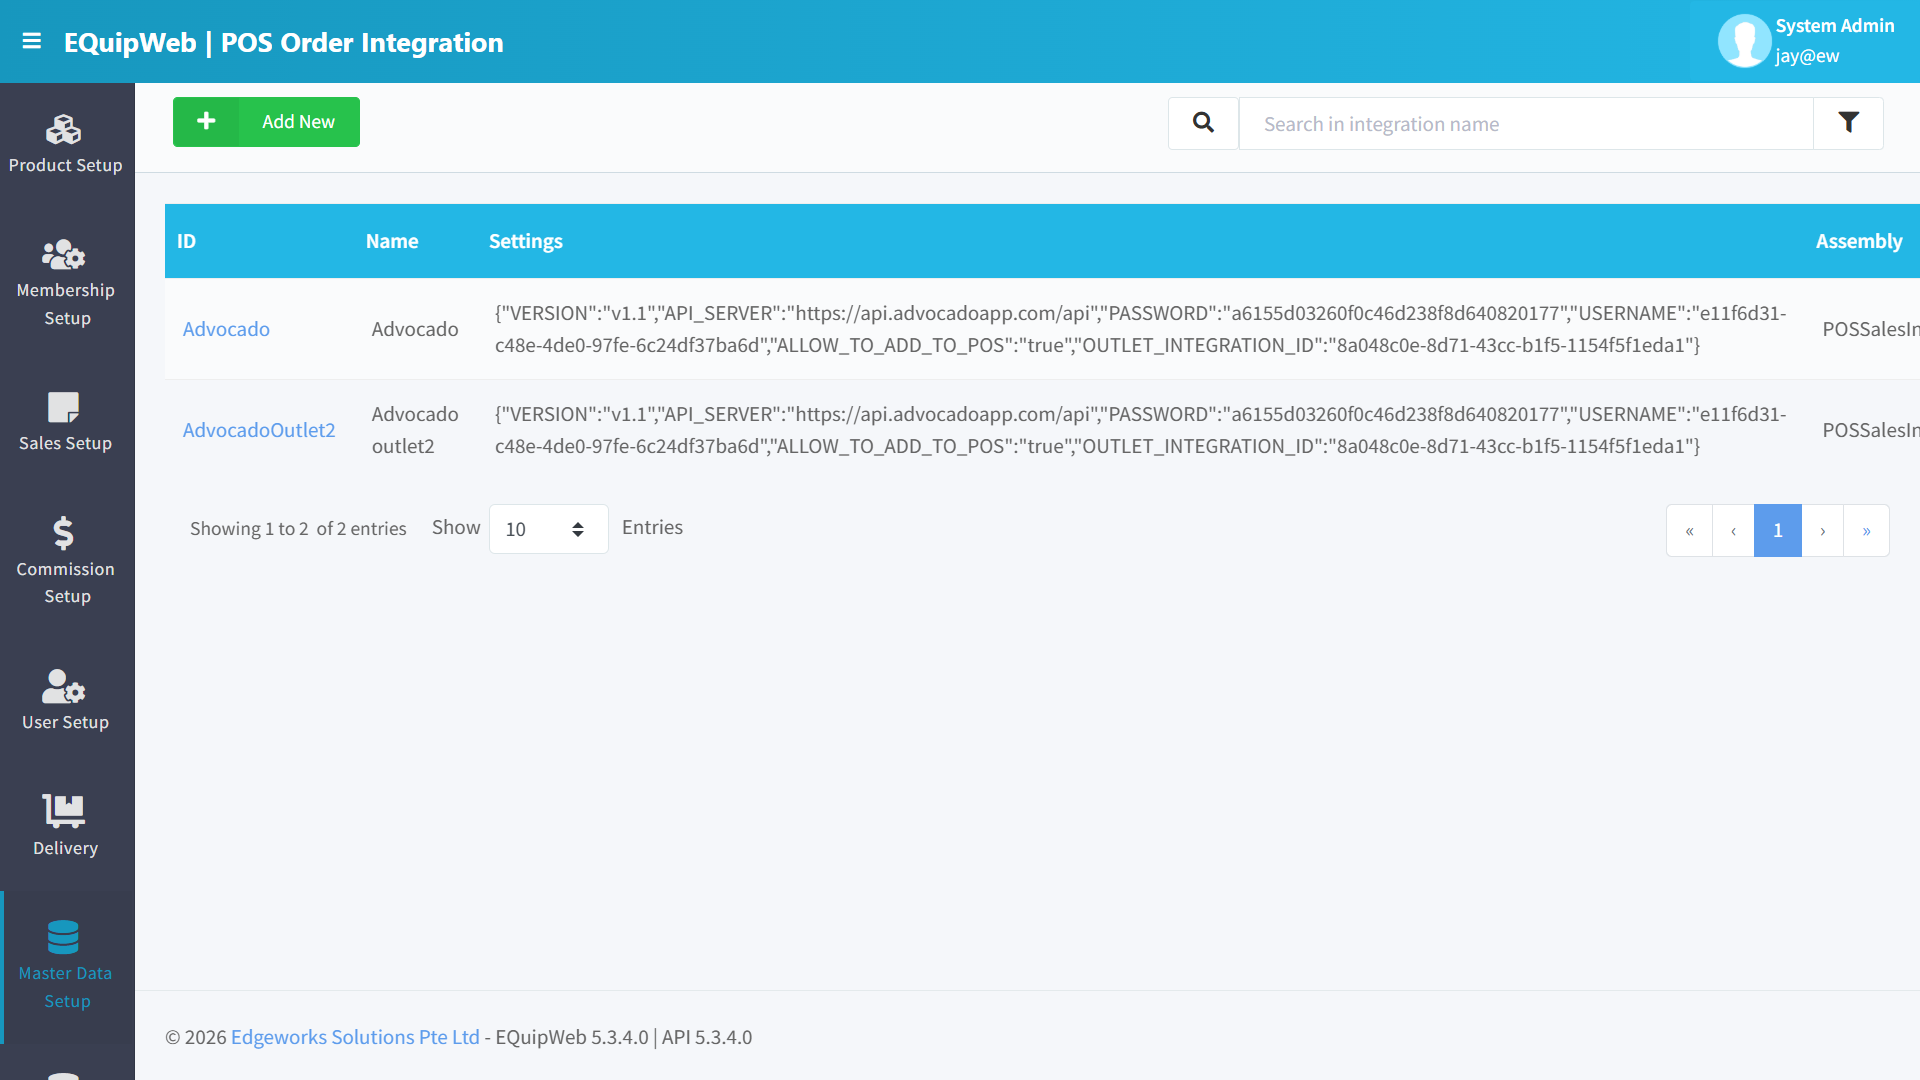
📝 General Description
Each integration entry maps an external order channel to a specific POS terminal and outlet. When an order arrives from the external platform, it is routed to the designated POS terminal — appearing on-screen as if a customer placed the order at the counter. This enables seamless multi-channel order management from a single POS interface.
⚙️ UI Elements
| Element | Type | Function |
|---|---|---|
| + Add New | Green Button | Create a new integration configuration |
| Export | Orange Button | Export integration configurations to Excel |
| Search Bar | Text Input | Filter by integration name or provider |
| 🔽 Filter | Funnel Icon | Toggle show/hide deleted integrations |
8.7.1 Data Grid Columns
| Column | Description |
|---|---|
| Integration Name | Name of the integration (clickable → opens edit form) |
| Provider | The external platform (e.g., GrabFood, Foodpanda, Shopee Food) |
| POS Name | The POS terminal linked to receive orders |
| Outlet | The outlet this integration serves |
| Is Active | Whether the integration is currently receiving orders |
| Deleted | Hidden/deleted status |
8.7.2 Add / Edit Integration
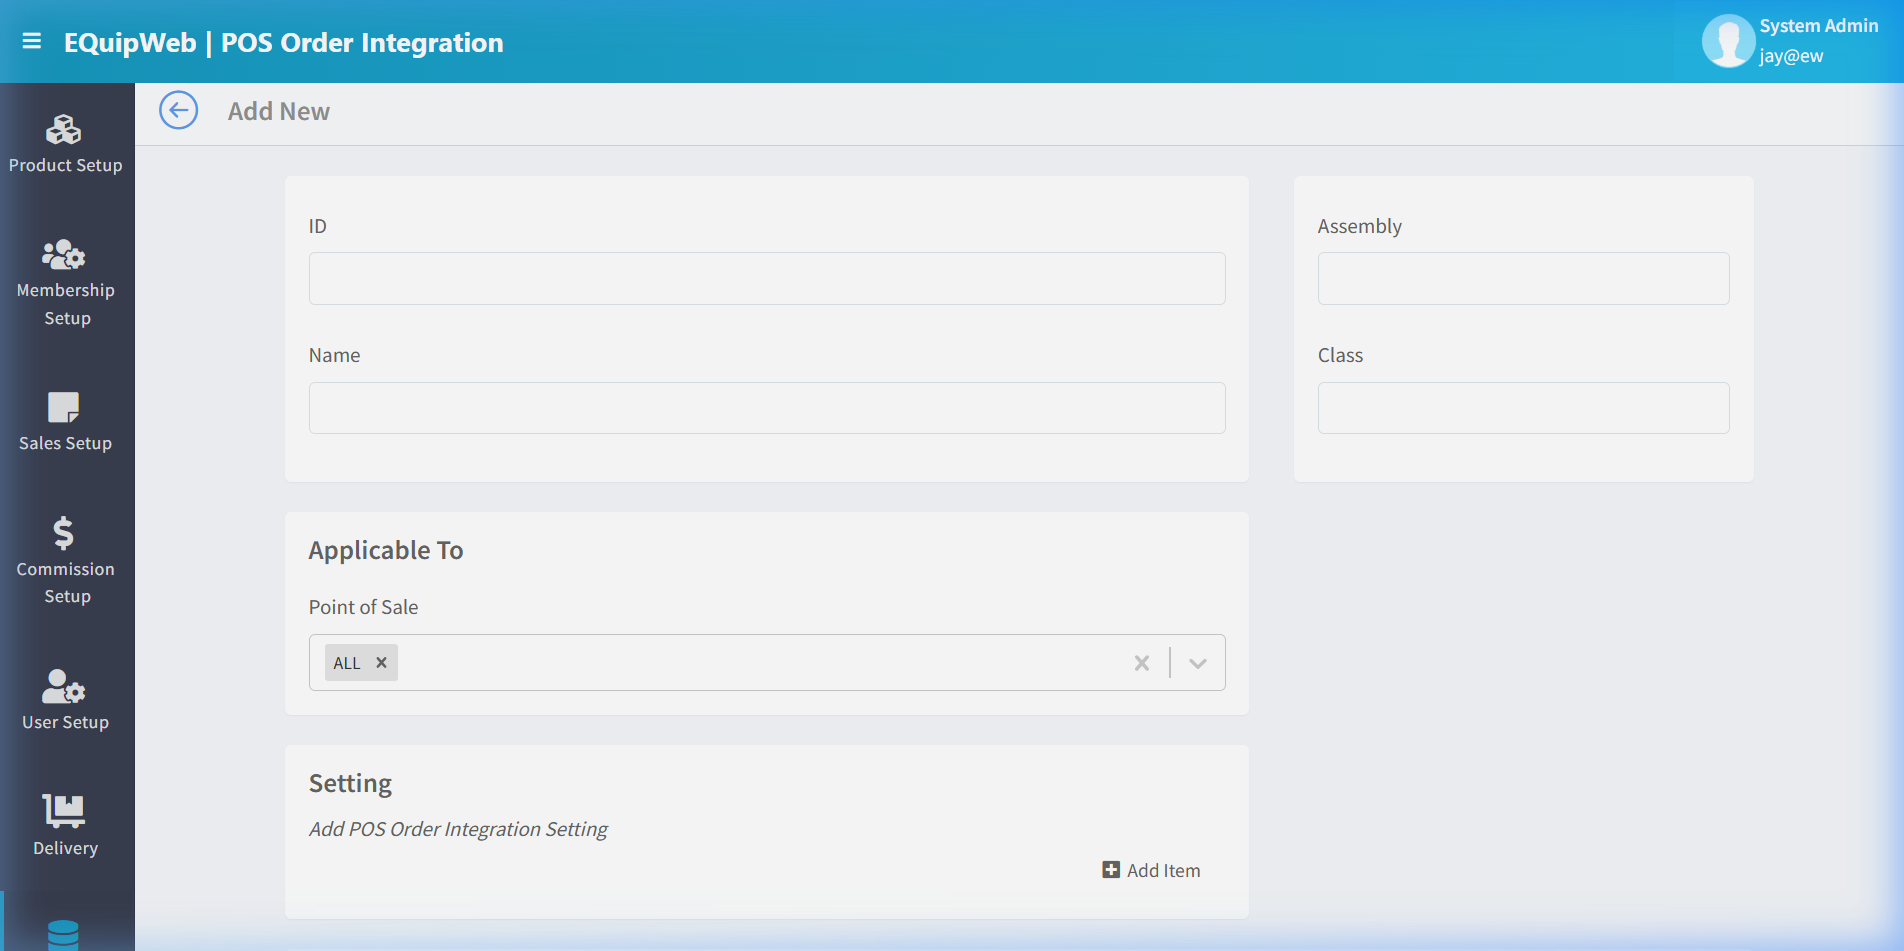
Basic Settings
| Field | Type | Required | Description |
|---|---|---|---|
| Integration Name | Text | ✅ Yes | Display name for this integration (e.g., "GrabFood - ION Orchard") |
| Provider | Dropdown | ✅ Yes | External platform name (GrabFood, Foodpanda, Deliveroo, Shopee, Custom) |
| Outlet | Dropdown | ✅ Yes | Which outlet receives orders from this channel |
| POS Terminal | Dropdown | ✅ Yes | Which POS terminal displays incoming orders |
| Is Active | Toggle | No | Enable/disable the integration |
API Configuration
| Field | Type | Description |
|---|---|---|
| API Endpoint | URL | The provider's API URL for order retrieval |
| API Key | Text (masked) | Authentication credentials for the provider's API |
| Webhook URL | URL (read-only) | EQuip's webhook endpoint — give this to the provider for automatic updates |
| Polling Interval | Number (seconds) | How often to check for new orders (for pull-based integrations) |
Order Settings
| Setting | Type | Description |
|---|---|---|
| Order Number Prefix | Text | Prefix for imported orders (e.g., "GRAB-", "FP-") to distinguish from walk-in sales |
| Auto-Accept | Toggle | Automatically accept incoming orders without staff confirmation |
| Auto-Print | Toggle | Automatically print kitchen orders when received |
| Payment Mode | Dropdown | Default payment mode for orders from this channel (e.g., "GrabPay", "Online Payment") |
Item Mapping
| Field | Type | Description |
|---|---|---|
| External Item ID | Text | The item code used by the external platform |
| Internal Item No | Dropdown | The EQuip product this maps to |
| Price Override | Toggle | Whether the external platform's price overrides the internal price |
Actions
| Button | Function |
|---|---|
| Save | Saves the integration configuration |
| Save & New | Saves and opens a blank form |
| Delete | Removes the integration (stops receiving orders) |
| Restore | Restores a deleted integration |
8.7.3 Order Flow
Customer places order on GrabFood/Foodpanda
    ↓
External platform sends order via API/webhook
    ↓
EQuip receives order → maps to configured POS terminal
    ↓
If Auto-Accept ON → order accepted immediately
If Auto-Accept OFF → staff reviews and accepts/rejects
    ↓
If Auto-Print ON → kitchen receipt prints automatically
    ↓
Order appears on POS screen with "GRAB-12345" prefix
    ↓
Kitchen prepares the order
    ↓
Staff marks order as complete
    ↓
Delivery rider picks up → order closed
    ↓
Payment recorded under the configured payment mode
8.7.4 Best Practices
| Practice | Rationale |
|---|---|
| Dedicated POS terminal per channel | Clean reporting — separate GrabFood sales from walk-in sales |
| Unique order prefixes | Easy to identify order source at a glance |
| Auto-accept during peak hours | Reduces staff workload — orders go straight to kitchen |
| Manual review during quiet hours | Gives staff control over order acceptance |
| Map all menu items | Unmapped items will fail at the POS → customer receives an error |
How to Edit a integration
- In the POS Order Integration page, find the integration you want to change.
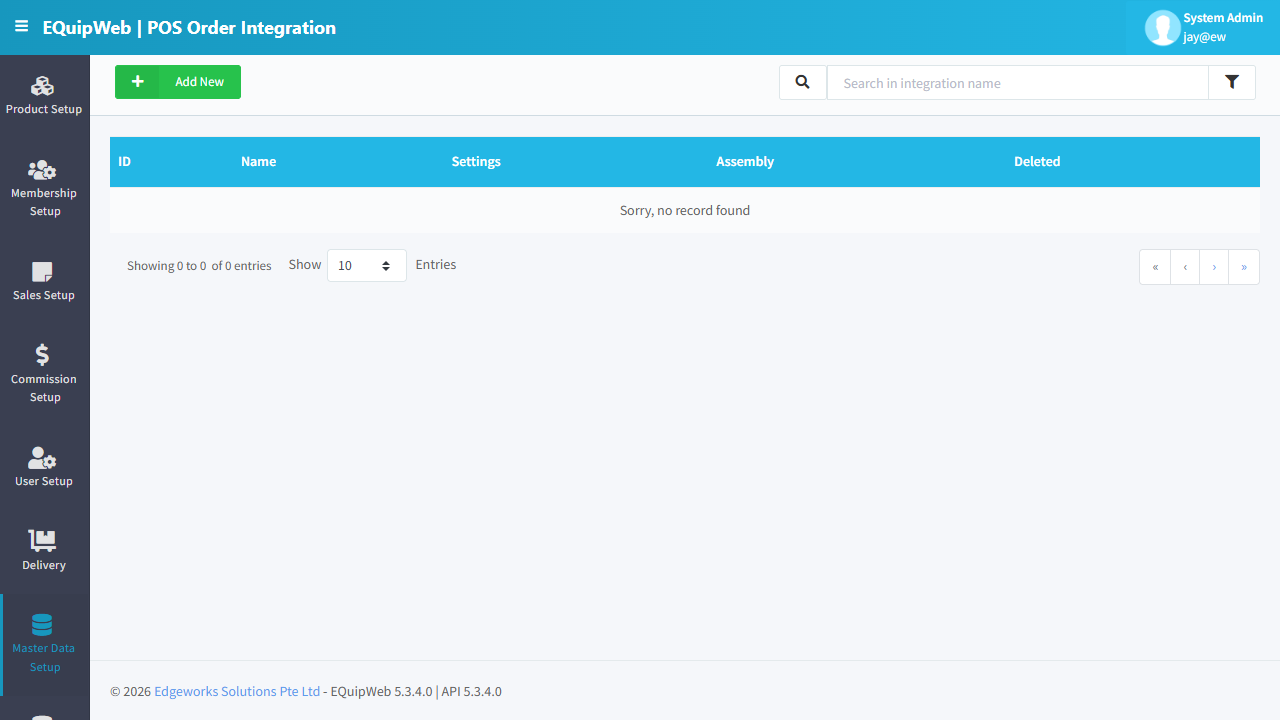
- Click the blue integration name link. The edit form opens — it looks the same as the "Add New" form, but all fields are already filled in with the current values.
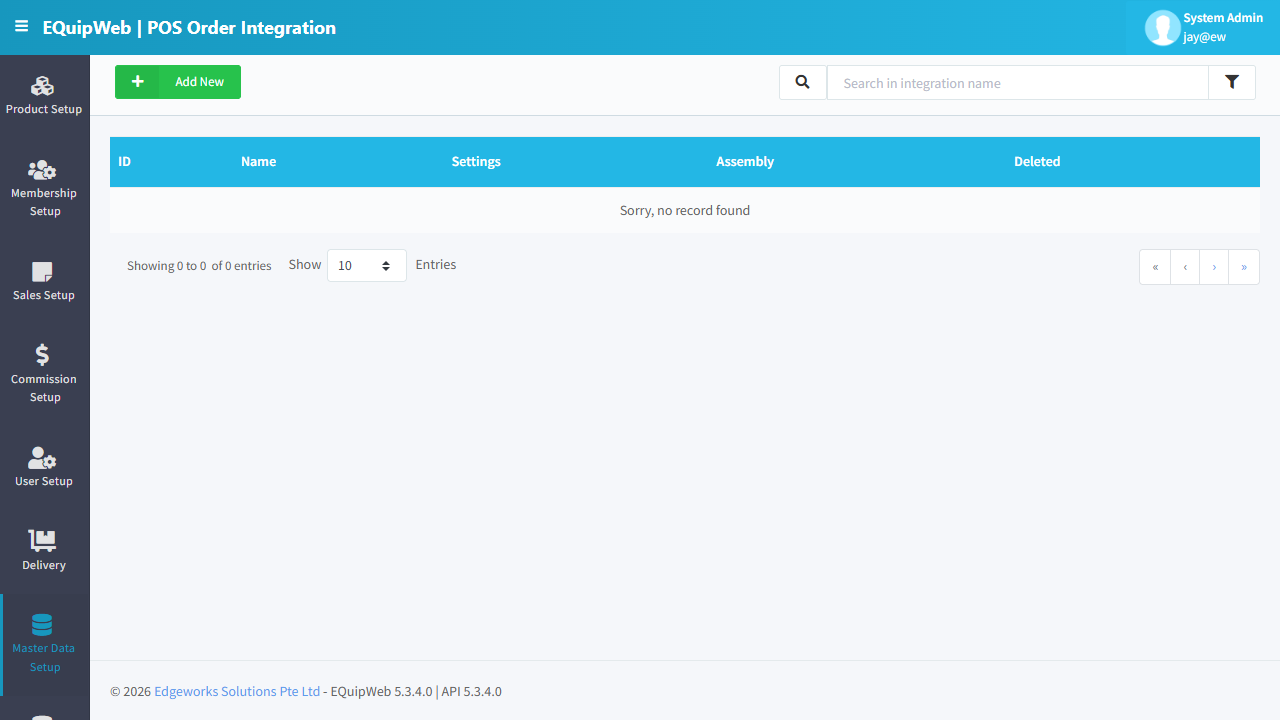
-
Change the fields you need to update.
-
Click Save to apply your changes.
Expected Result: The integration settings are saved.
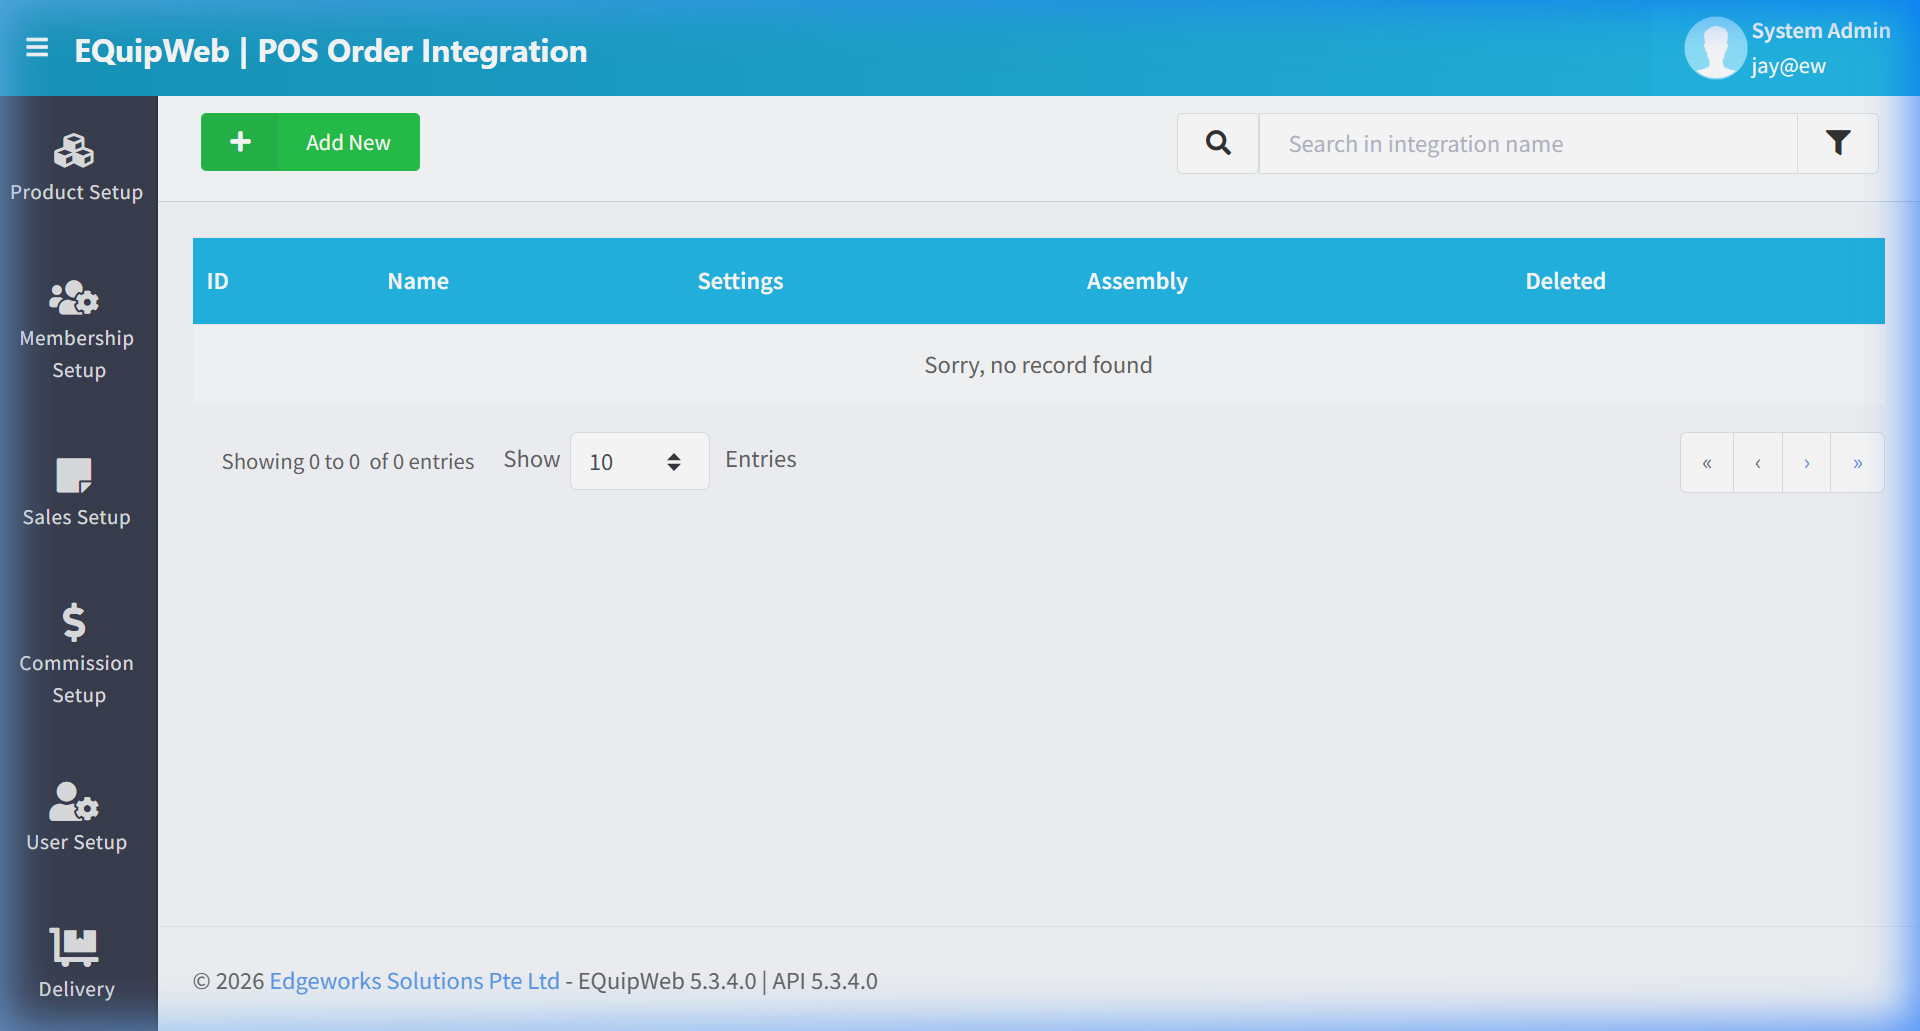
[!TIP] To make changes, just click the name of any integration in the list — the same form opens with everything already filled in. Change what you need and click Save.
💡 Example
Scenario: A bubble tea shop signs up for GrabFood and needs to receive delivery orders directly on their POS.
Setup:
- Navigate to POS Order Integration → Click + Add New.
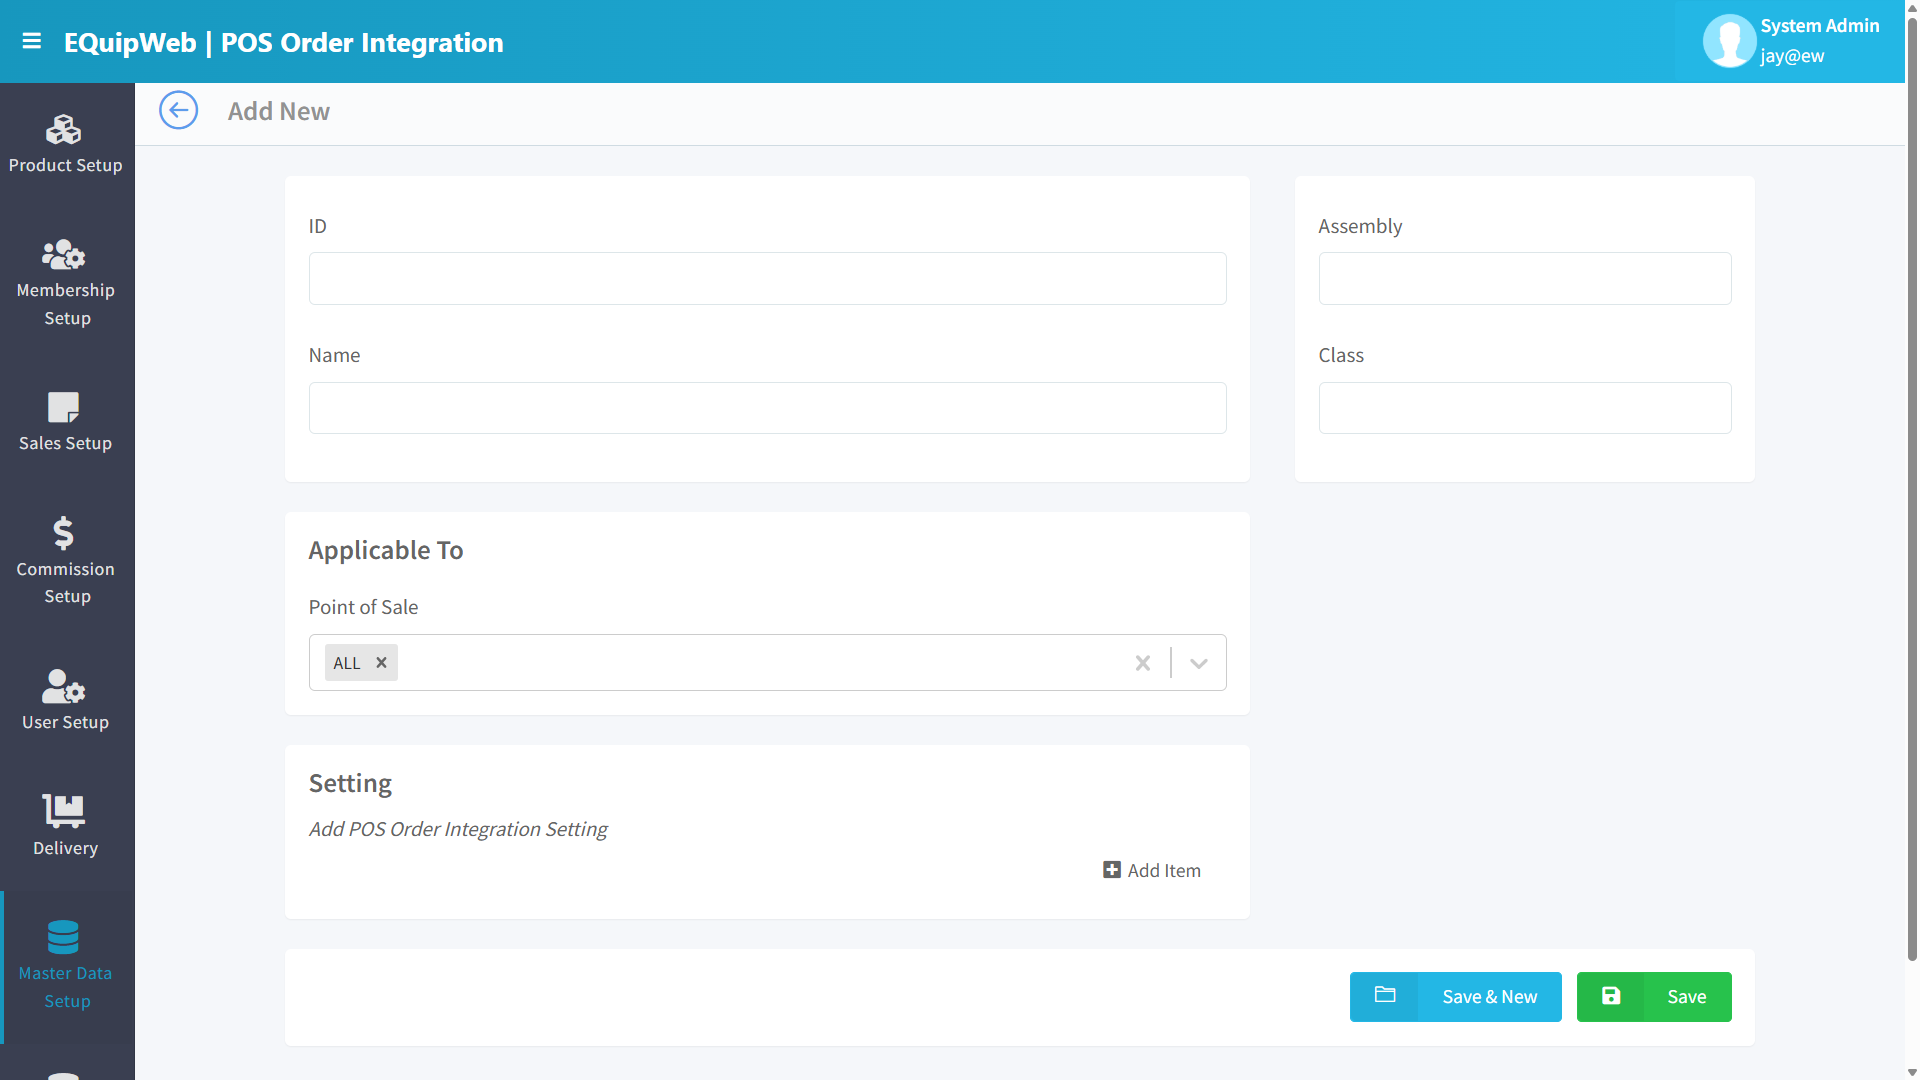 2. Fill in:
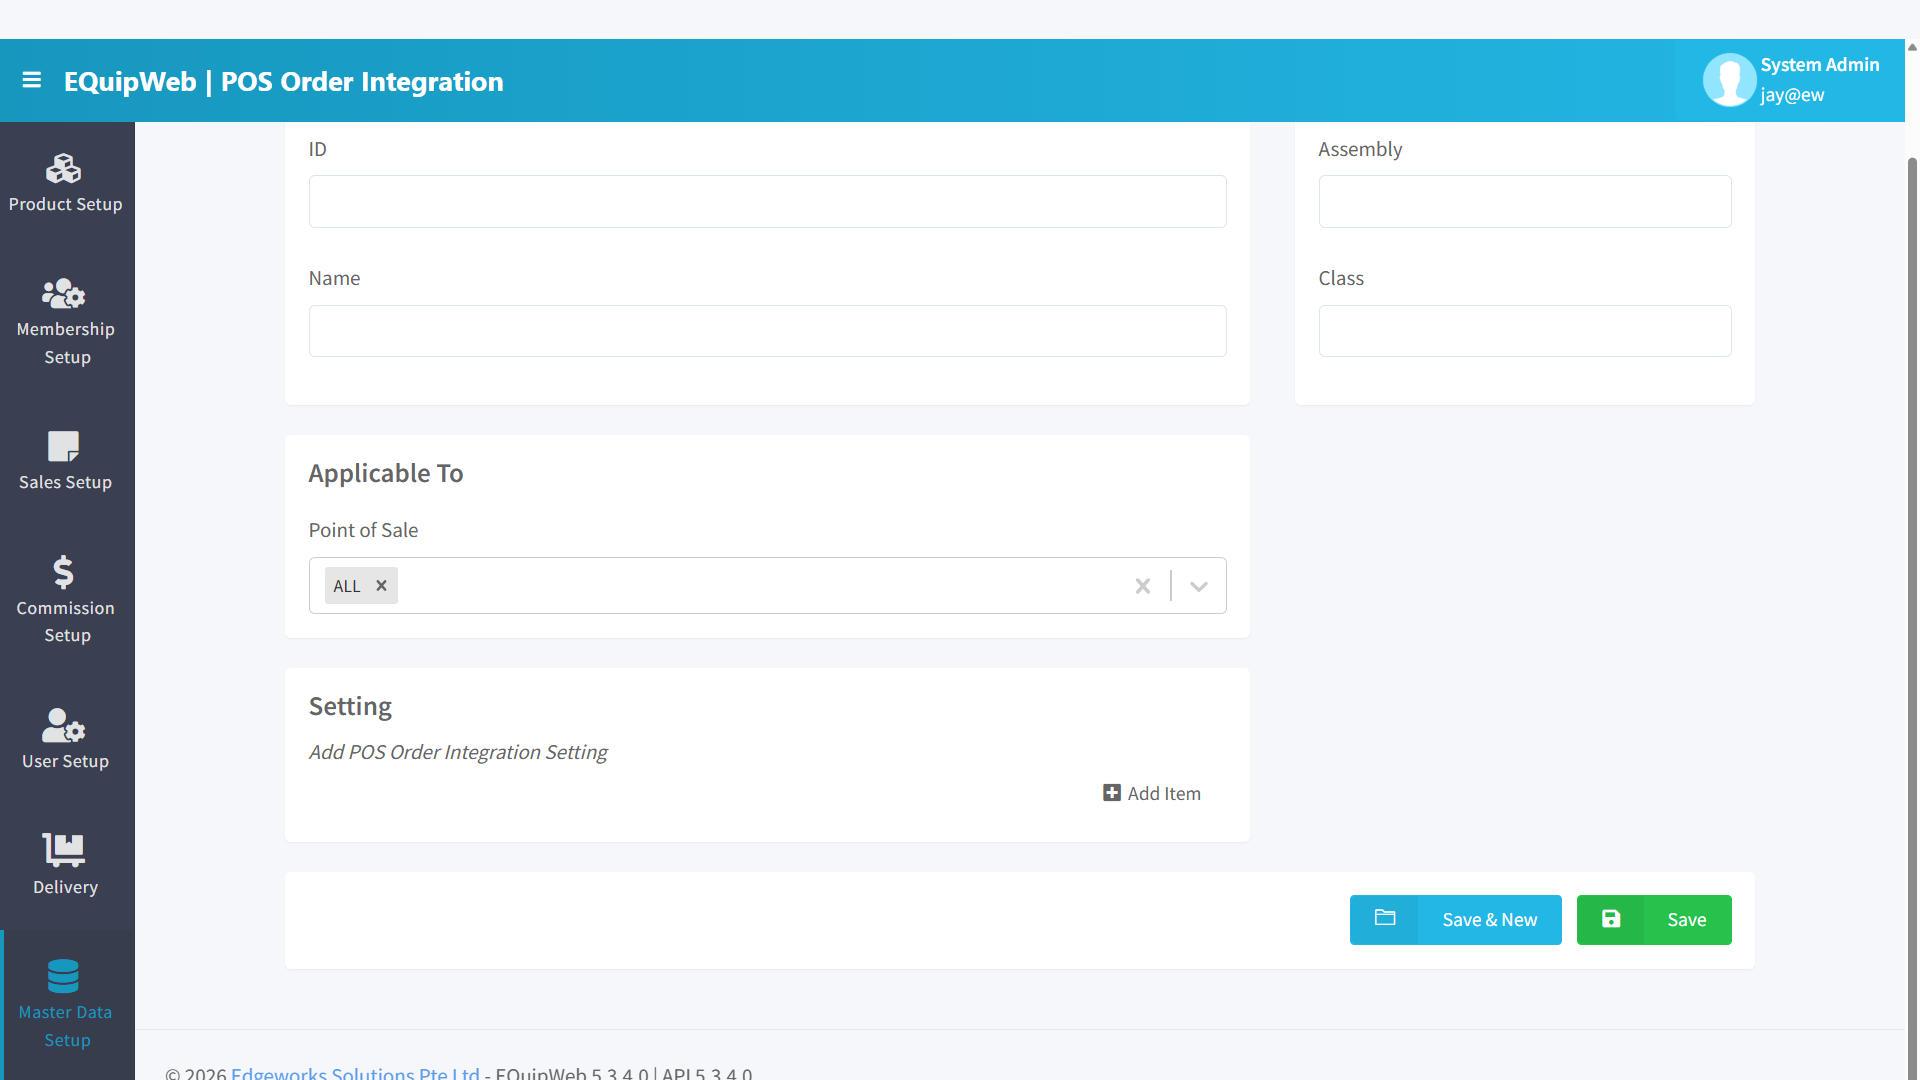
- Integration Name:
GrabFood - Tampines - Provider:
GrabFood - Outlet:
Tampines Mall - POS Terminal:
POS-03 (Delivery Terminal) - Is Active: ON
- Configure API:
- API Key: (provided by GrabFood merchant portal)
- Webhook URL:
https://t1.equipweb.biz/api/webhook/grab(give this to Grab)
- Configure Order Settings:
- Order Prefix:
GRAB- - Auto-Accept: ON
- Auto-Print: ON
- Payment Mode:
GrabPay
- Order Prefix:
- Map items: Link GrabFood menu items to EQuip product codes.
- Click Save.
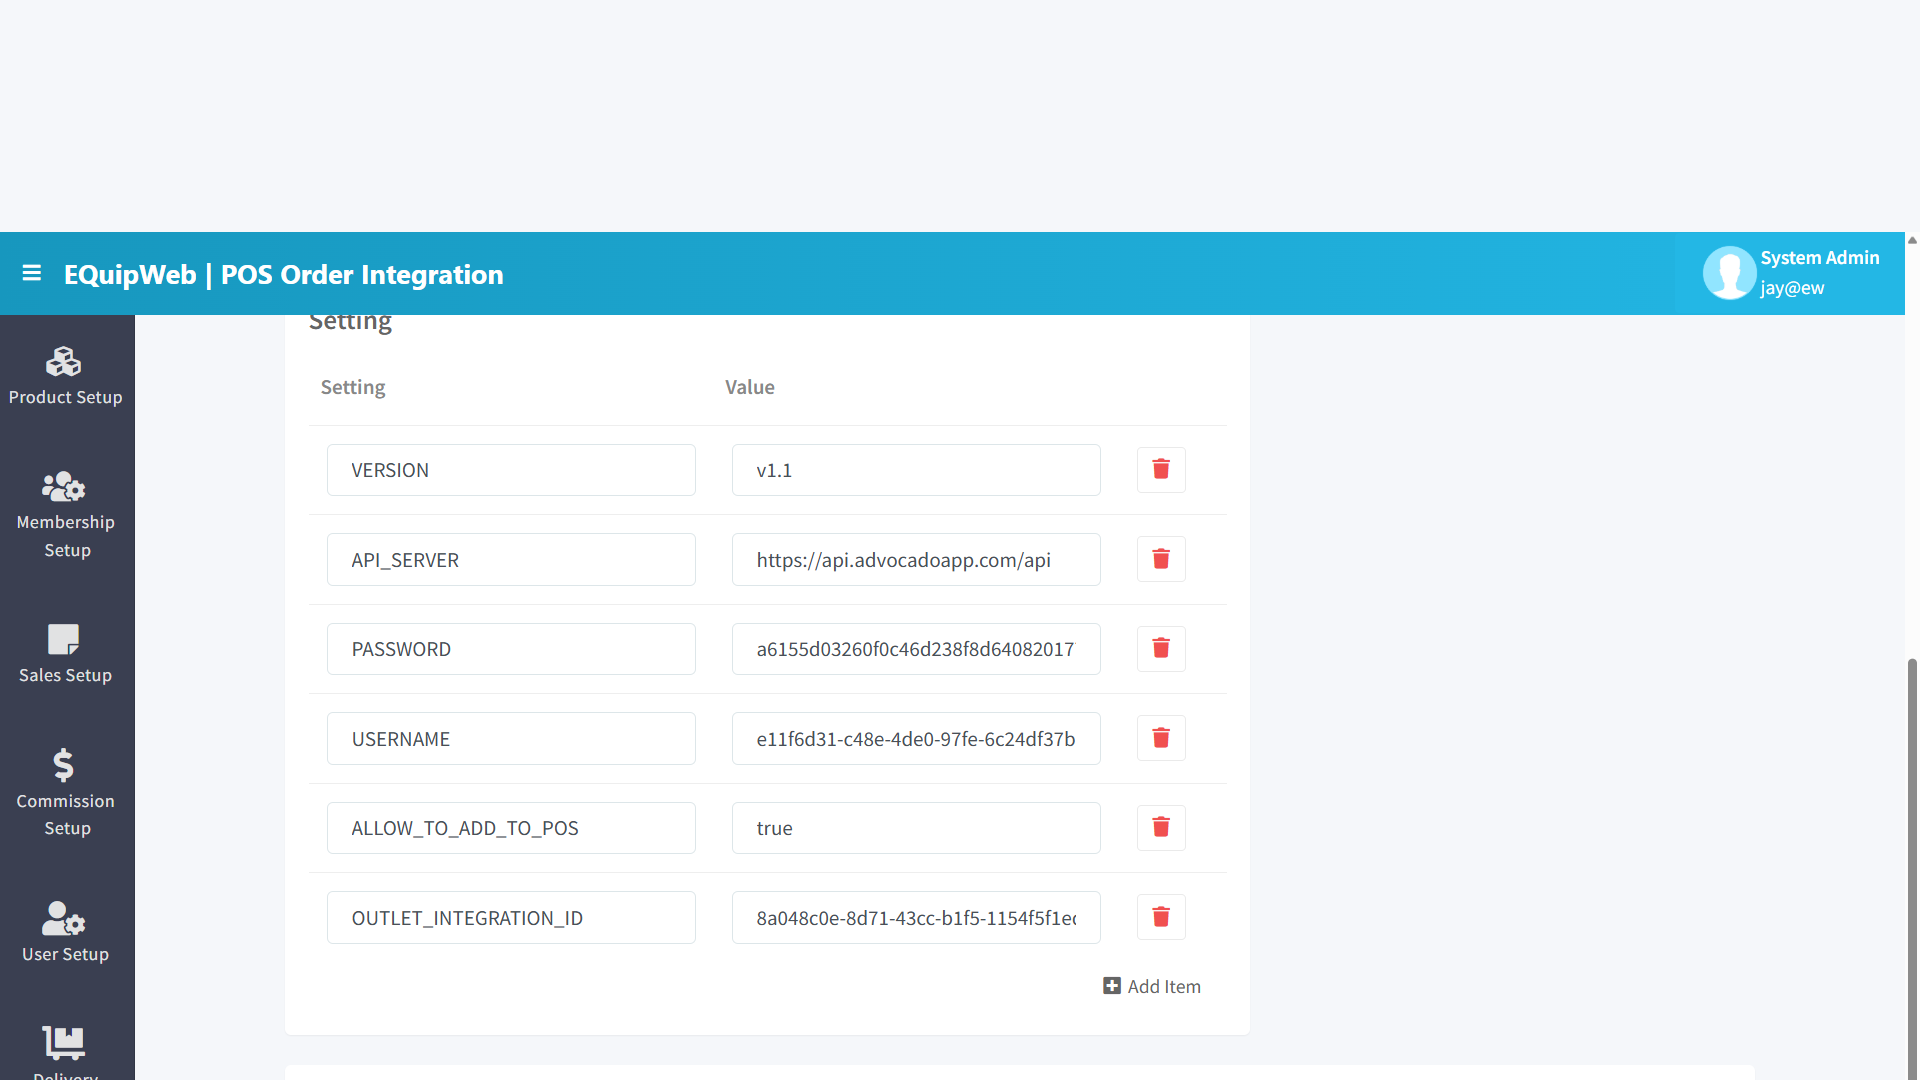 7. GrabFood orders now appear on POS-03 automatically.
[!IMPORTANT] The linked POS terminal must be always online to receive incoming orders. If the terminal is offline, orders will queue on the server and be delivered when the terminal reconnects — potentially causing delays for customers.
[!TIP] Create a separate POS terminal for each delivery channel (e.g., POS-03 for GrabFood, POS-04 for Foodpanda). This makes daily sales reconciliation much easier — you can generate per-terminal reports to match against each platform's payout statements.
[!WARNING] If the Item Mapping is incomplete, orders containing unmapped items will fail. Always verify that every menu item on the external platform has a corresponding EQuip product code configured in the mapping.
Access & Permissions
| Role | View | Create | Edit | Delete |
|---|---|---|---|---|
| Admin | Yes | Yes | Yes | Yes |
| Supervisor | Yes | Yes | Yes | No |
| Cashier | No backend access | — | — | — |
[!NOTE] Exact permissions depend on the Privileges Setup configured for each role. Contact your administrator if you cannot access this page.
How to Delete a POS Order Integration
- Navigate to POS Order Integration from the sidebar menu.
2. Click the name or code link (blue text) of the record you want to delete.
3. In the edit form, scroll down to the bottom.
4. Click the Delete button (red button).
5. A confirmation dialog appears — click Yes to confirm deletion.
Expected Result: The record is soft-deleted — it is hidden from the active list and POS terminals but can be restored later using the "Show Deleted" filter.
[!WARNING] Records linked to active transactions or other modules cannot be deleted. The system will display an error if deletion is not allowed.
How to Add a New POS Order Integration
- Navigate to POS Order Integration from the sidebar menu.
-
Click the + Add New button (green button).
-
Fill in the required fields in the form.
-
Fill in any optional fields as needed.
-
Click Save to create the new pos order integration.
✅ Expected Result: The new pos order integration appears in the list and is available for use across the system.
FAQ
Q: Can I delete an outlet that has transaction history? A: You can soft-delete it, but it cannot be permanently removed if it has linked transactions or POS terminals.
Q: Why are changes not showing on the POS terminal? A: The POS needs to sync. Check Terminal Status for the last sync time and trigger a manual sync if needed.
Q: What happens if I change the company name? A: The change will appear on all new receipts after the next POS sync. Existing printed receipts are not affected.
Troubleshooting
| Issue | Possible Cause | Solution |
|---|---|---|
| Cannot save the record | Required fields are empty or invalid | Check all fields marked with * and fill in valid data |
| Record not appearing in POS | POS terminal has not synced yet | Wait for the next sync cycle or manually trigger sync from Terminal Status |
| Cannot delete the record | Record is being used by other modules | Check if the record is linked to active transactions, products, or other settings |
| Changes not taking effect | Browser cache showing old data | Refresh the page (Ctrl+F5) or clear browser cache |
| "Duplicate" error on save | A record with the same name/code already exists | Search the list (including deleted records) for duplicates |
| Page not loading | Session expired or network issue | Log out and log back in. Check your internet connection |
Related Menus
- Product Setup > Product List — products linked to outlets
- User Setup > User List — users assigned to outlets
- Sales Setup > Payment Mode — payment methods per outlet
- Setting > Company Setup — company-wide settings
Open Questions / Confirmation Needed
[!NOTE] The following items may vary depending on your system version and configuration:
- Exact permission settings depend on your Privileges Setup configuration
- Sync timing to POS terminals depends on network conditions and sync schedule
- Some features may require additional licensing or module activation
- Field behavior may differ between EQuip versions
If you encounter behavior not described in this manual, contact your system administrator or EQuip support team.
Related Articles
Membership Integration Settings
? Backend — EQuipWebRetail ModeMembership Setup Chapter 3: Membership Setup — 3.4 Membership Integration Settings Use Membership Integration Settings to connect your EQuip loyalty system with external CRM or marketing platforms. This allows member ...Online Sales Order
? Backend — EQuipWebRetail ModeSales Setup Sales Setup — 4.8 Online Sales Order Use Order to manage and configure this feature in your EQuipWeb system. The Online Sales Order page shows all orders coming in from your connected delivery platforms ...Delivery Order List
? Backend — EQuipWebRetail ModeDelivery Chapter 7: Delivery — 7.1 Delivery Order Use Order to manage and configure this feature in your EQuipWeb system. The Delivery Order List shows all your delivery orders in one place. Track order statuses, view ...POS Setup
? Backend — EQuipWebRetail ModeMaster Data Setup Chapter 8: Master Data Setup — 8.2 POS Setup Use POS Setup to register and configure each POS terminal in your outlets. Every cash register or tablet running the POS app needs to be set up here first ...POS Terminal Settings
? Backend — EQuipWebRetail ModeSetting Chapter 12: Setting — 12.9 POS Terminal Settings Use POS Terminal Settings to fine-tune how each POS terminal behaves — receipt formatting, printer assignments, payment options, and display preferences. ...