POS Terminal Settings
Chapter 12: Setting — 12.9 POS Terminal Settings
Use POS Terminal Settings to fine-tune how each POS terminal behaves — receipt formatting, printer assignments, payment options, and display preferences. Settings here override the global defaults for specific terminals.
When to use this: When you need to configure POS terminal behavior like receipt format, payment options, or display settings.
Prerequisites
- POS Setup completed
POS Terminal Setting
📝 General Description
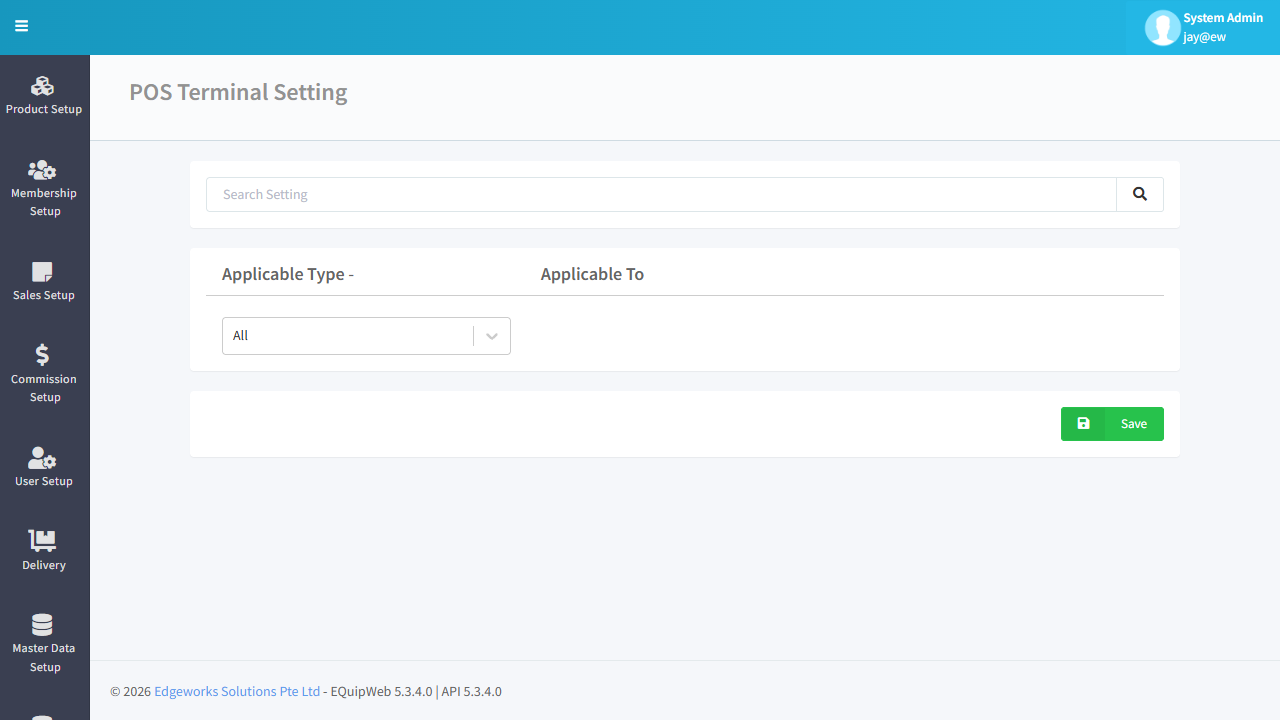
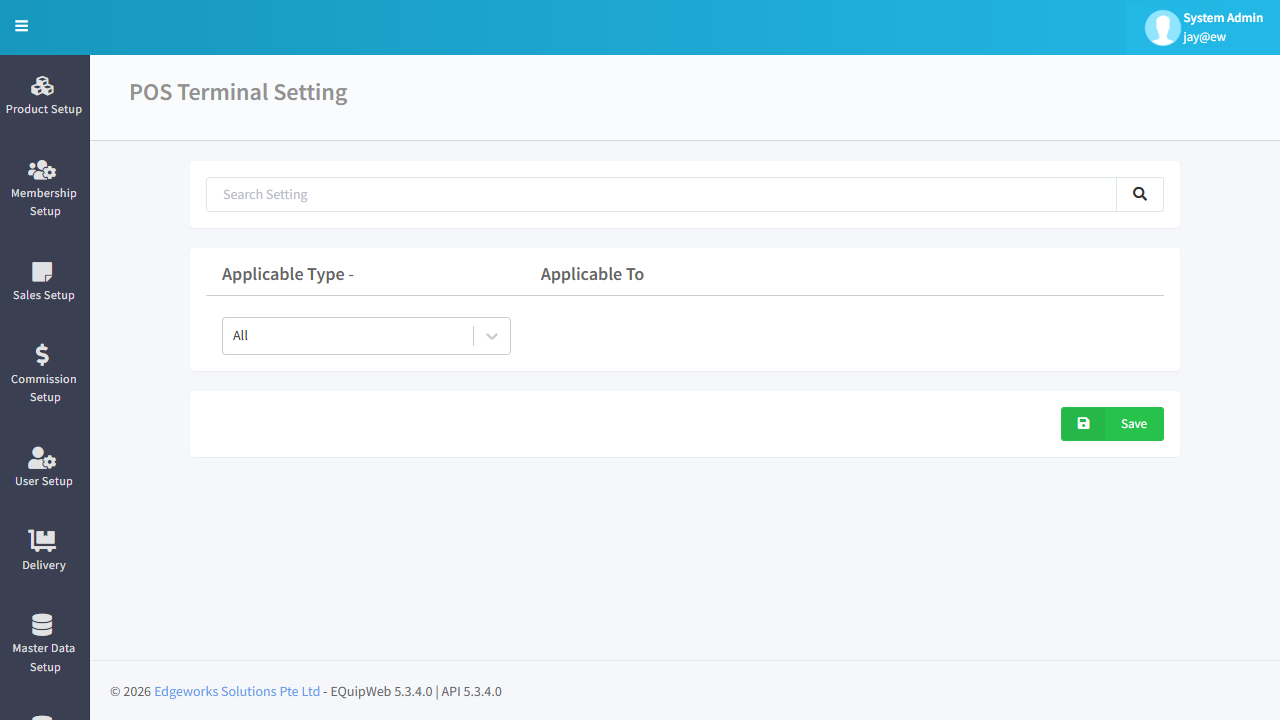
This is a settings-only page (no data grid). It provides device-level configuration that controls POS terminal behavior. You first select the Applicable Type and Applicable To target to load the settings for that device, then configure each section.
⚙️ Page Controls
| Element | Type | Function |
|---|---|---|
| Search Setting | Text Input + 🔍 | Filter settings by keyword — quickly find a specific setting |
| Applicable Type | Dropdown | Select the type of device: POS or Outlet |
| Applicable To | Dropdown | Select the specific terminal/outlet to configure (e.g., Jay, POS01) |
[!IMPORTANT] You must select both Applicable Type and Applicable To before settings appear. The page starts empty until a target is selected.
12.9.1 Kitchen Order Section
| Setting | Type | Description |
|---|---|---|
| Enable Kitchen Order | Checkbox | When checked, the POS sends kitchen order tickets to the kitchen printer or Kitchen Display System (KDS) after each sale |
12.9.2 Membership Section
| Setting | Type | Description |
|---|---|---|
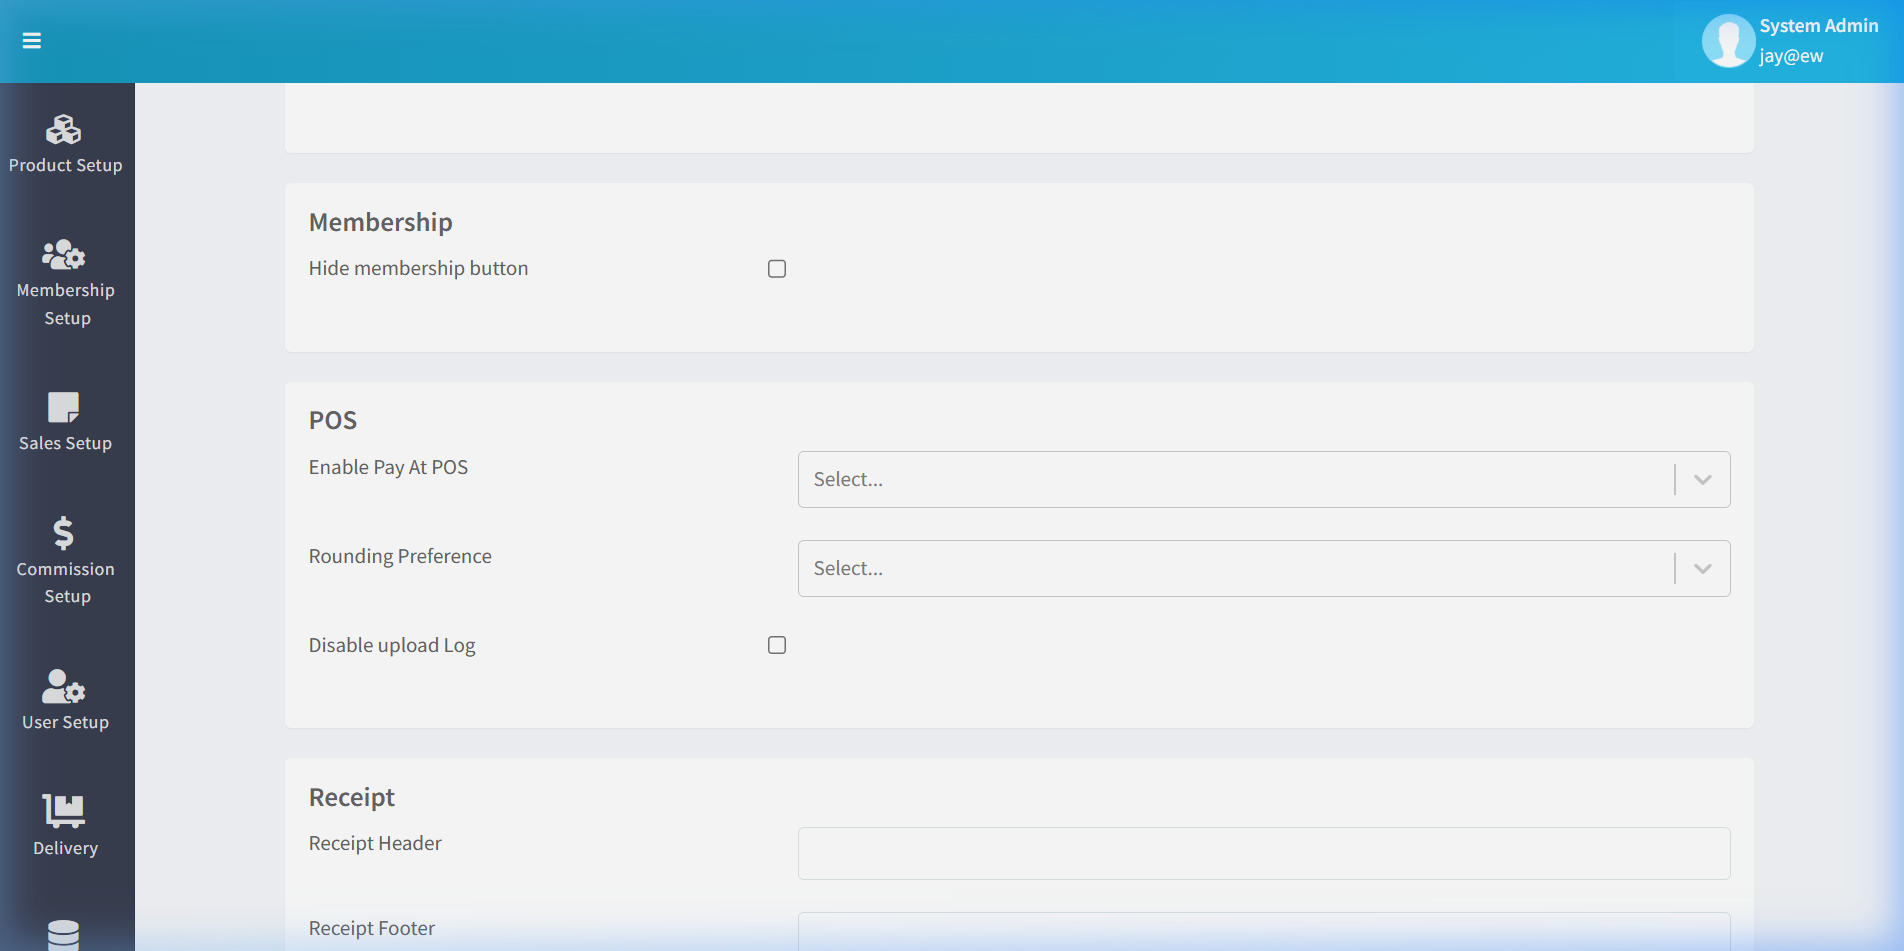
| Hide membership button | Checkbox | When checked, hides the membership lookup button on the POS screen — useful for express counters that don't process loyalty |
12.9.3 POS Section
| Setting | Type | Description |
|---|---|---|
| Enable Pay At POS | Dropdown (Select...) | Controls the Pay-at-POS workflow. Options define how payment is handled at the terminal |
| Rounding Preference | Dropdown (Select...) | How to round the final transaction amount (e.g., Round to 0.05, Round to 0.10, No Rounding) |
| Disable upload Log | Checkbox | When checked, disables the POS from uploading transaction logs to the server — use only for troubleshooting |
[!WARNING] Only check Disable upload Log temporarily for debugging. Leaving it on will prevent sales data from syncing to the server.
12.9.4 Receipt Section
| Setting | Type | Description |
|---|---|---|
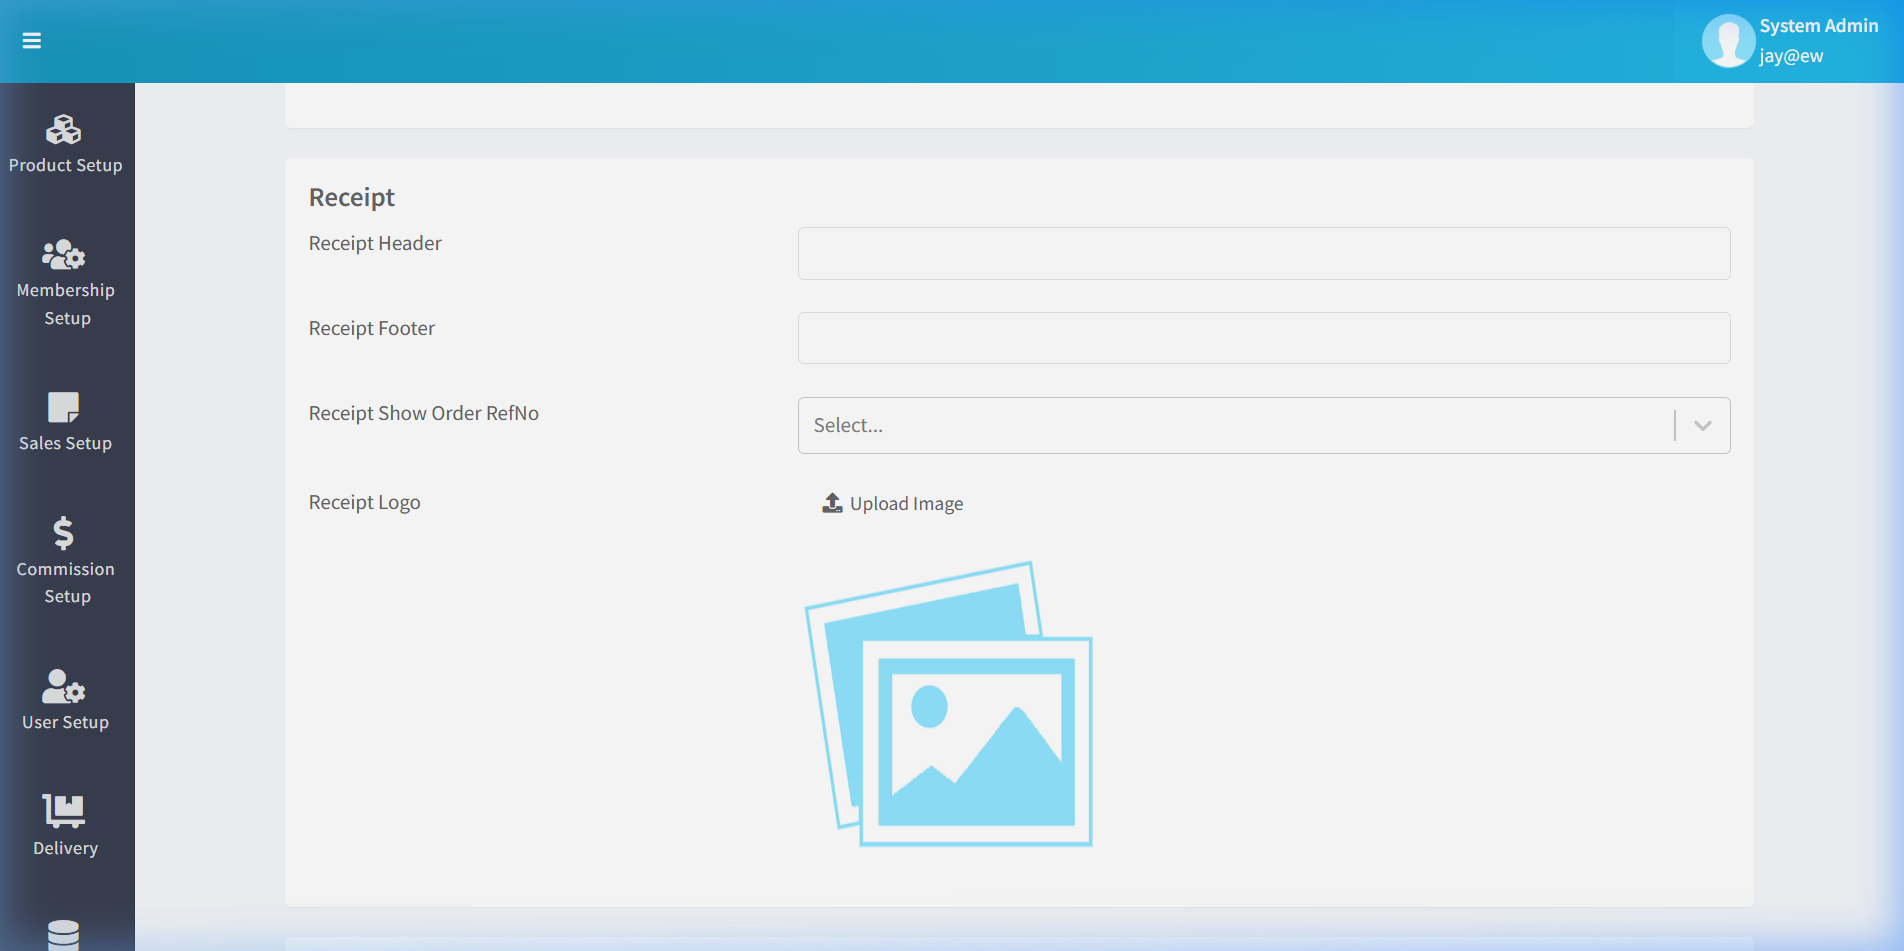
| Receipt Header | Text Input | Custom text printed at the top of every receipt (e.g., store name, address, phone) |
| Receipt Footer | Text Input | Custom text printed at the bottom of every receipt (e.g., "Thank you for visiting!", return policy) |
| Receipt Show Order RefNo | Dropdown (Select...) | Controls whether the order reference number is printed on the receipt |
| Receipt Logo | Image Upload | Upload a logo image that appears at the top of printed receipts. Click Upload Image to select a file. Supported formats: JPG, PNG |
12.9.5 How to Configure POS Terminal Settings
- Navigate to Setting → POS Terminal Settings.
 2. Select Applicable Type — choose
 POS or Outlet.
 3. Select Applicable To — choose the specific terminal or outlet name.
 4. The settings load for that device.
5. Configure each section as needed:
4. The settings load for that device.
5. Configure each section as needed:
- Check/uncheck checkboxes for toggle settings.
- Select options from dropdowns.
- Enter text for Receipt Header and Footer.
- Upload a logo image if desired.
- Click Save at the bottom of the page.
✅ Expected Result: The terminal settings are saved and take effect after POS sync.
[!TIP] Use the Search Setting field at the top to quickly find a specific setting by keyword instead of scrolling through all sections.
12.9.6 Applicable Type: POS vs. Outlet
| Applicable Type | Scope | When to Use |
|---|---|---|
| POS | Individual POS terminal | When different terminals at the same outlet need different settings (e.g., one terminal has a kitchen printer, another doesn't) |
| Outlet | All terminals in an outlet | When all terminals in an outlet should share the same settings |
[!NOTE] Terminal-level settings (Applicable Type = POS) override outlet-level settings. If a setting is configured at both levels, the POS-level value takes priority.
12.9.7 Common Configurations by Business Type
| Business | Kitchen Order | Hide Membership | Rounding | Receipt Logo |
|---|---|---|---|---|
| F&B Restaurant | ✅ Enabled | ❌ Not hidden | Round to 0.10 | Restaurant logo |
| Retail Fashion | ❌ Disabled | ❌ Not hidden | No rounding | Brand logo |
| Express Kiosk | ❌ Disabled | ✅ Hidden | Round to 0.05 | Company logo |
| Beauty Salon | ❌ Disabled | ❌ Not hidden | No rounding | Salon logo |
💡 Tips
[!TIP] Set up the Receipt Header with your store name, address, and phone number. The Receipt Footer is ideal for return policies, promotional messages, or website URLs.
[!IMPORTANT] Set the Rounding Preference to match your country's legal requirements. Singapore uses round-to-nearest-0.05 for cash transactions.
[!NOTE] Changes to POS Terminal Settings take effect on the selected terminal's next sync. If you need immediate changes, trigger a manual sync from the terminal.
Access & Permissions
| Role | View | Create | Edit | Delete |
|---|---|---|---|---|
| Admin | Yes | Yes | Yes | Yes |
| Supervisor | Yes | Yes | Yes | No |
| Cashier | No backend access | — | — | — |
[!NOTE] Exact permissions depend on the Privileges Setup configured for each role. Contact your administrator if you cannot access this page.
Field Reference
| Field | Required | Description |
|---|---|---|
| Name / Title | Yes | The display name for this record |
| Status / Active | — | Whether this record is active in the system |
| Created Date | Auto | System-generated creation timestamp |
| Modified Date | Auto | System-generated last modification timestamp |
[!NOTE] Additional fields specific to this page are documented in the sections above. The table above shows common fields present across most pages.
Business Rules
- Records that are linked to active transactions or other modules cannot be permanently deleted
- Changes made here will take effect on POS terminals after the next sync
- Deleted records can be restored from the list using the Show Deleted filter
- All changes are logged with the user who made them and the timestamp
How to Edit POS Terminal Settings
- Navigate to POS Terminal Settings from the sidebar menu.
- The current settings are displayed on the page.
- Modify the fields you want to change.
- Click Save to apply your changes.
Expected Result: Settings are updated immediately. Changes sync to POS terminals on the next data refresh.
FAQ
Q: Why are my setting changes not taking effect on POS? A: Settings need to sync to POS terminals. Check Terminal Status for sync timing, or trigger a manual sync.
Q: Can I revert a setting change? A: Yes. Simply toggle the setting back to its previous value and save. Changes take effect after the next POS sync.
Q: Who should configure these settings? A: Most settings should be configured by an administrator. Pages marked as "IT Admin only" (App Command, Webhook) require technical knowledge.
Troubleshooting
| Issue | Possible Cause | Solution |
|---|---|---|
| Setting changes not reflected in POS | POS has not synced since the change | Trigger a manual sync or wait for the next automatic sync |
| Toggle not saving | Page not fully loaded or session expired | Refresh the page and try again. Re-login if needed |
| Cannot access this setting | Insufficient permissions | Contact your administrator to check your role privileges |
| Setting reverts after saving | Conflicting setting in another module | Check related settings pages for overriding configurations |
| Page shows blank or error | Browser compatibility issue | Try a different browser (Chrome recommended) or clear cache |
Related Menus
- Master Data > Company Setup — company information
- User Setup > Privileges Setup — permission configuration
- Master Data > POS Setup — POS terminal settings
Open Questions / Confirmation Needed
[!NOTE] The following items may vary depending on your system version and configuration:
- Exact permission settings depend on your Privileges Setup configuration
- Sync timing to POS terminals depends on network conditions and sync schedule
- Some features may require additional licensing or module activation
- Field behavior may differ between EQuip versions
If you encounter behavior not described in this manual, contact your system administrator or EQuip support team.
Related Articles
Terminal Status
? Backend — EQuipWebRetail ModeMaster Data Setup Chapter 8: Master Data Setup — 8.1 Terminal Status The Terminal Status page shows you the live status of all your POS terminals — which ones are online, which are offline, and when they last synced. ...POS Setup
? Backend — EQuipWebRetail ModeMaster Data Setup Chapter 8: Master Data Setup — 8.2 POS Setup Use POS Setup to register and configure each POS terminal in your outlets. Every cash register or tablet running the POS app needs to be set up here first ...Membership Integration Settings
? Backend — EQuipWebRetail ModeMembership Setup Chapter 3: Membership Setup — 3.4 Membership Integration Settings Use Membership Integration Settings to connect your EQuip loyalty system with external CRM or marketing platforms. This allows member ...Company Setup (Settings)
Chapter 12: Setting — 12.9 Company Setup (System Level) Use Setup to manage and configure this feature in your EQuipWeb system. Use Company Setup (under Settings) to configure system-wide business settings — like your GST registration number, ...POS Order Integration
? Backend — EQuipWebRetail ModeMaster Data Setup Chapter 8: Master Data Setup — 8.7 POS Order Integration Use POS Order Integration to connect your POS terminals with external ordering systems. This is where you set up how orders from third-party ...